
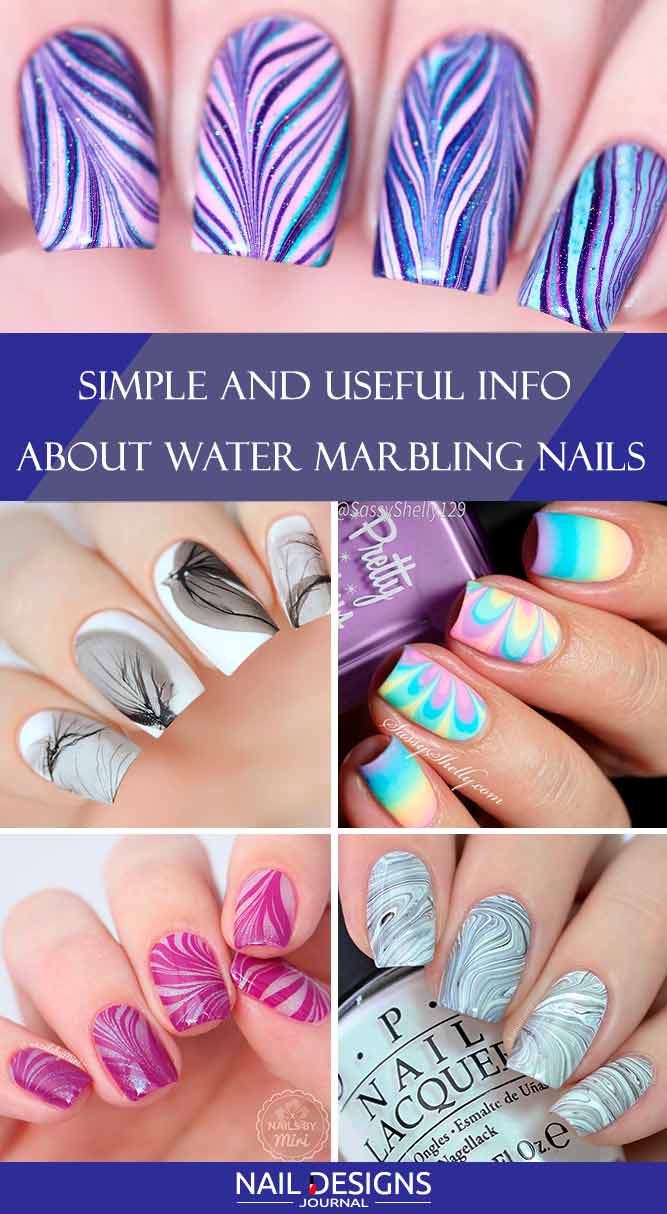
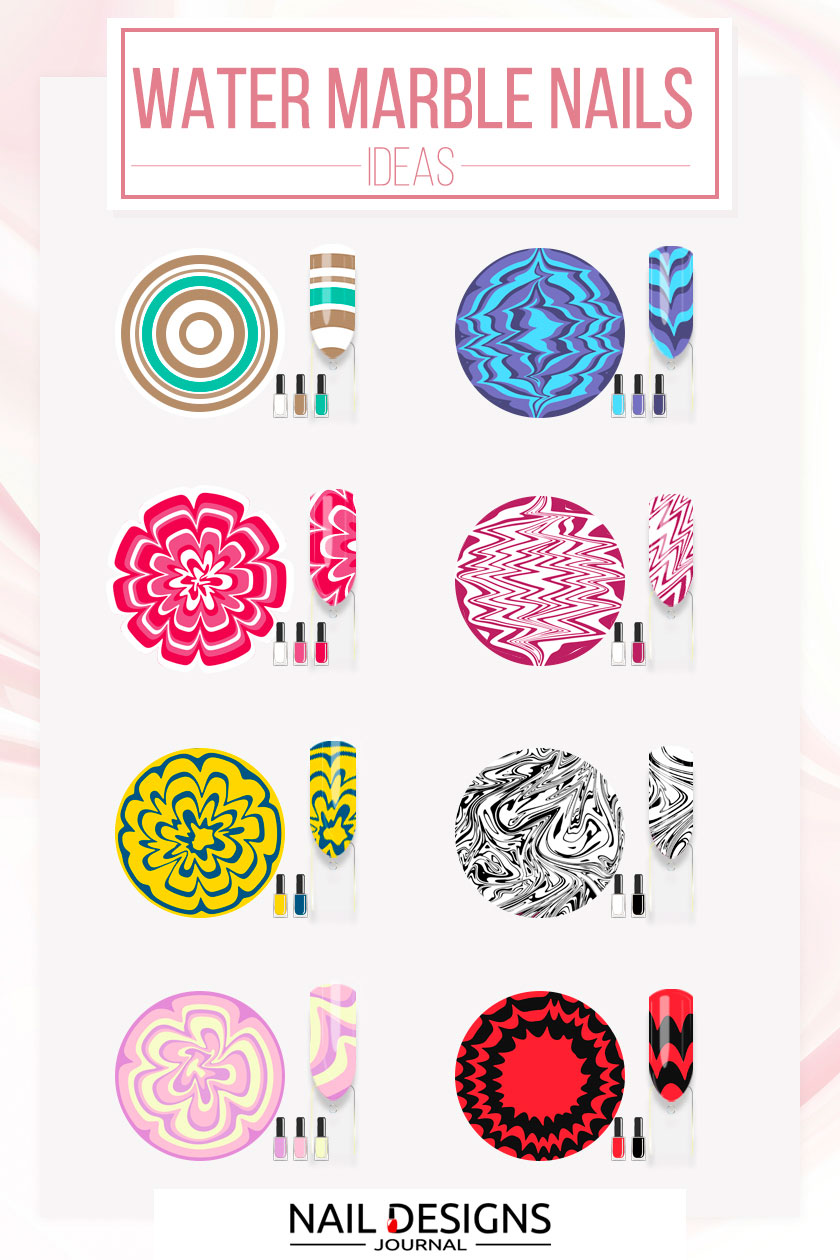
Water marble nails are that one trendy nail art that represents the beauty of nature most. The thing is that the outcome you achieve with this techniques corresponds with the way the natural marble stone looks like. But that is not where all the benefits end! Apart from looking flawless and gorgeous, these designs are easy to copy. That is why today we decided to prove how simple water marble nail art step by step is. We hope you enjoy these tutorials and will come up with a proper idea to try out yourself!
DIY Blue and Yellow Water Marble Nails
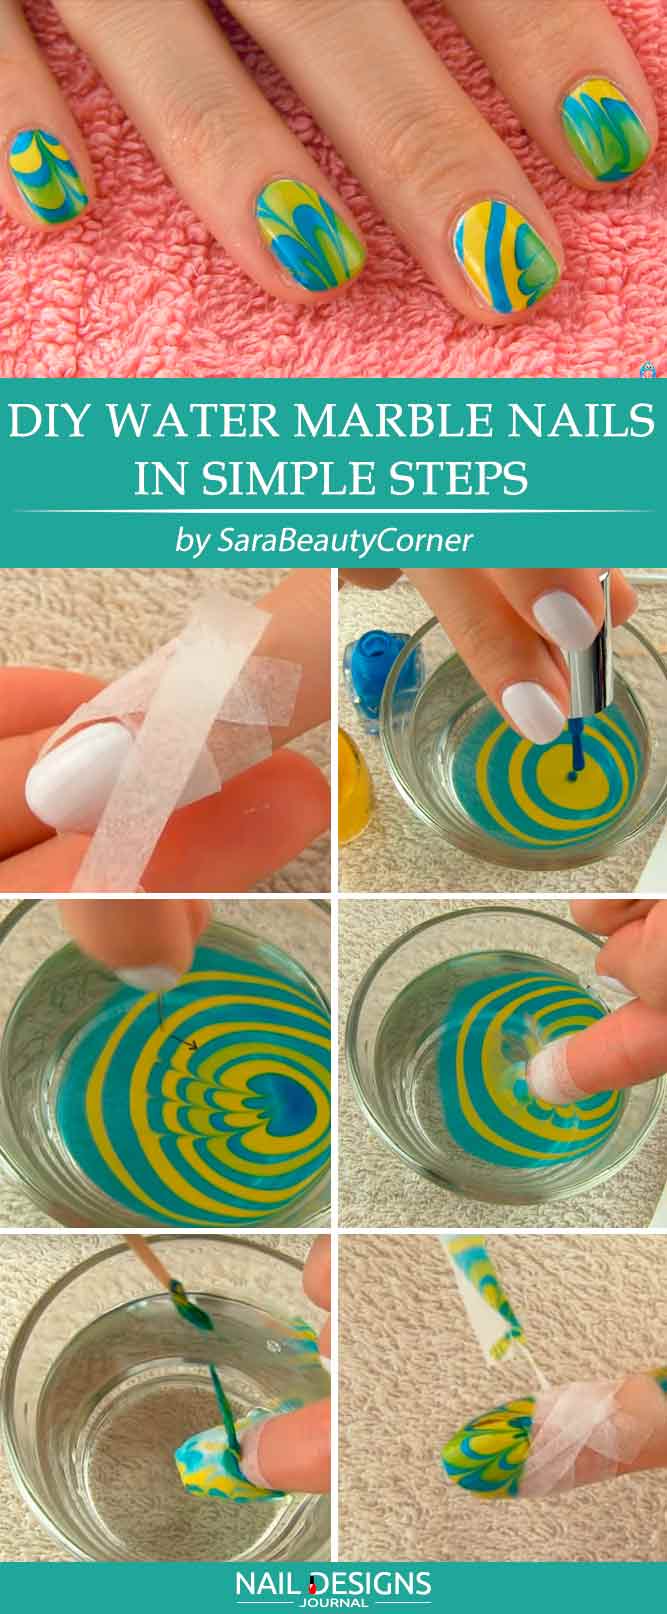
- Apply a base coat.
- Apply two coats of white nail polish.
- Use liquid latex or tape to secure your cuticles.
- Gather up all of your tools so that you do not waste too much time on the design.
- To start off with your marble nails drip a drop of blue nail polish into the center of your water container.
- Continue the procedure with yellow nail polish.
- Keep taking turns with yellow and blue nail polishes until you reach the desired consistency.
- Take a needle or any other sharp tool to create the design, make sure that you do not start pulling from the very first nail polish circle.
- Wipe off your tool every time you are using it.
- Drag straight lines towards the center to end up with a flower pattern.
- Dip the finger in.
- Leave the finger in the water for few seconds.
- Remove the remaining polish from the surface with the help of a toothpick.
- Pull the finger out and fix all the messes if any.
- Apply top coat.
Easy Blue and Gold Water Marble Nails
If you are looking for water marble nail art for beginners – we have got something special for you!
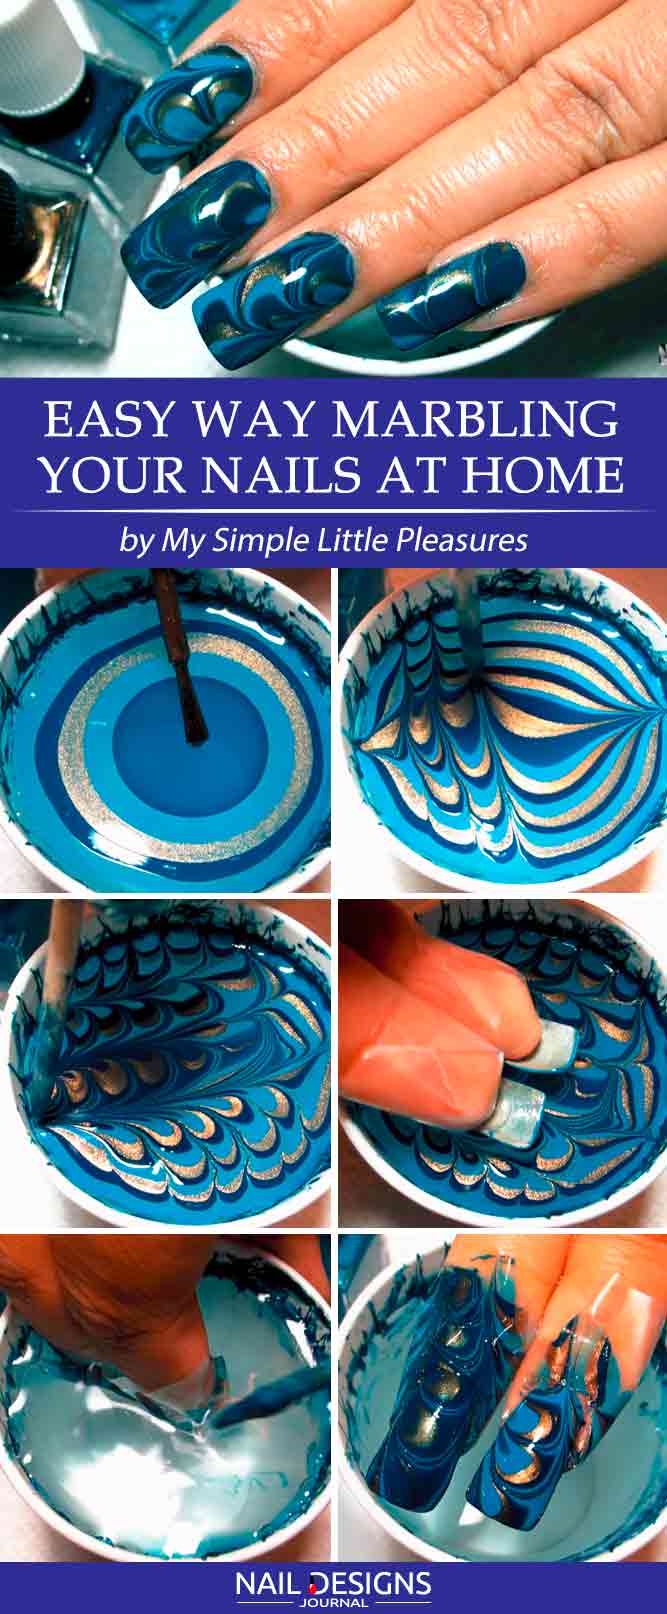
- Apply a base coat.
- Apply light blue base coat.
- Apply liquid latex or tape to secure your cuticles.
- Take three nail polishes of choice, in our case they are light blue, dark blue and gold.
- Take a water cup filled with room temperature water and start the creation of the pattern.
- Start off with light blue nail polish, continue with darker one and finish off with gold one.
- Repeat the pattern until you reach the desired intensity and consistency.
- Use an orange stick or a toothpick to go up to the top from the center and down to the bottom.
- Add some more vertical lines to the design.
- To add intricacy to the pattern add up some more horizontal lines.
- Dip your nails in.
- Clean all the remaining polish from the water surface.
- Slowly pull your nails out.
- Clean up all the messes.
- Apply top coat.
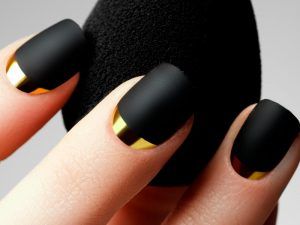
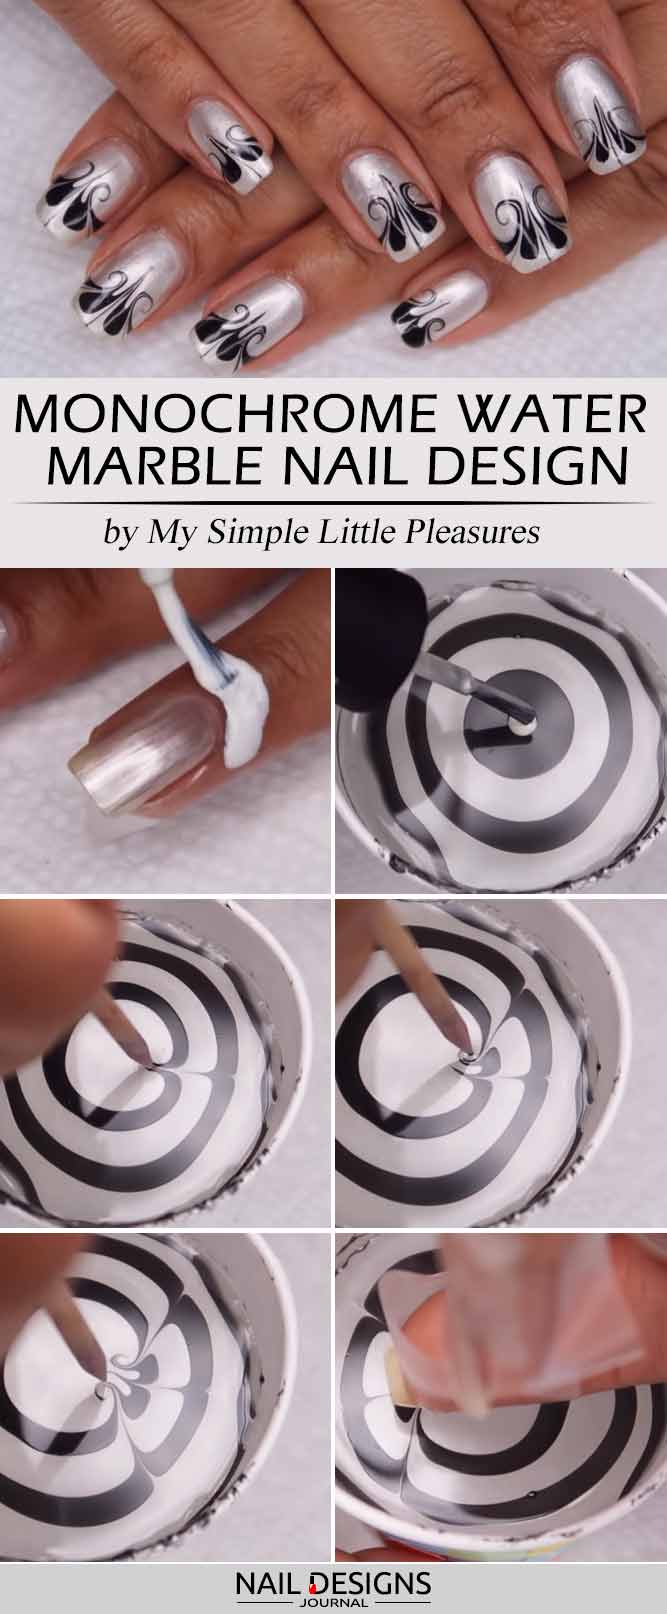
Easy Black and White Water Marble Nails
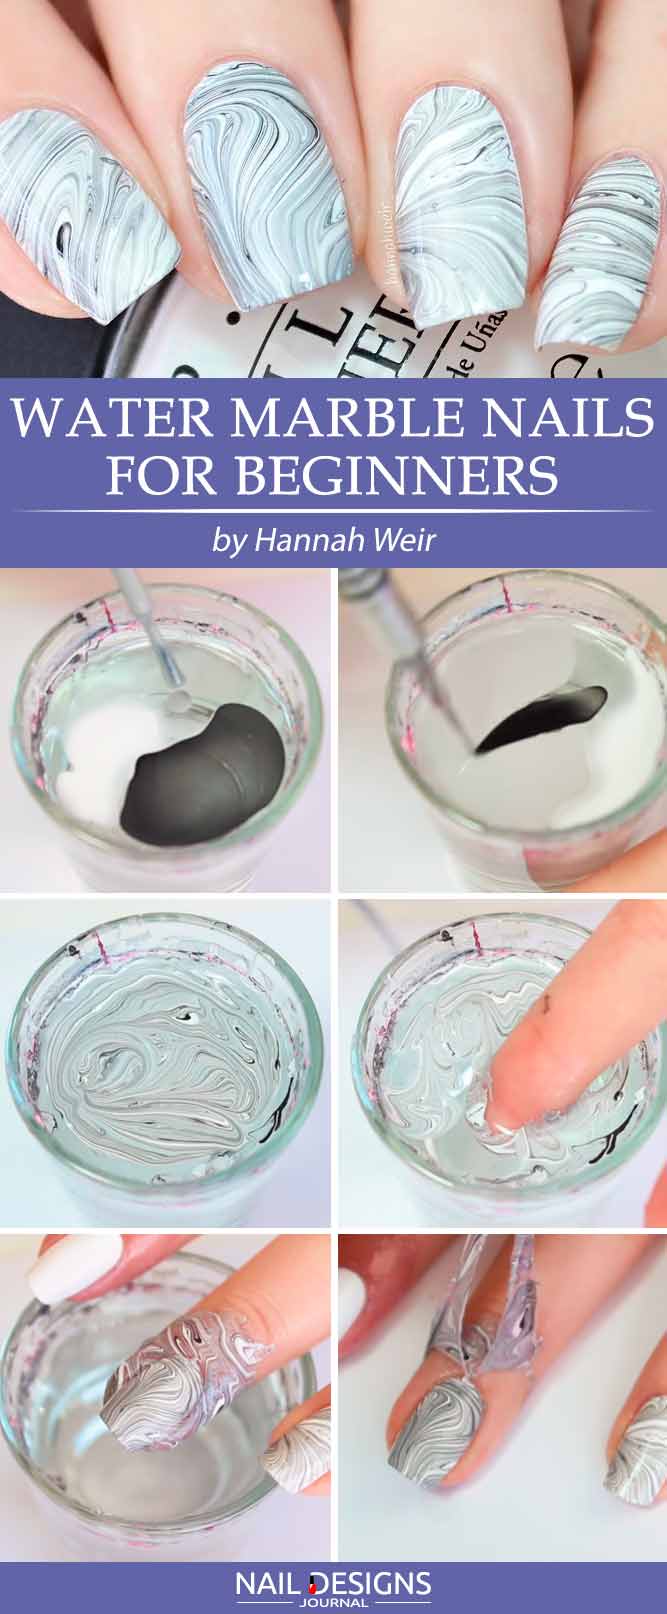
- Apply a base coat.
- Apply white base coat.
- Apply liquid latex to secure the cuticles.
- Take a water container and place a few drops of white, black and grey nail polishes into it.
- Take a toothpick or any other sharp tool to mix the drops all together, so that intricate black and white pattern comes out.
- Dip your finger into the water and clear the remains on the surface.
- Slowly pull your finger out and clean up all the messes.
- Apply top coat.
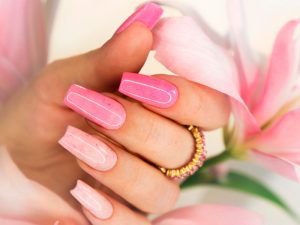
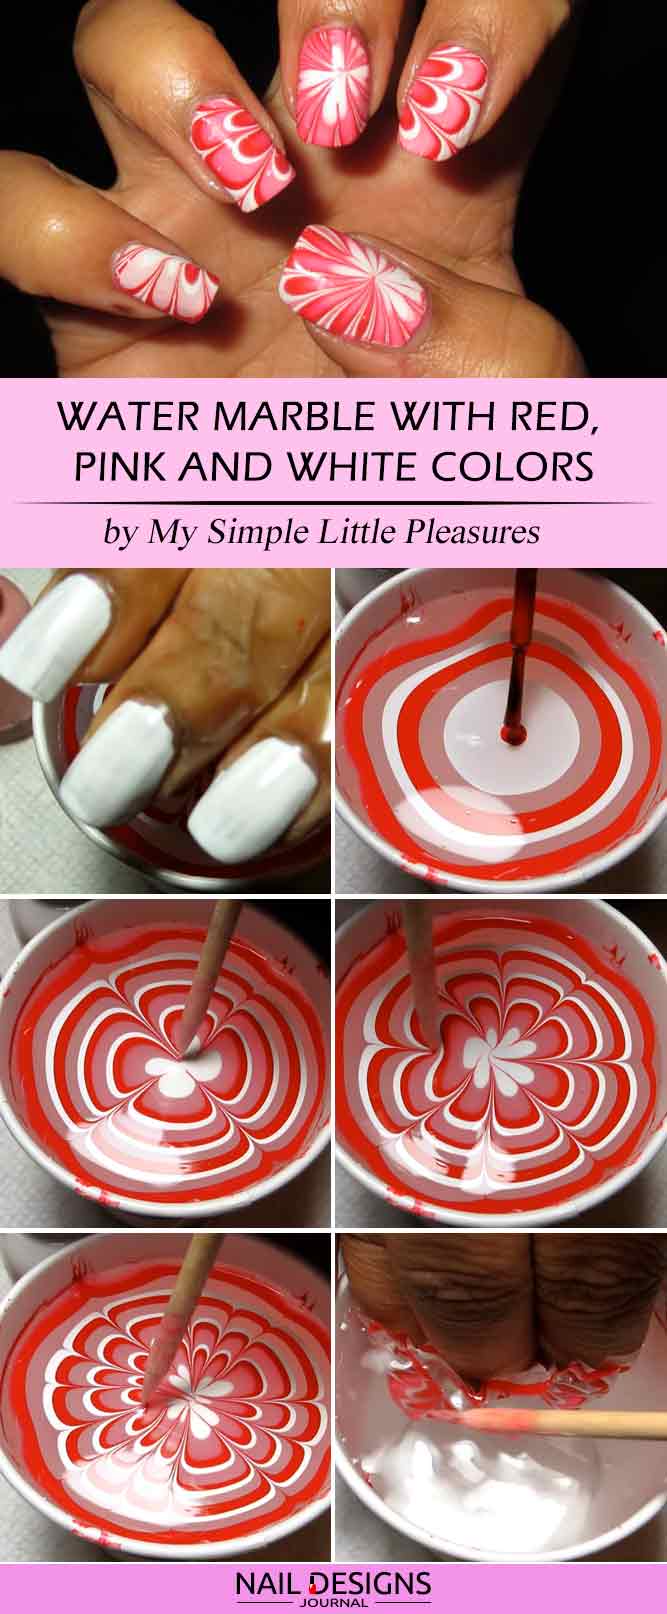
Pink Water Marble Nails You Can Do In 5 Min
Those of you who are looking for fun nail art with water step by step will surely appreciate this one!

- Apply base coat.
- Apply pale pink base coat.
- Apply liquid latex to secure your cuticles.
- Take the water container and start the process by dripping pale pink and holographic nail polishes onto it to create a water marble design.
- Keep going until you reach the desired intensity of the marble pattern.
- Use an orange stick or a toothpick to go up to the top from the center and down to the bottom.
- Add some vertical lines to the design.
- Create some more vertical lines going the opposite direction so that a kind of chevron pattern is achieved.
- Slowly dip your fingers in.
- Clean up the water surface.
- Pull the fingers out and clean up the messes.
- Apply top coat.

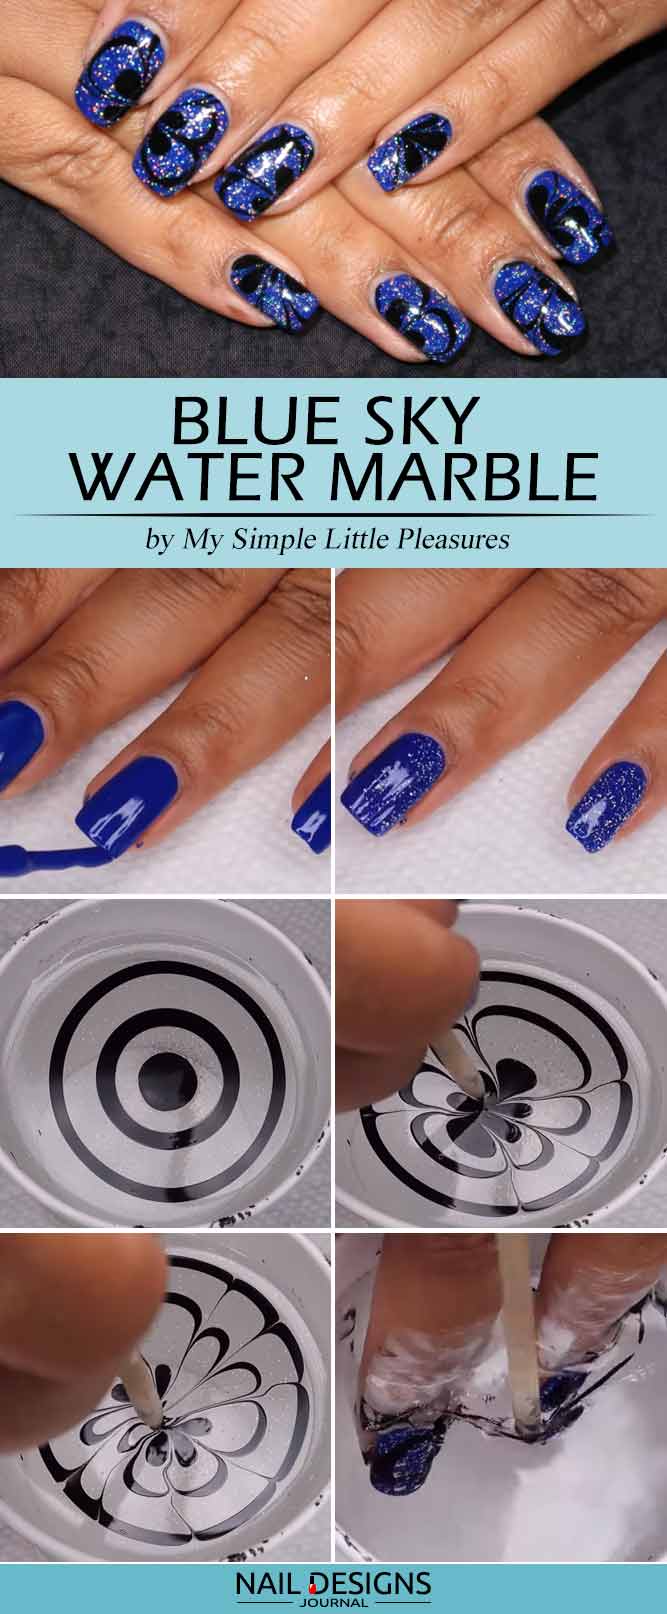
Swirl Nails In Simple Steps
In case you have been wondering how to do swirl nails we have some practical information to share with you!
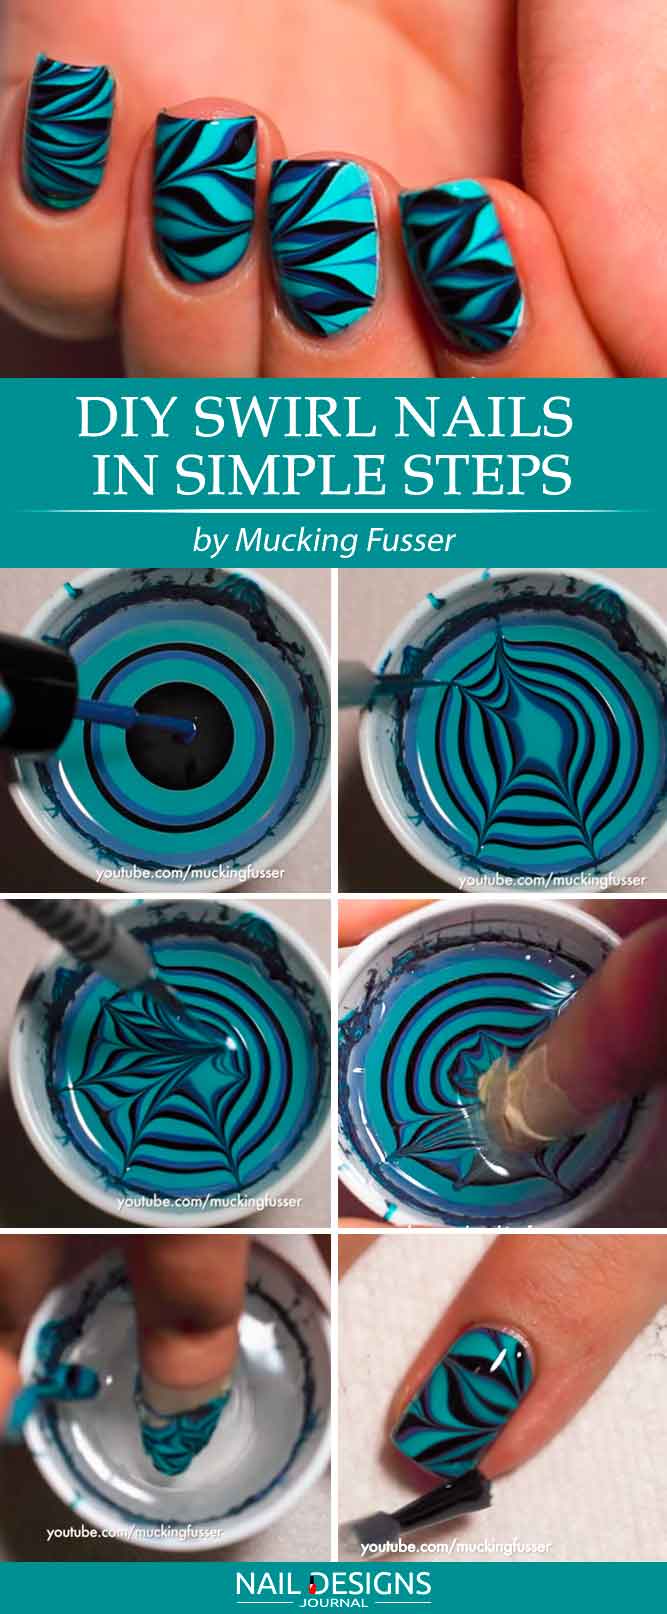
- Apply a base coat.
- Apply white base coat.
- Apply liquid latex.
- Choose three colors of your choice or use pale blue, deep blue and black as shown in the design.
- Start off with deep blue, then use your pale blue and finish off with black.
- Keep repeating the procedure until you get a lovely bull eye pattern.
- Use a marble nail art tool or any other sharp tool you have to create a water marble pattern.
- You can go in different directions to make your pattern look even more intricate.
- Wipe off your tool every time you take it out.
- Dip your finger into the water.
- Clean up the water surface.
- Take the finger out and clean off all the messes.
- Apply a top coat.
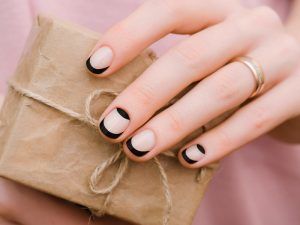
Unique Water Marble Nails Design
Once you have tried many marble designs on and wished to step away from the pattern but not too far away, there is something we can suggest you try out. The thing is that this design that we are going to discuss right now is slightly different from water marble nails that you are used to but that does not make it any less charming and unique.
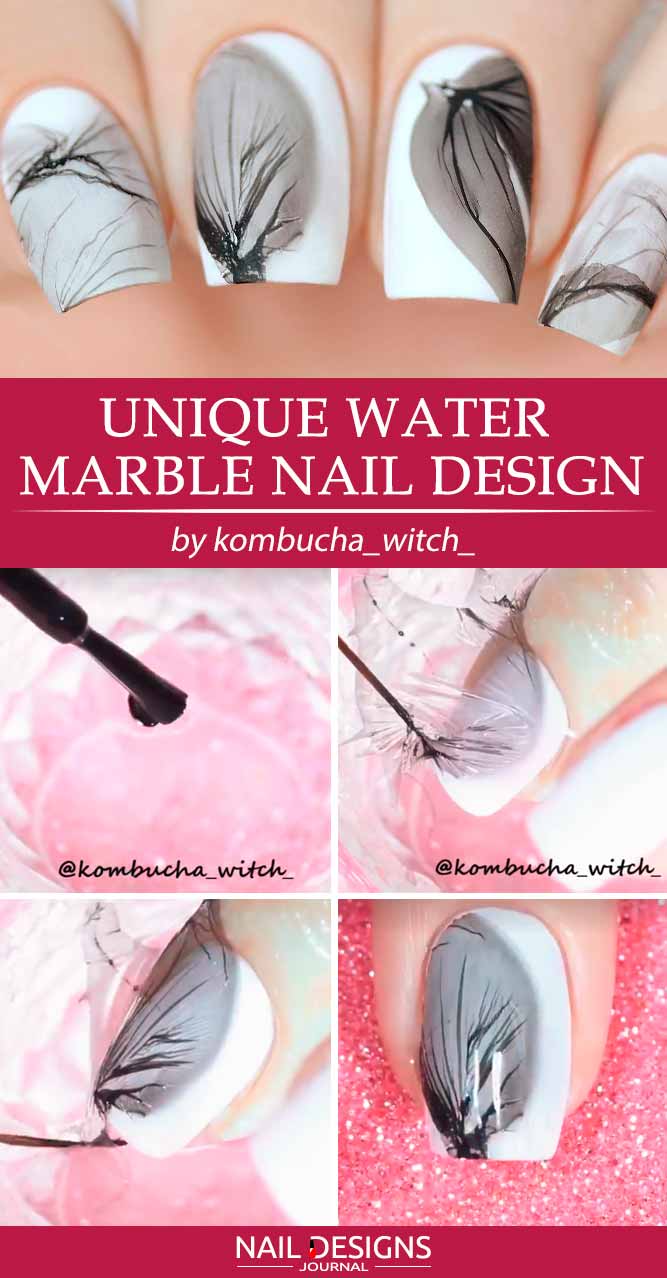
- Apply a base coat.
- Apply white base coat.
- Apply liquid latex to secure your cuticles.
- Take a water container and place a single drop of black nail polish into it.
- Wait until it dries a little and use a toothpick to kind of gather the ‘drop’ together but not to the full extent.
- Dip your nail into clean water and gently place the black ‘drop’ onto your nail but so that it does not cover your nail fully.
- Slowly take the finger out.
- Apply top coat.
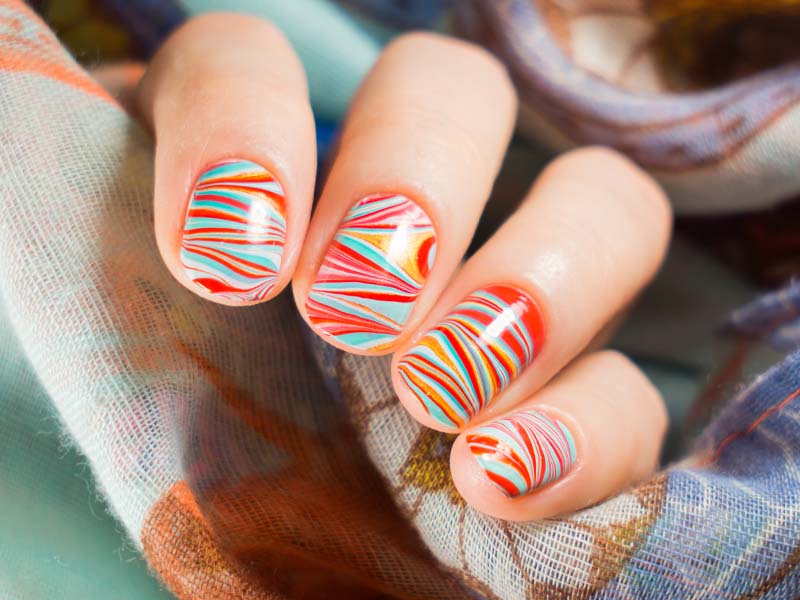
Quick And Easy Colorful Marble Nails
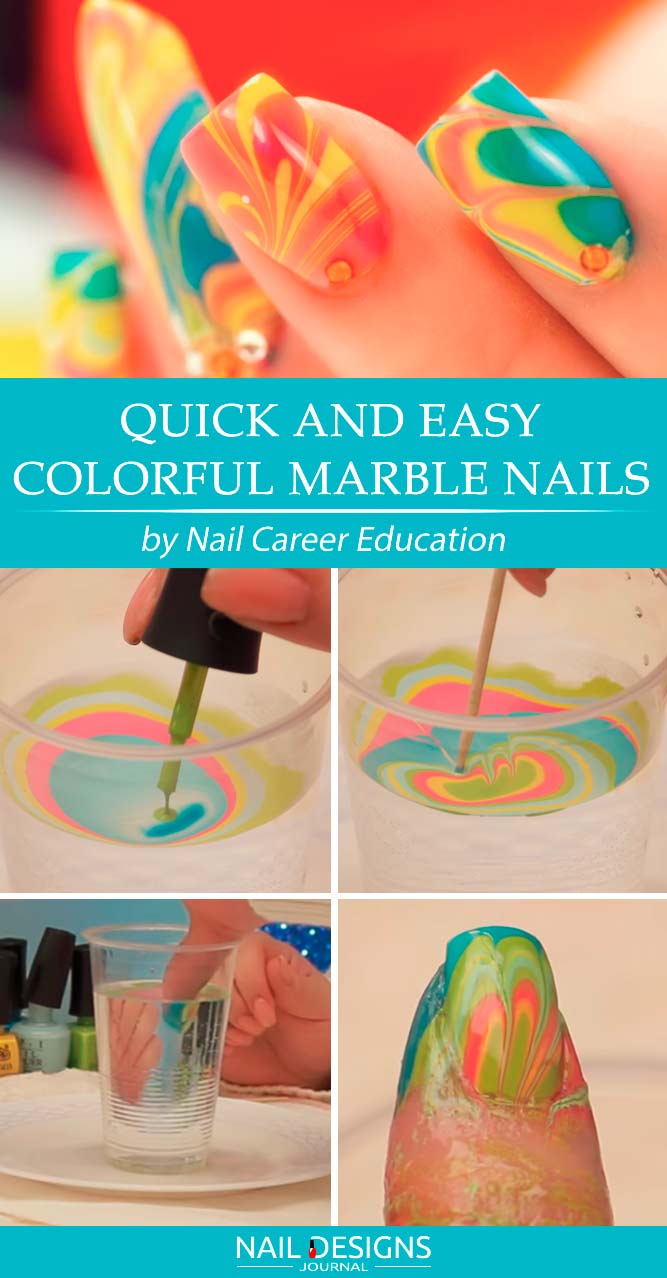
- Apply a base coat.
- Apply a white base coat.
- Apply liquid latex or Vaseline around your fingernail to protect your cuticles.
- Gather up your nail polishes of choice and a glass of room temperature water.
- Start dripping nail polish one by one into the glass so that every next drop goes into the center of the previous one.
- Once you are ready with the intensity of color, take an orange stick or a toothpick to create the pattern.
- Slowly dup your finger into the glass and remove the excess nail polish from the surface with the help of a Q-tip.
- Slowly take the finger your and clean up the messes.
- Apply a top coat.
- Add rhinestones to the design if you wish.
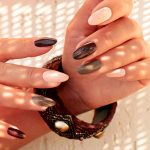
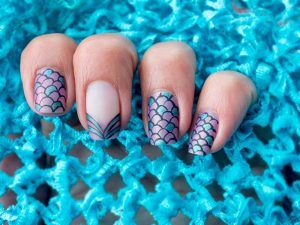
Simple Marble Nail Design With Stamping
- Apply a base coat.
- Apply liquid latex around your fingernail to protect your cuticles.
- Gather up light purple, dark purple and blue nail polishes and a glass of room temperature water.
- Start dripping nail polishes one by one into the glass so that every next drop goes into the center of the previous one.
- Once you are ready with the intensity of color, take an orange stick or a toothpick to create the pattern.
- Get your stamper and gently press it into the water.
- Clean up the surface with a Q-tip.
- Wait until the design dries a little on the stamper.
- Press the stamper over your nail moving it slightly so that the pattern transfers.
- Remove liquid latex and clean up the messes.
- Apply a top coat.
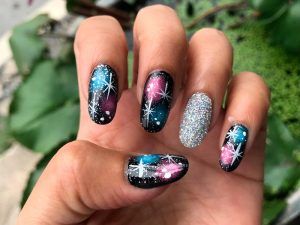
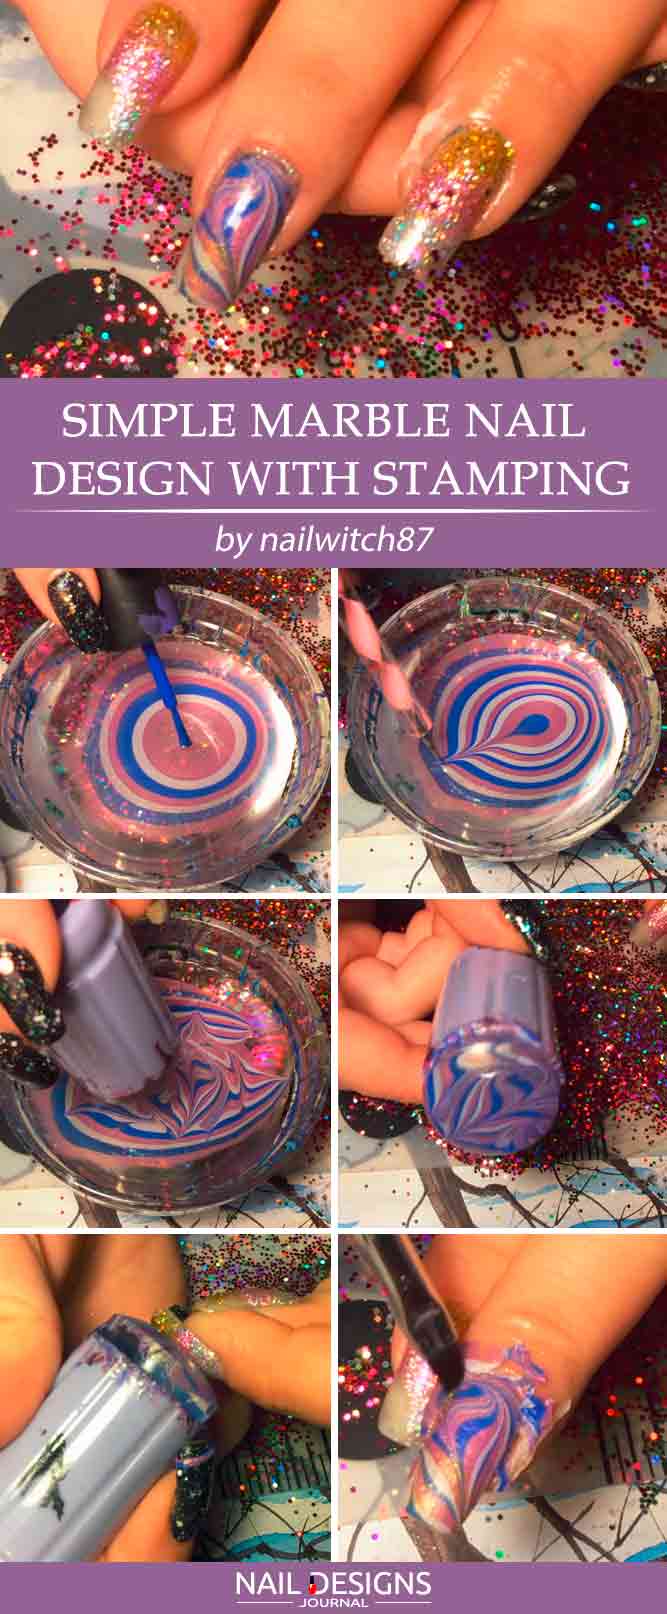
Rainbow Water Marble Nails Tutorial
Holographic Water Marble Tutorial

Water Marble With Red, Pink and White Colors
Monochrome Water Marble Nail Design
Blue Sky Water Marble
Things You’re Doing Wrong When Water Marbling Your Nails!
Of course, many things look easy to replicate when you are watching pro-made tutorials. But the reality is such that there still a lot of mistakes to face and we decided to point out the most common ones here so that you do not have to ever fail with your marble nail art!
We hope you enjoy these tutorials and will succeed in their replication with the least of time and effort involved. Do not forget to visit us for some more fresh ideas and pieces of trendy advice!
Was this article helpful?