These days, the world of nail art is constantly changing and getting to fresh levels of cool with every day. However, most of you may already know that everything beautiful comes at a price. Well, at least this is a fact until you get to know what we are going to share with you today. How many of you have a couple of sharpies lying around the house? We are more than sure that all of you, but did you know that you can use sharpies as tools for your next mani? That is exactly what we are going to talk about today. To be more precise, we are going to share with you a set of worthy sharpie nail art ideas which most of you will definitely succeed at home with.
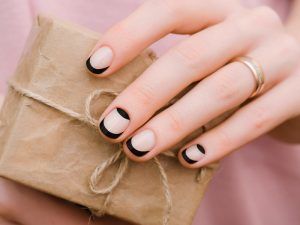
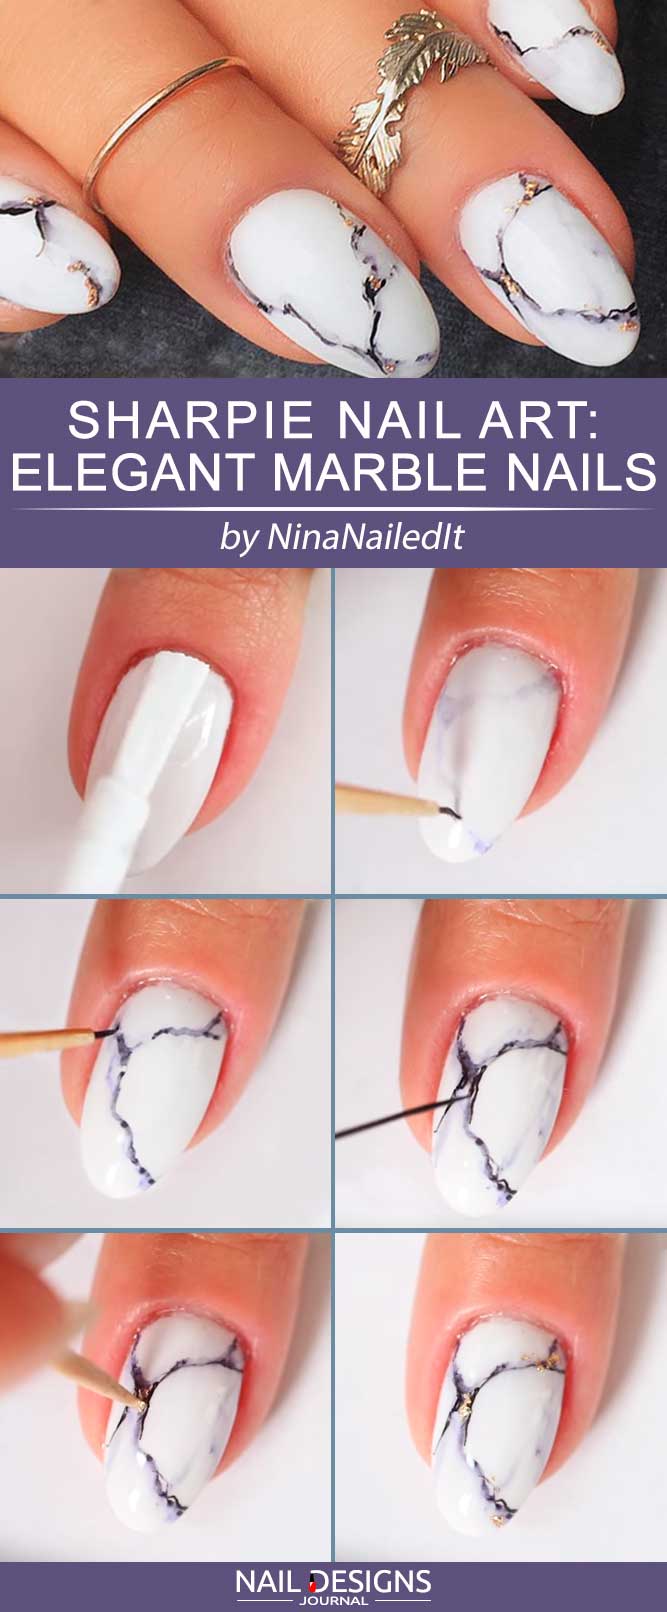
Black Sharpie Nail Art: Elegant Marble Nails
Marble nails are on the edge of popularity these days but who knew that marble effect nail art tutorial could be one of those nail designs!
- Apply a base coat.
- Apply a white base coat.
- Take a black sharpie and scribble it on a piece of plastic.
- Soak your detailer brush in rubbing alcohol to dilute the marker.
- Drag your brush across the nail in abstract shapes.
- Add some darker lines to the design for a 3-d effect.
- Add the final dark accent with the help of black nail polish.
- Add tiny pieces of gold flake near the darkest areas.
- Apply a top coat.
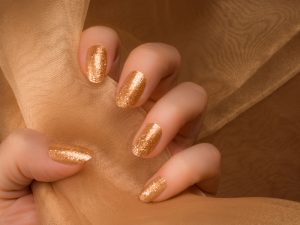
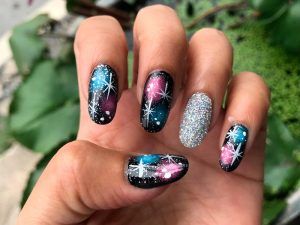
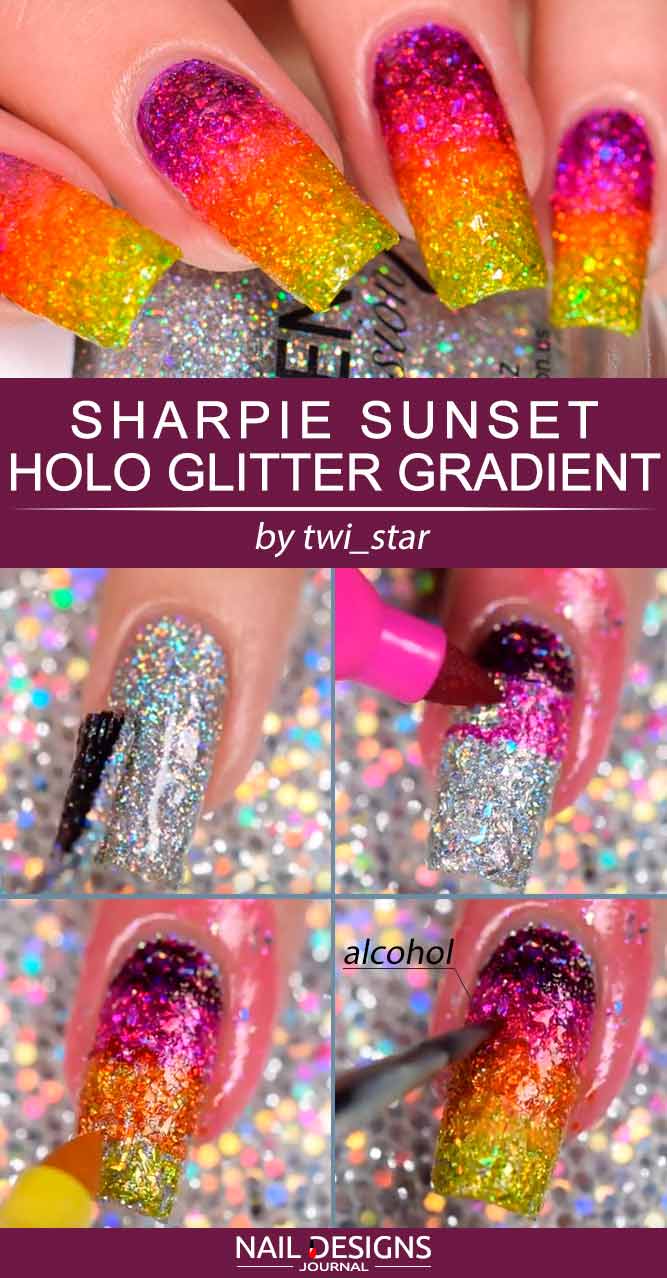
Easy DIY: Sharpie Holo Glitter Gradient Nails
Using a sharpie on nails can be extremely fun, and the outcome will be bright and fabulous sharpie nail art, and we are going to prove it to you right now!
- Apply a base coat.
- Apply a silver holographic base coat.
- Apply some liquid latex to secure your cuticles.
- Start with a dark purple sharpie, add it to the bottom of your nail.
- Follow up with a pink one.
- Move on to the orange sharpie.
- Add yellow sharpie line to the tip of your nail.
- Soak a brush in rubbing alcohol to help the colors blend, but be careful and wipe off the brush every time.
- Remove the liquid latex.
- Apply a top coat.
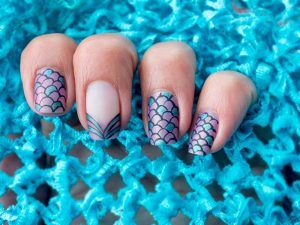
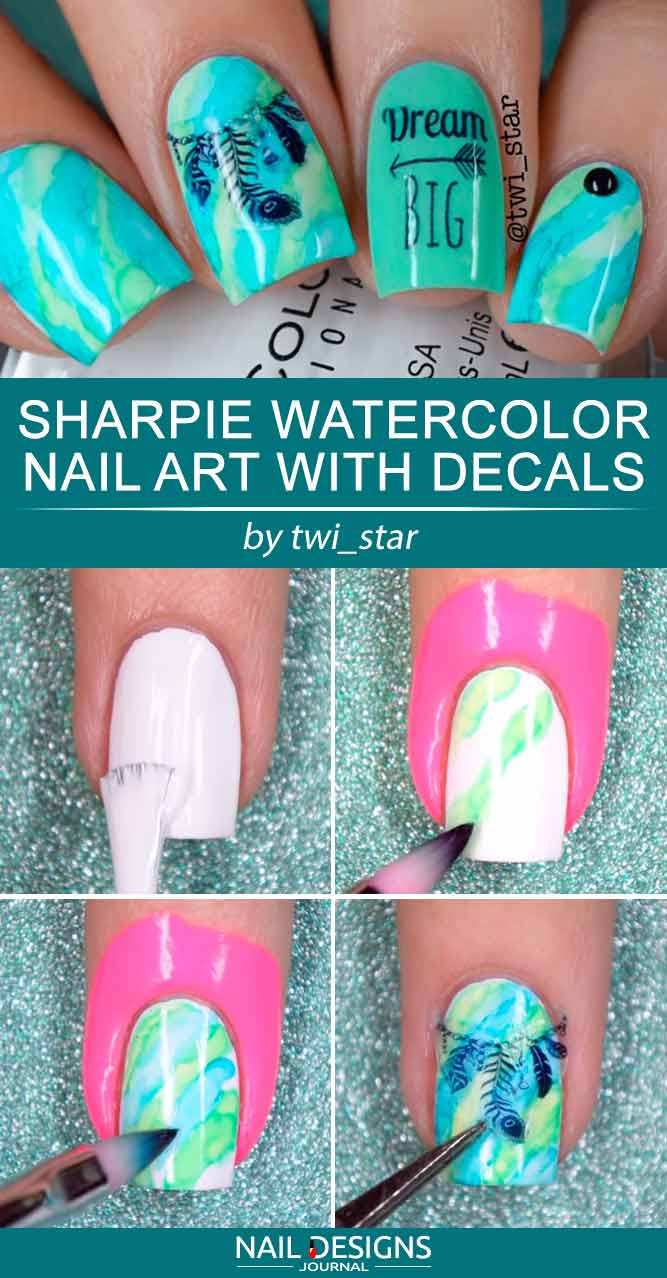
Sharpie Watercolor Nail Art With Decals
Sharpie watercolor nail art has never been so easy!
- Apply a base coat.
- Apply a white base coat.
- Take a green and blue sharpie and scribble it on a piece of plastic.
- Apply some liquid latex to secure your cuticles.
- Soak your detailer brush in rubbing alcohol to dilute the green marker and apply it to your nail in a striped pattern.
- Repeat the procedure with blue sharpie color.
- Remove the liquid latex.
- Dip the decal into the water.
- Apply the decal to your nail.
- Apply a top coat.
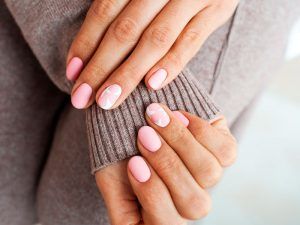
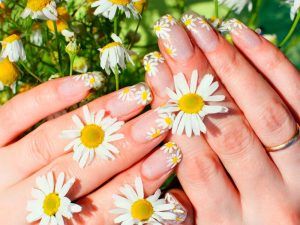
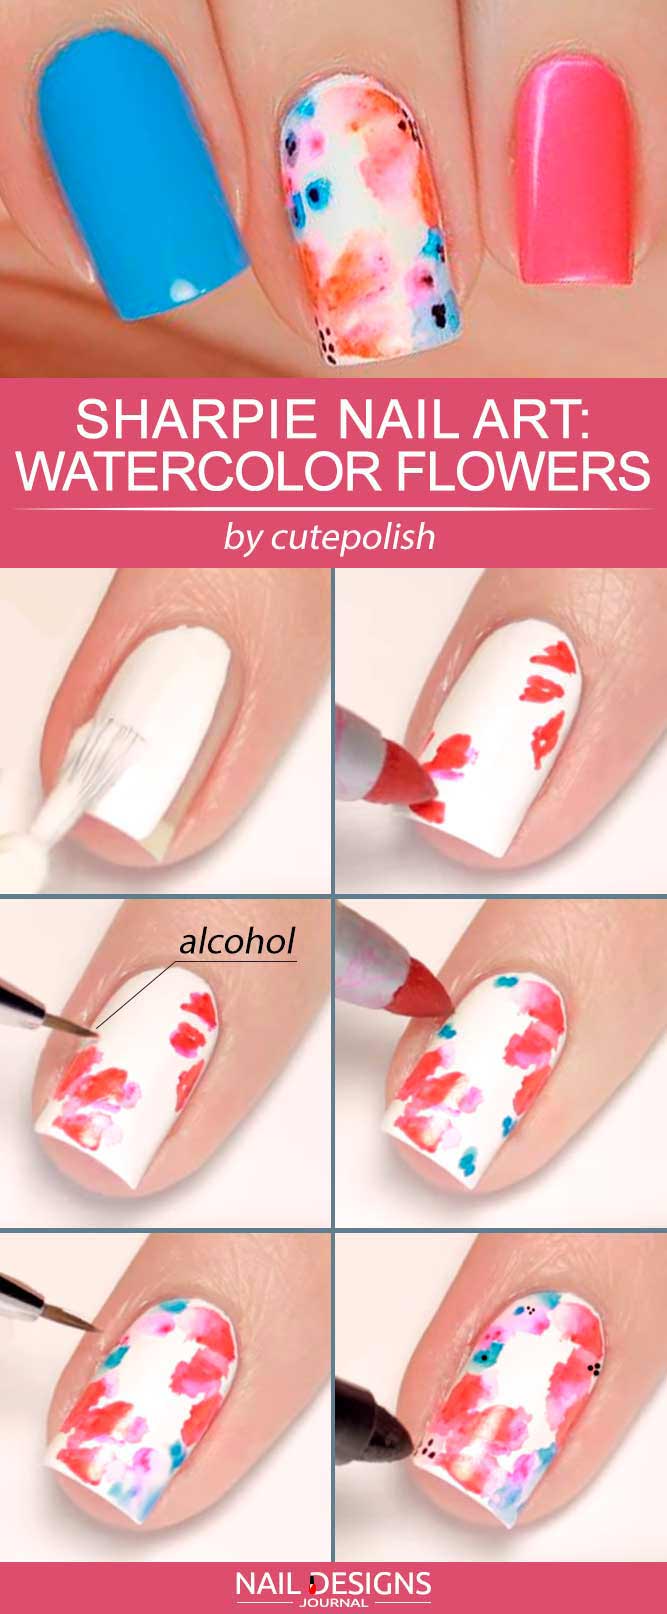
Sharpie Nail Art Ideas: Tender Watercolor Flowers
Sharpie flower nail art is so cute and feminine that it is hard to resist.
- Apply a base coat.
- Apply a white base coat.
- Draw some red flower petal on the base with the red sharpie.
- Add some pink color around the petal.
- Dip your brush into rubbing alcohol and dab around the petals to achieve the watercolor effect.
- Add some blue blobs to fill out the look.
- Use the rubbing alcohol soaked brush once again.
- Continue until you are satisfied with the look.
- Add some tiny black dots to the center of your flowers.
- Apply a top coat.
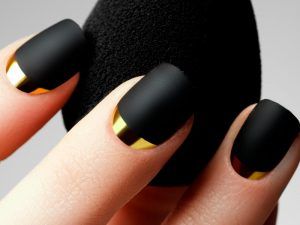
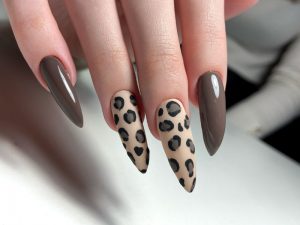
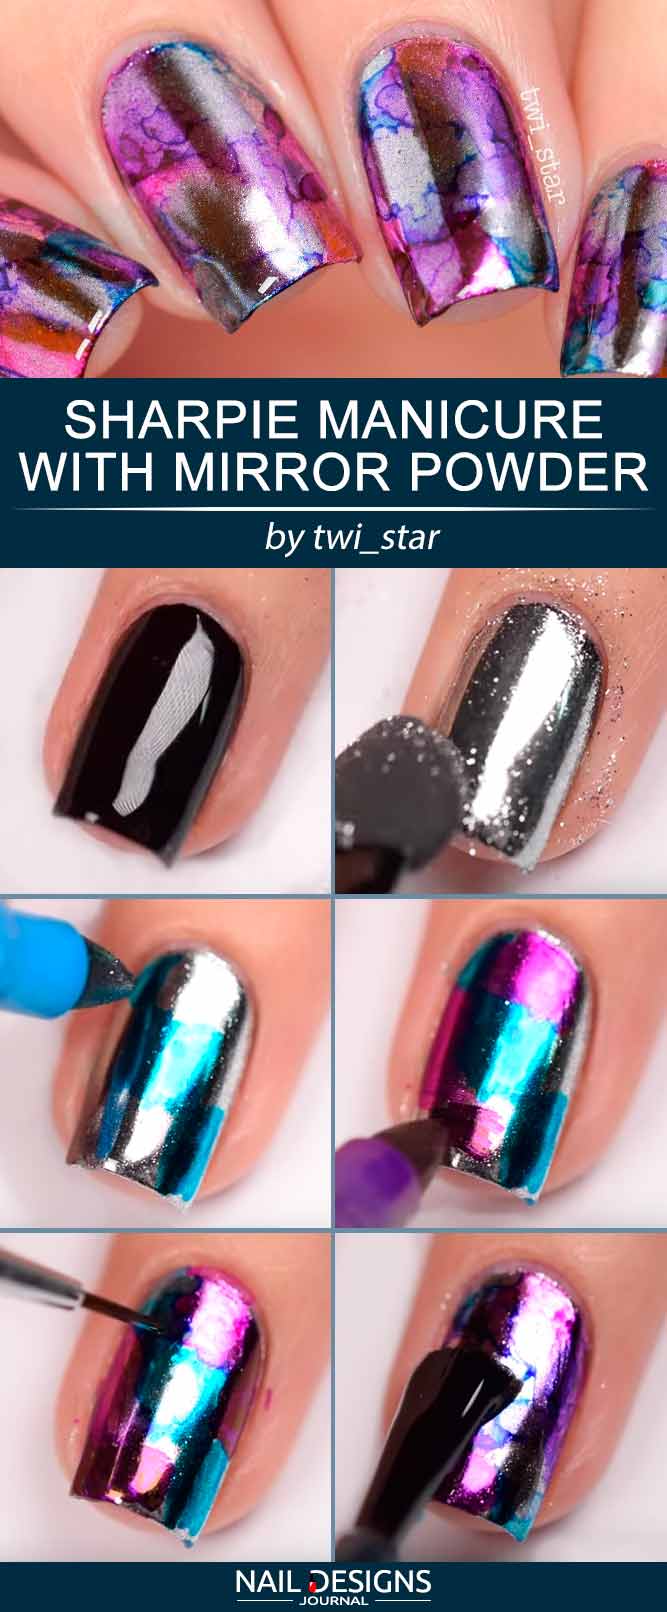
Sharpie Manicure With Mirror Powder
Sharpie manicure is extremely trendy, and we are going to prove it to you with this mirror powder sharpie nail art tutorial!
- Apply a base coat.
- Apply a black base coat.
- Apply a mirror powder to your nail.
- Apply a top coat.
- Use your favorite sharpie colors to draw on your nails.
- Use the tiny brush and rubbing alcohol to blend the colors.
- Apply a top coat.
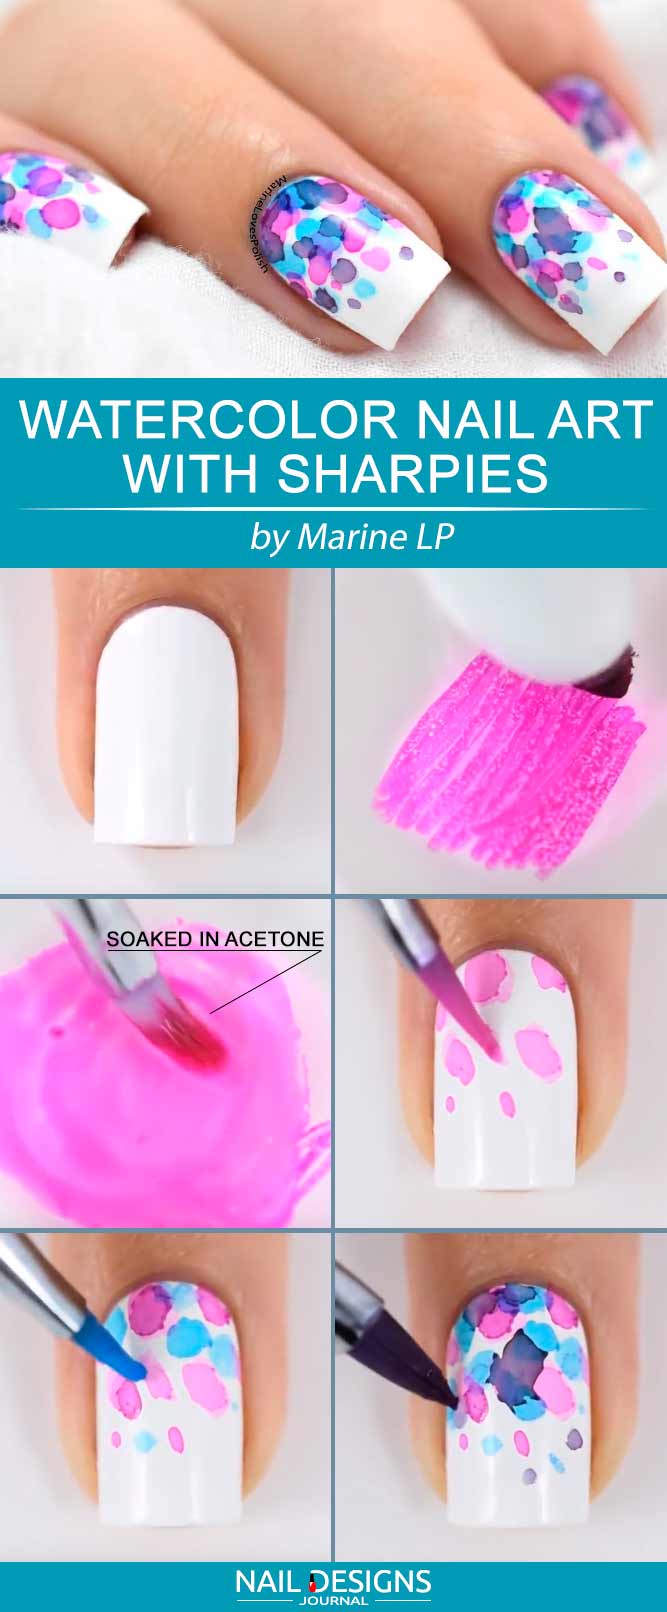
Watercolor Nail Art With Sharpies
- Apply a base coat.
- Apply a white base coat.
- Take a purple sharpie and draw with it on a piece of plastic.
- Take a drop of acetone and a small brush and place it on the sharpie paint.
- Dissolve it a little.
- Transfer it to your nail in different-sized blobs.
- Repeat the process with a blue and black sharpie.
- Apply a top coat.
Geometric Nail Art Using Sharpie
- Apply a base coat.
- Apply a white base coat to your pinkie and ring fingers.
- Apply light purple nail polish to all the other nails.
- Take a piece of wax paper to draw on with your sharpies.
- Dissolve the sharpie drawings with a drop of acetone.
- Apply a square-shaped vinyl to the white base.
- Apply the dissolved sharpie colors to your nail in any order you like.
- Remove the vinyls.
- Add a sparkly coat to your middle finger and place a square stud in the center.
- Apply a top coat.

5 Easy Nail Designs For Back To School Nails
- Apply a base coat.
- Apply a white base coat.
- Apply different-shaded stripes to the middle finger using your favorite sharpie colors.
- Add colorful letters to your ring finger.
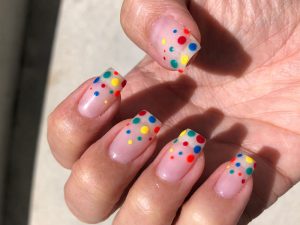
- Add a colorful polka dot design to your pinkie.
- Add different-colored triangles to the pointer finger.
- Add different-shaded numbers to your thumb.
- Apply a top coat.

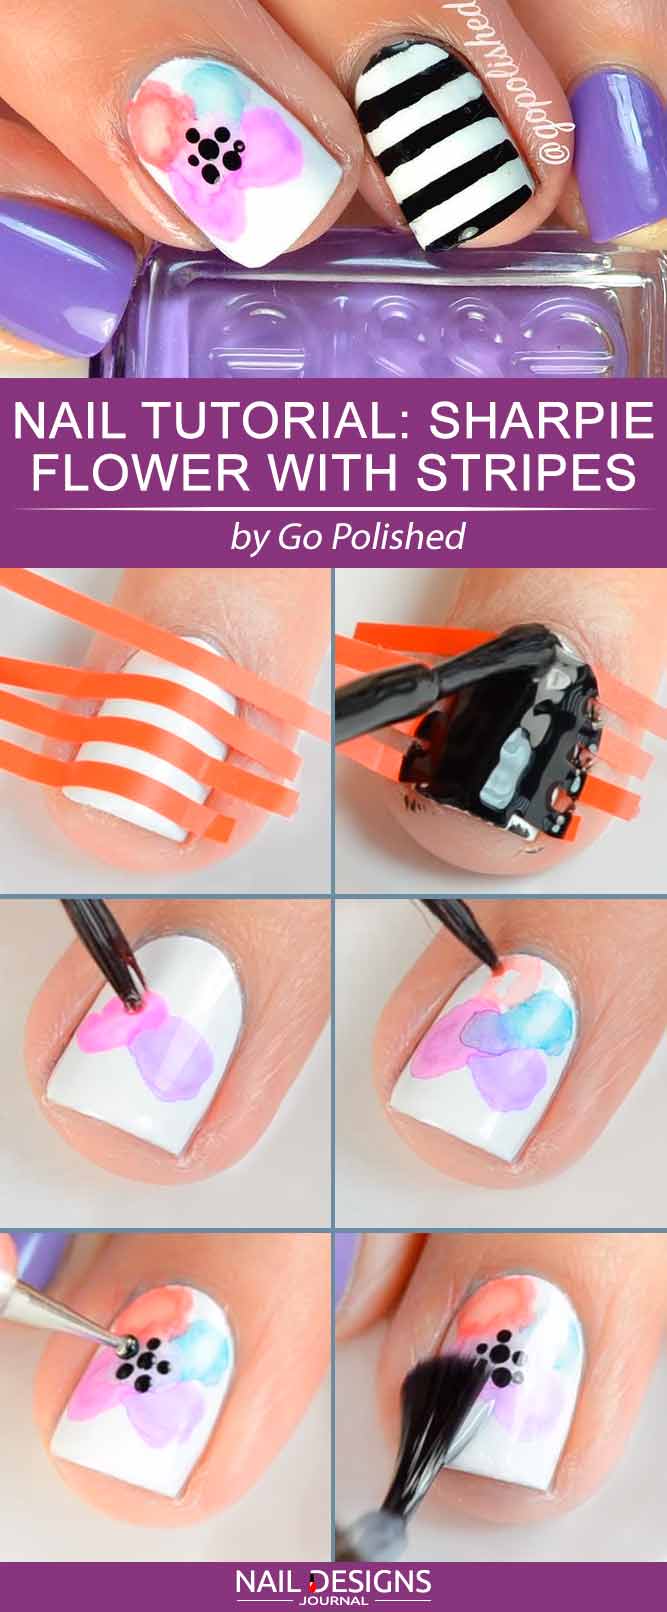
Cute Sharpie Flower Nails
- Apply a base coat.
- Apply purple base to all of your fingers but middle one and ring one.
- Apply a white base coat to the ring and middle fingers.
- Place some striped stickers on your ring finger.
- Apply black nail polish over the stripes.
- Remove the stripes.
- Take a piece of wax paper or a piece of plastic to draw on with your sharpies of choice.
- Dissolve the sharpie drawings with a drop of acetone.
- Add different-shaded petals to form a watercolor flower on the white base.
- Add tiny black dots to the center of the flower.
- Apply a top coat.
We hope you enjoy these tutorials and will succeed in their replication with the least of time and effort involved. Do not forget to visit us for some more fresh ideas and pieces of trendy advice!
Was this article helpful?