Trying different nail designs is the nature of every woman. Maybe there are ladies who remain devoted to one design throughout the life but we are sure that even those will decide to try something new after reading this article. Believe it or not, but you can create something new on your own with the least of effort. And today we will teach you how.
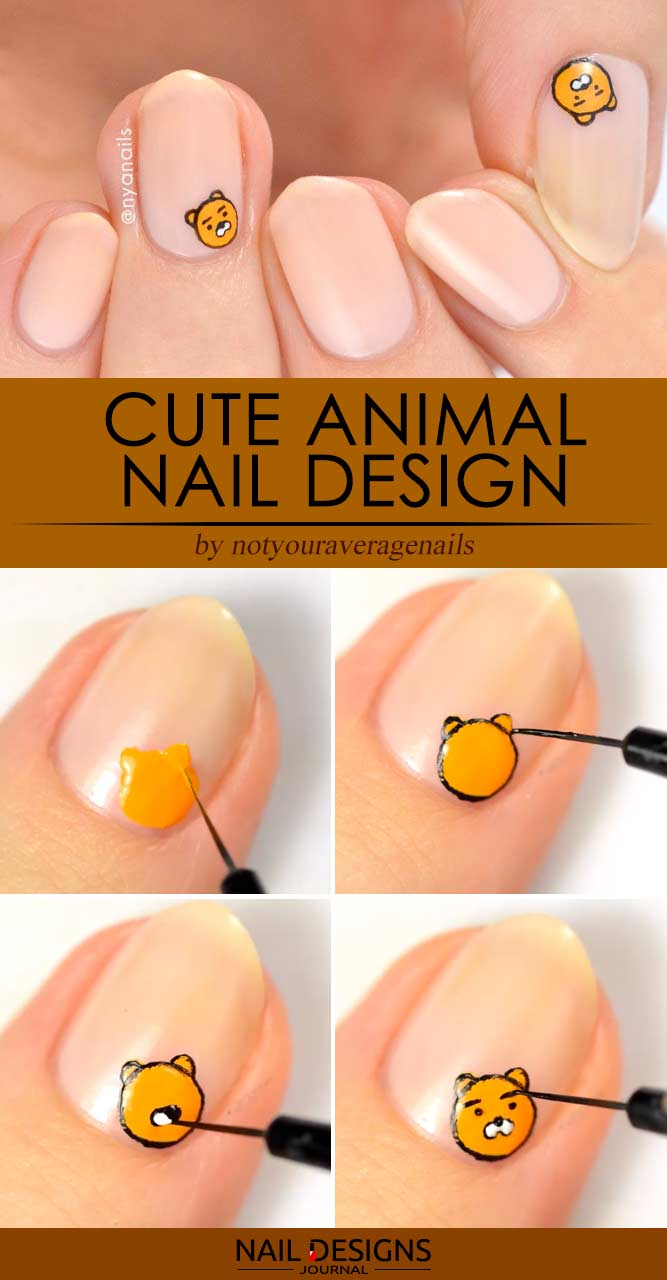
Animal Art Different Nail Designs
Mermaid Nail Art Tutorial

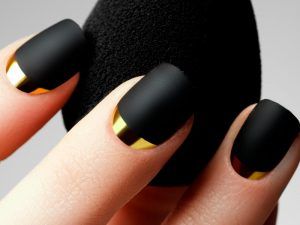
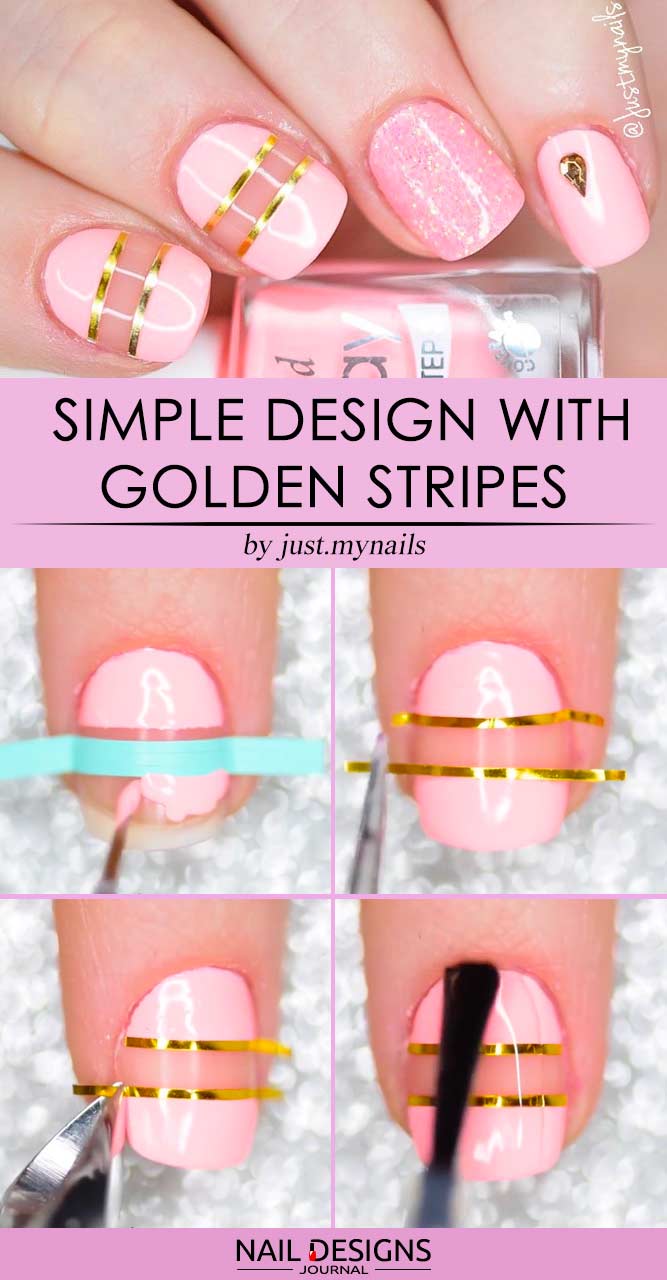
Nails Design With Golden Stripes
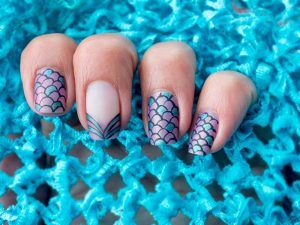
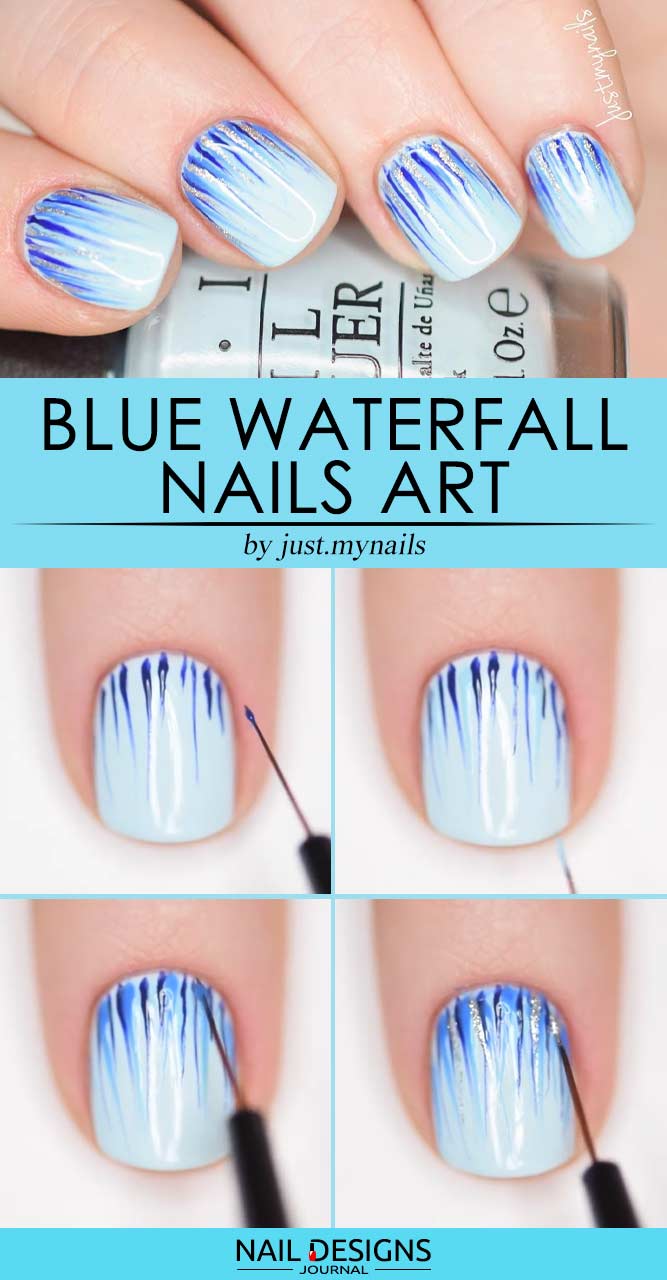
Sweet Blue Waterfall Nails Art

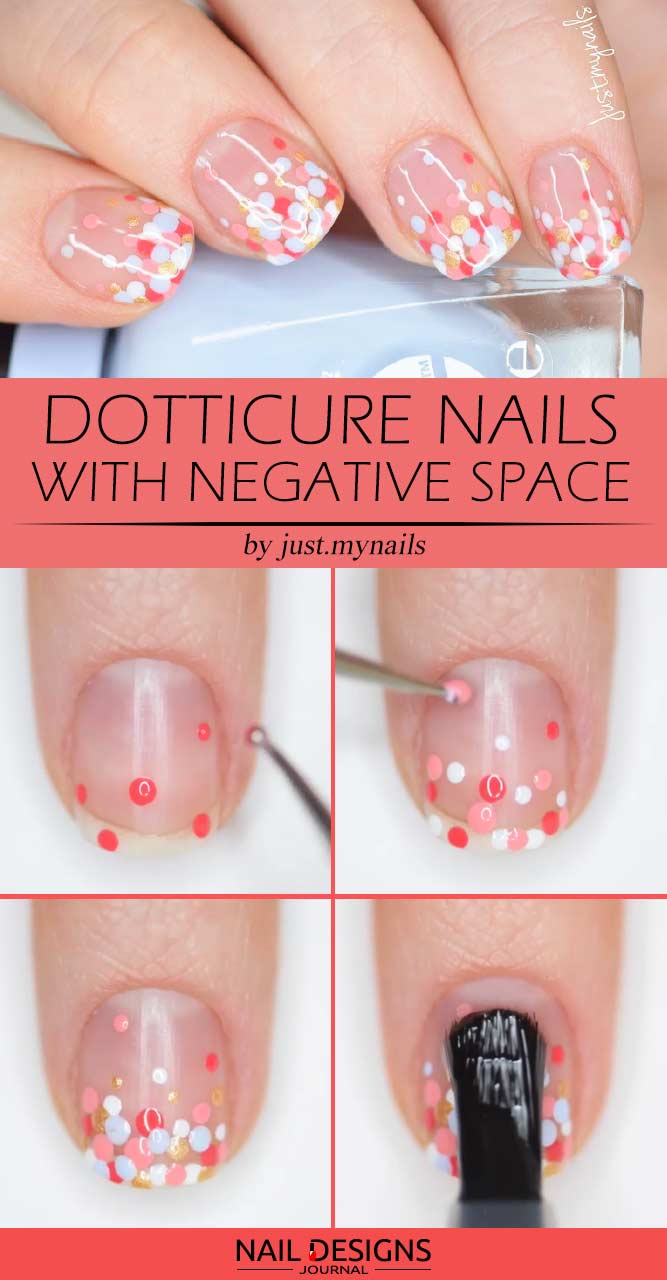
Dotticure Nails With Negative Space
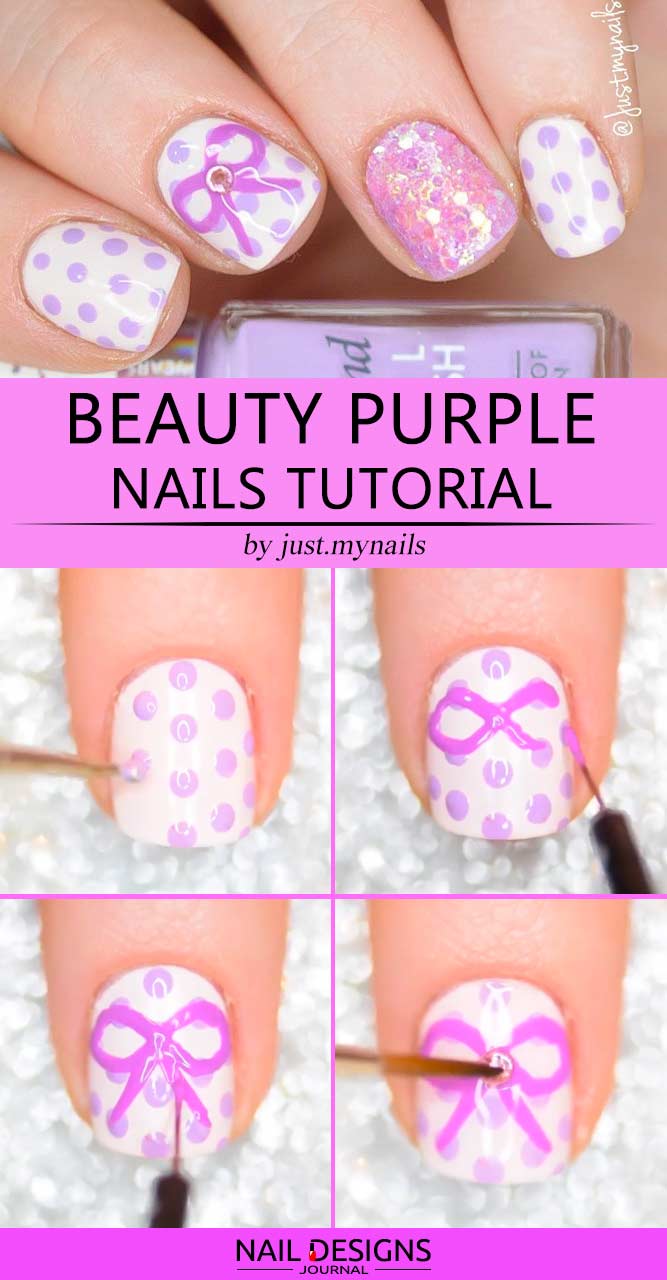
Beauty Purple Nails Tutorial
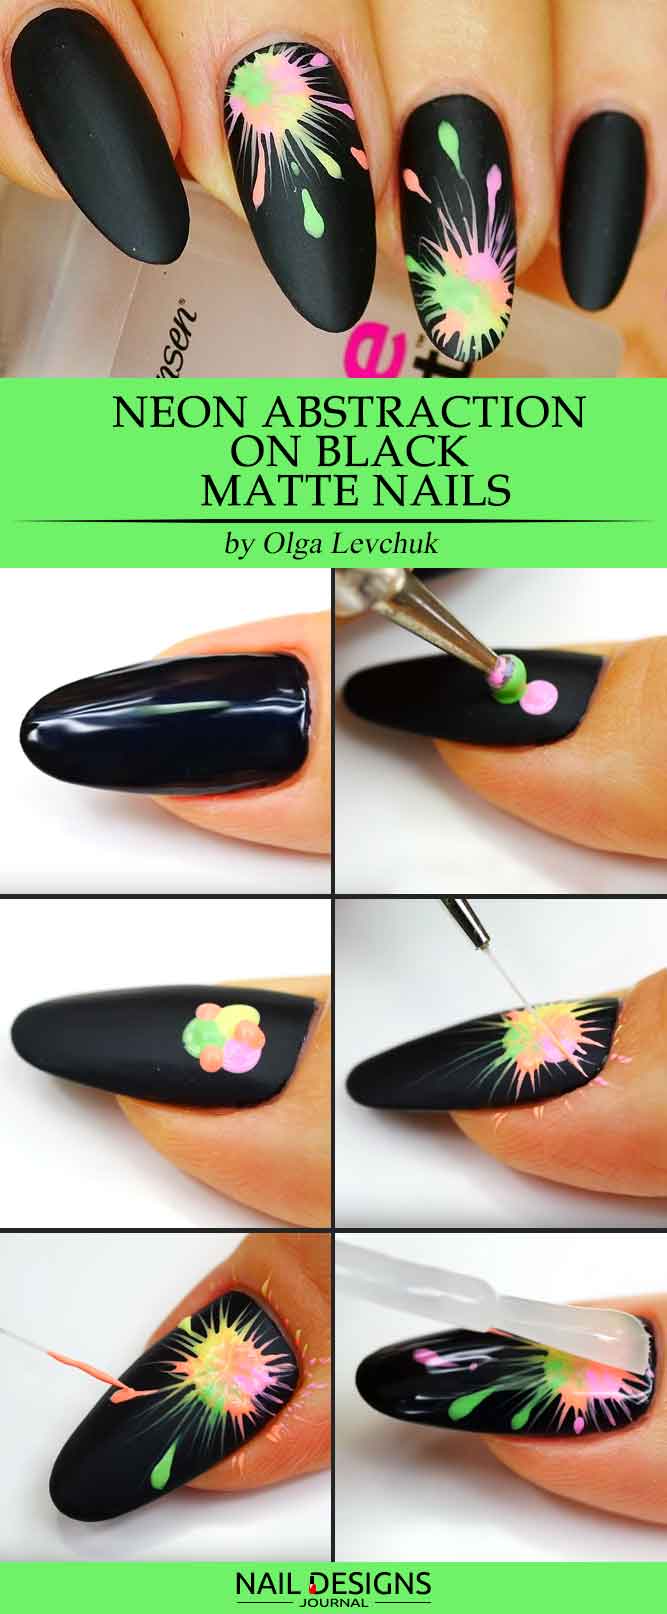
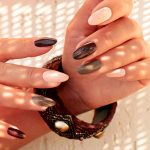
Neon Abstract on Black Matte Nails
For the black matte nails with abstraction, you will need to coat your nails with a black matte base first. With the help of different-colored acrylic paint, create small dots and smudge them with a brush. Now when you got your desired color, fresh it up with some more colorful drops and once more add the matte top coat. Yep, as simple as that!
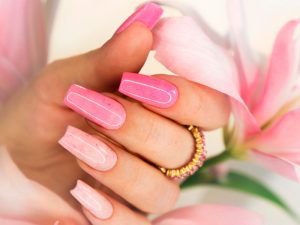
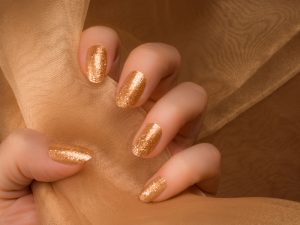
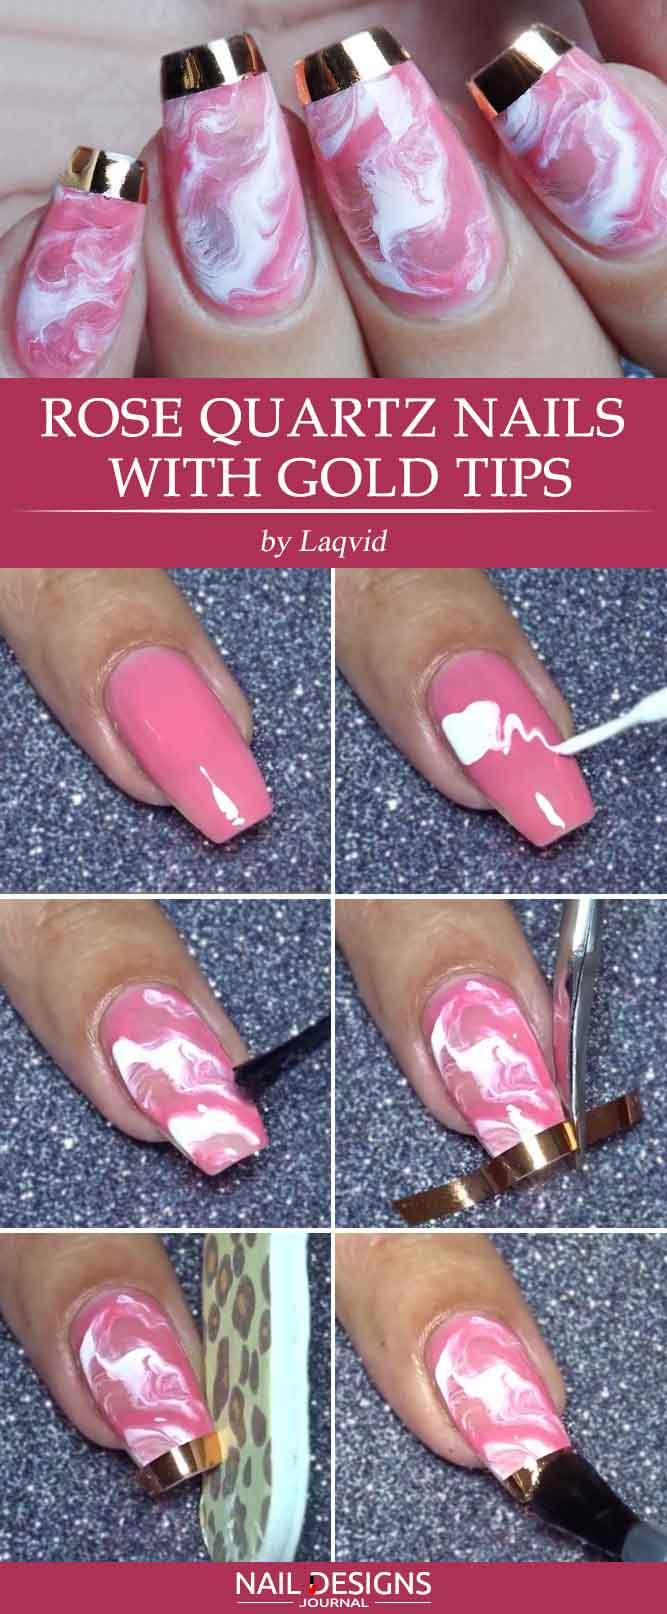
Rose Quartz Nails with Gold Tips
Rose quartz nails with gold tips are easier to get then you think. To start, cover your nails with pink nail polish. But before it dries out, add a few white thin lines, dissolve it a bit with the help of transparent nail polish. With the help of gold stripes, create gold tips and finish all up with the top coat.
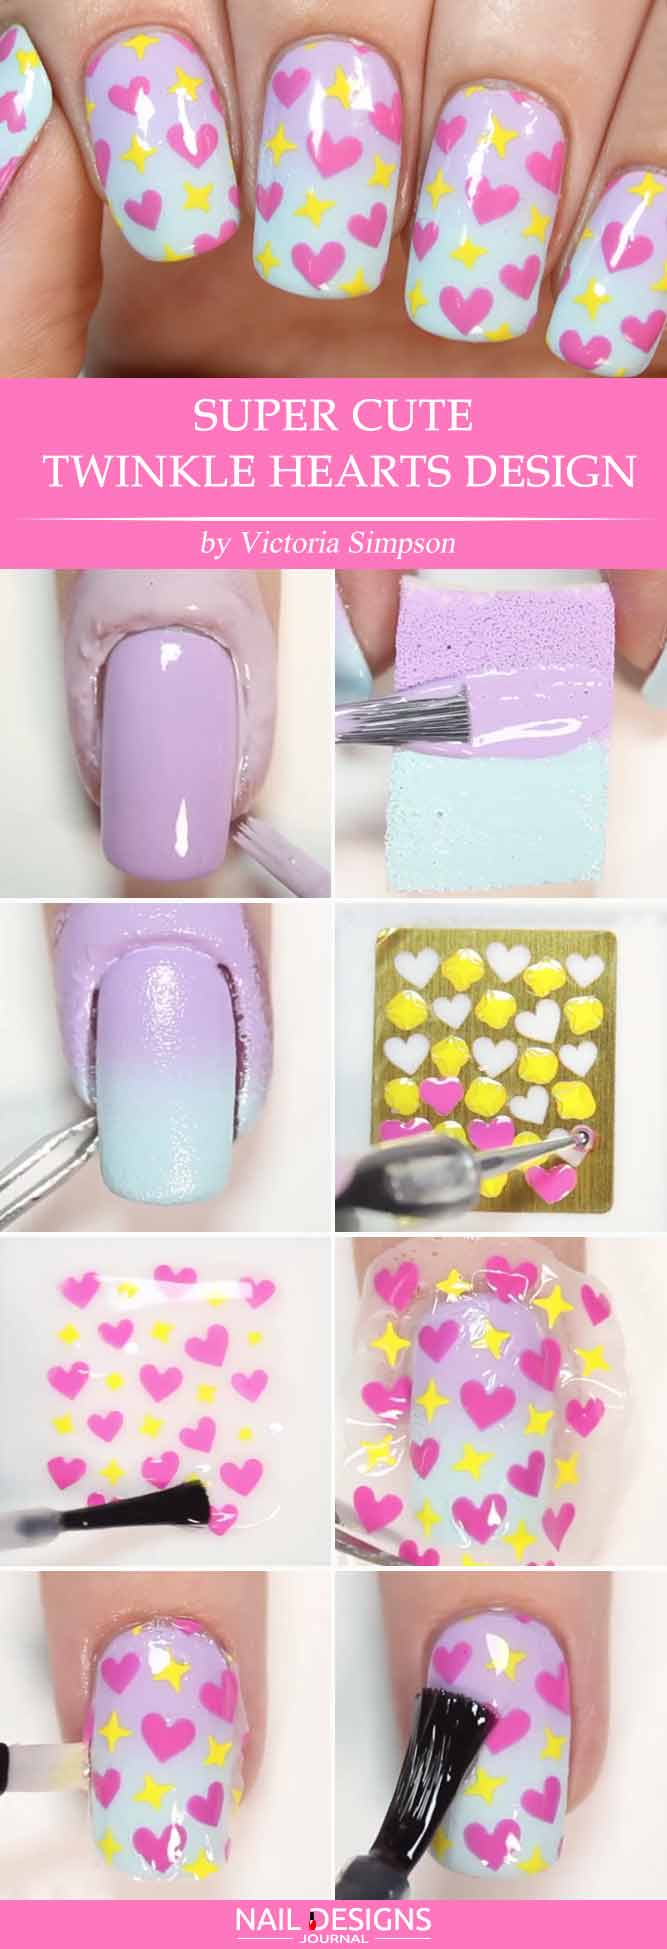
Twinkle Hearts Design with Nail Stencils
With the help of nail stencils, you can easily create something as beautiful as this twinkle hearts design. Use pastel purple nail polish as a base. Do not leave out the liquid latex phase so that there are no stains on your fingers later. Use the sponge to create the purple to blue ombre. Now put the vinyl nail stencil on the piece of cellophane and apply pink and yellow nail polish. The pattern that you get should be coated with top. After it dries out, you have the DIY nail decals with the help of which you will be able to create your new nail art. Press it onto your nail and cut off all of the remnants. After the final step which will be the top coat you are ready to conquer!
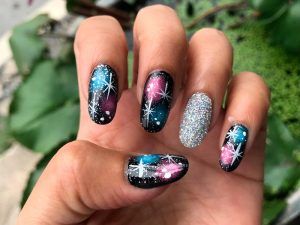
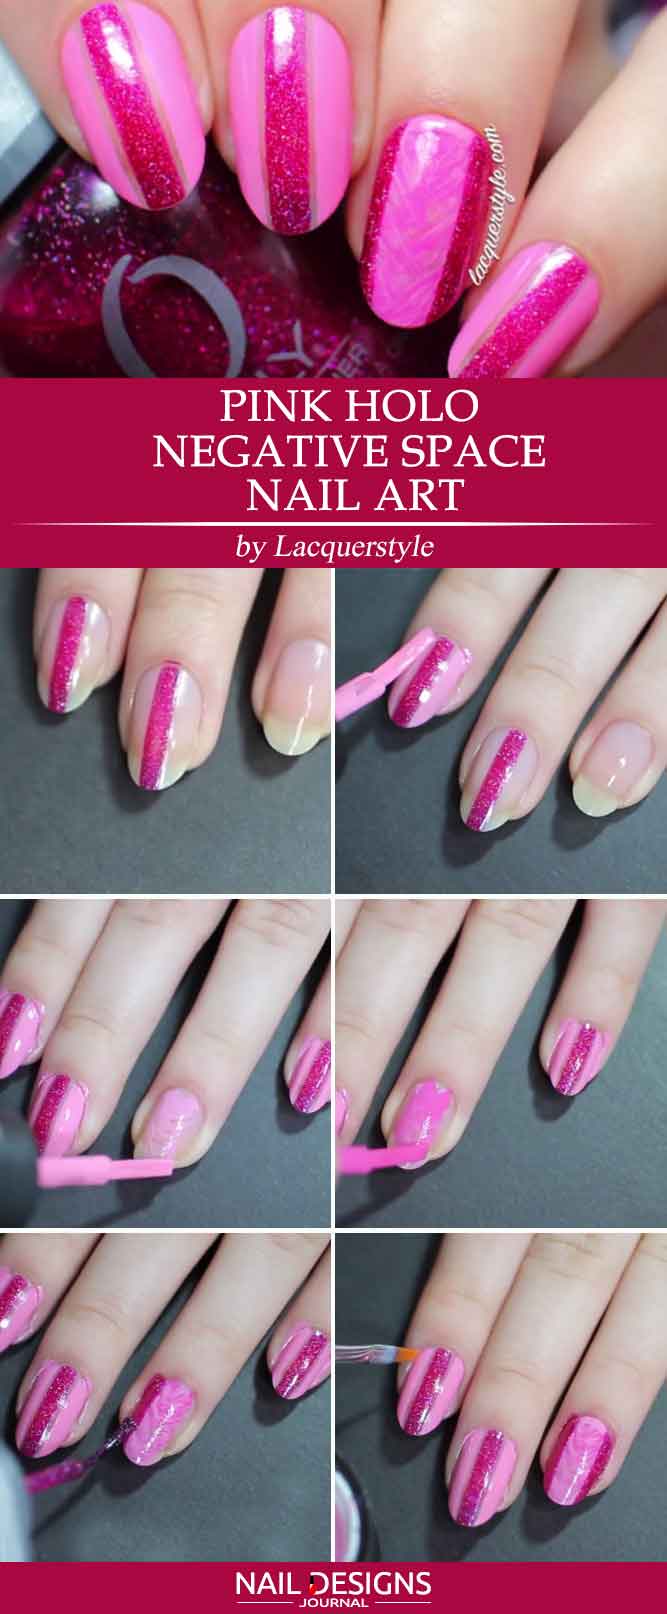
The Star Nails Designs
To create pink holo negative space nails, you will need to start with the base, of course. Now get the three shades of pink you have and start with the darkest you have. With the help of it, paint a vertical line in the middle of your fingernail. Add stripes of lighter shade to each side of the nail but leave small spaces on each side. On the spare, base-covered space, make a crisscross pattern with the lightest shade and repeat with the darker on top and then lighter once again. To finish the design, add two darkest-shaded lines to the side and cover with the top coat so that your mani lasts longer.
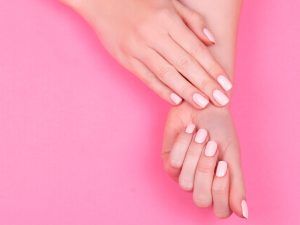
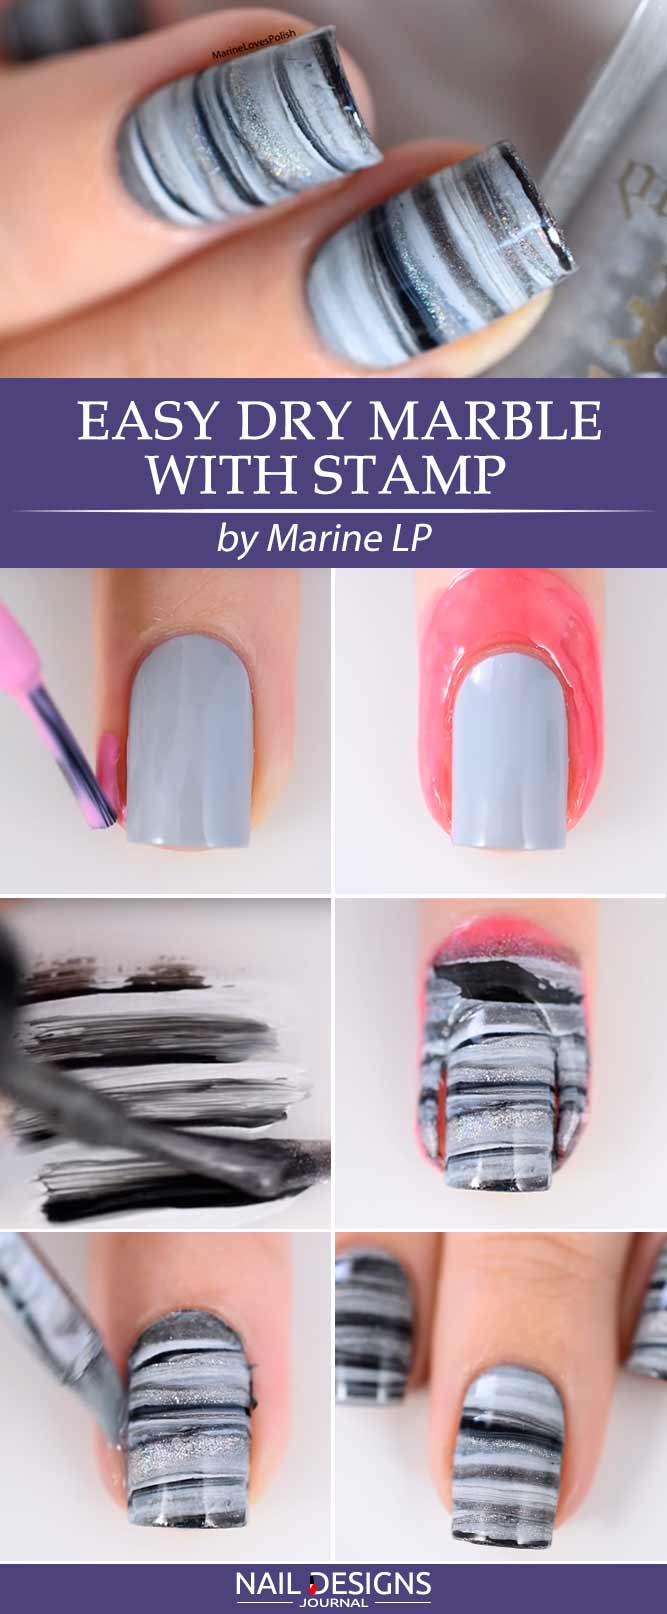
Easy Dry Marble Nails with Stamp
To get this stunning design, you need to start with a pale gray base. Now mix all the shades of gray you have with white and black on the sheet of plastic in a gentle stroke movement way. Press the stamp over it and apply in onto your fingernail. Remove all the unnecessary remains and cover it with the top coat. Yes, as simple as that!
Gradient Chevron Nails with Vinyls
For this design, start with coating your nails with white and let them dry out completely. Place the chevron-shaped vinyls on your nail. On the makeup sponge, mix the shades you want to apply to your nails. When the combination is ready, simply press it to your nail. Now while the polish is still wet remove the chevron stickers. What is left to do is to apply the top coat. Voila!
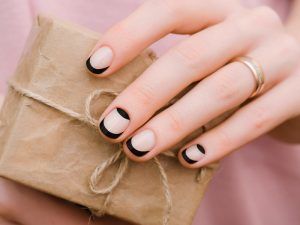
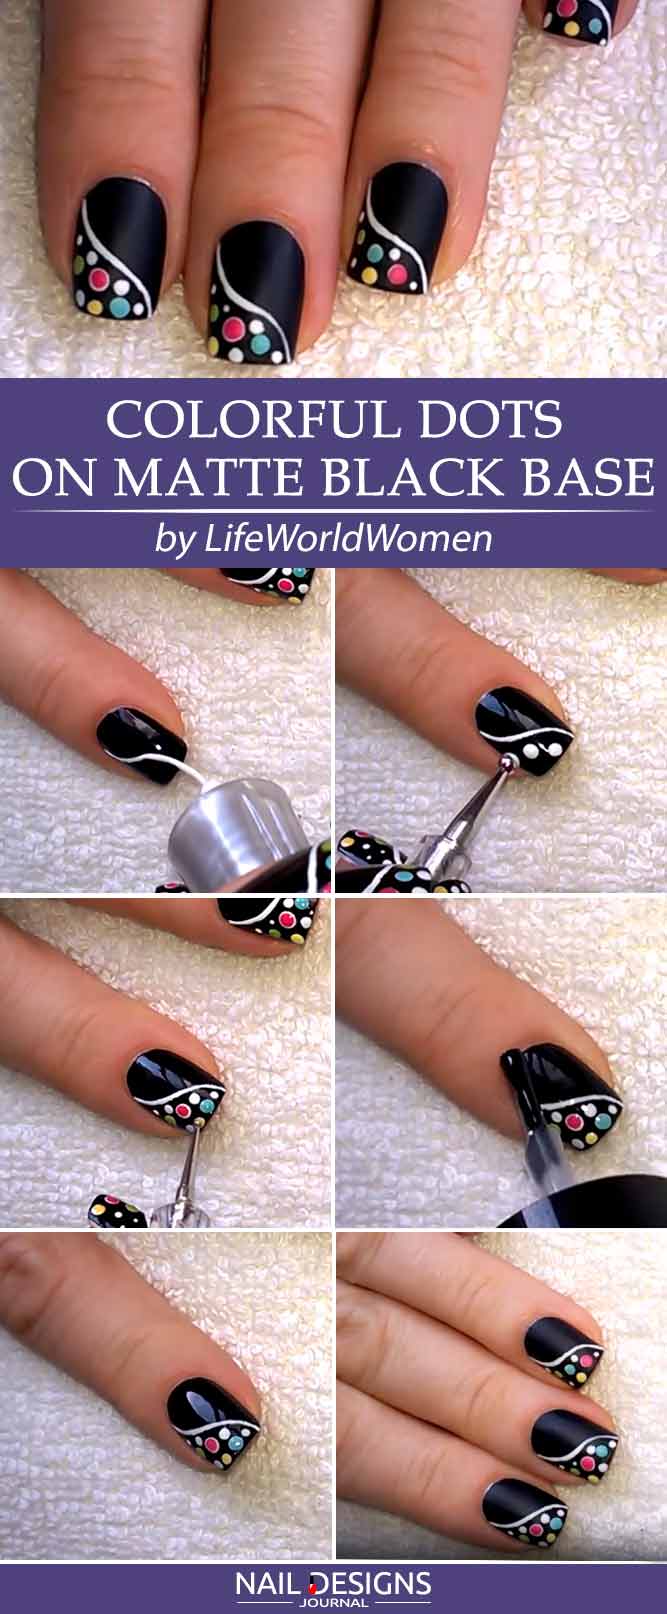
Colorful Dots On Matte Black Nails
For this cute nail art, start with the base coat and a black coat over it. Now draw a white curved line in the middle of your fingernail. With the help of a dotting tool, add white dots to the upper side of your nail. When it’s done, start placing different-colored dots over the white ones. Finish this simple but gorgeous design with the matte top coat.
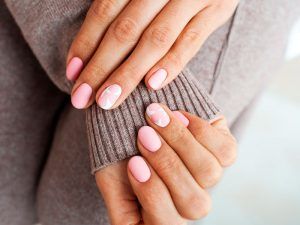
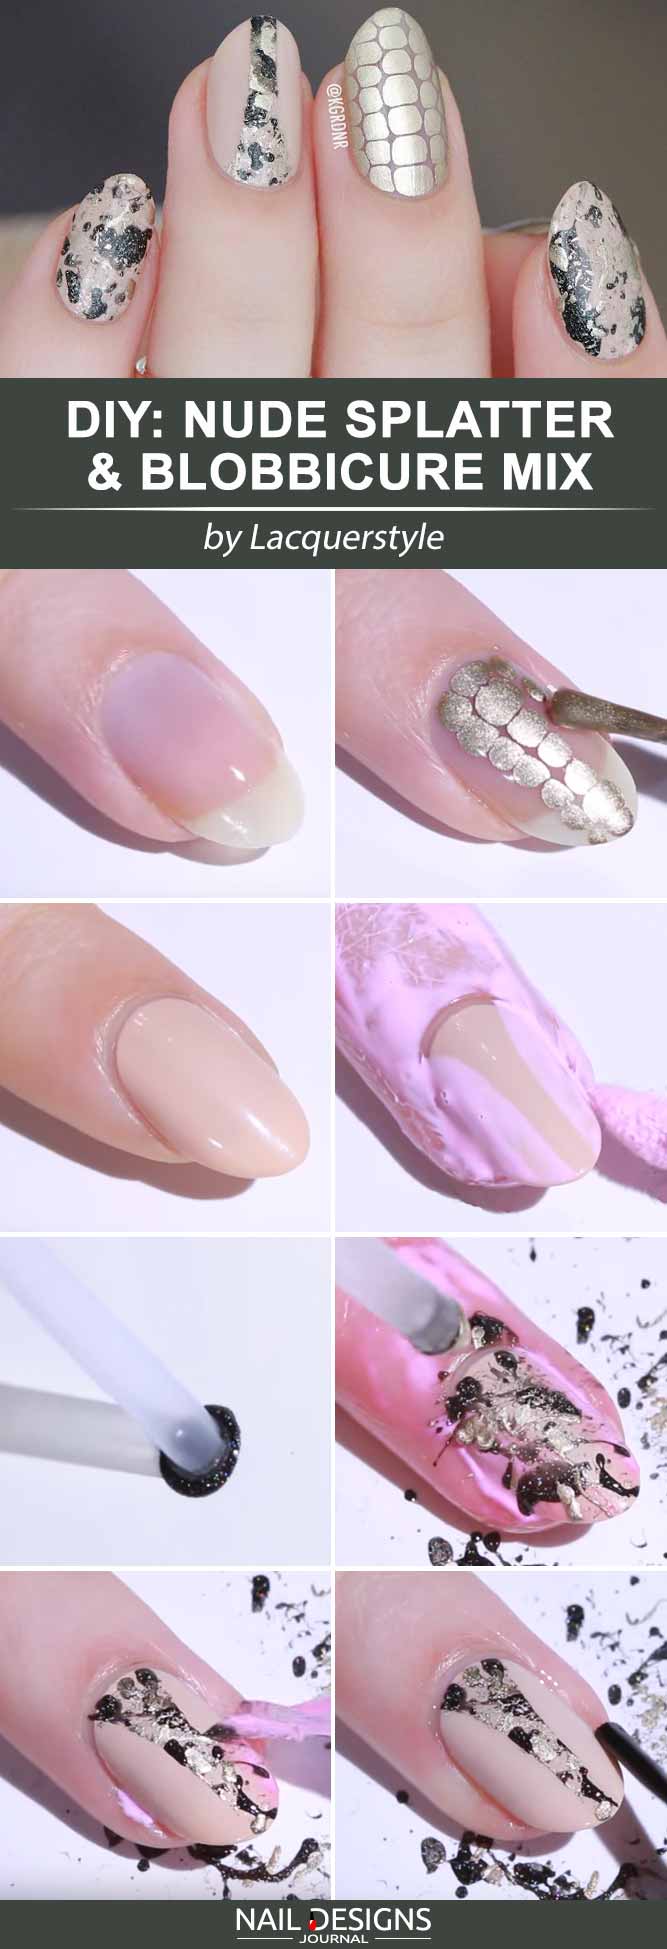
Nude Nails and Blobbicure Mix
To start, apply a base coat. Add some vertical dotted lines to the base while it is still wet. Apply matte or shiny top coat to secure this design. Cover your other nails with a cream base. Then apply liquid latex around your finger and onto your nail leave the area where the design should be untouched. Dip the straw in some polish and blow through the straw onto your nail. Finish off the design with a top coat.
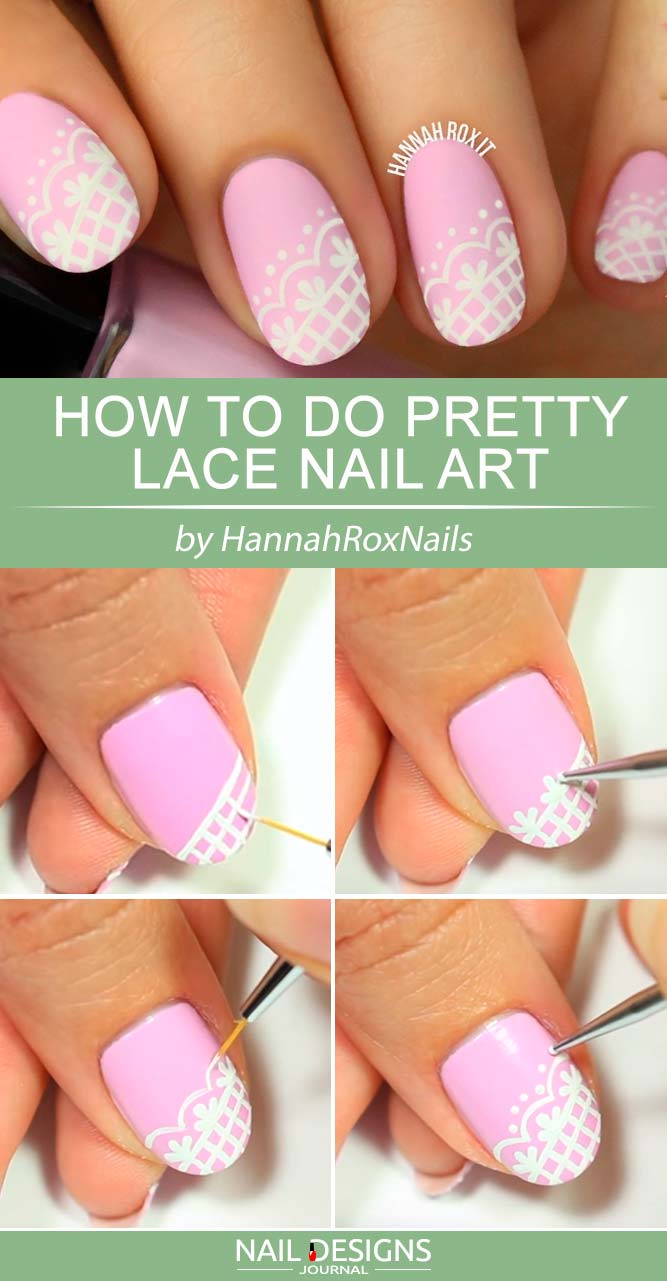
Pretty Lace Nail Art
For the cute laced nails, you will need to coat your nails with a baby pink base first. Then add a diagonal line to the tip of your nail using a tiny brush and a white nail polish. Add another two similar lines. Paint small vertical lines to the design. Using a small dotting tool create little floral patterns. Draw small connecting archer over the floral patterns. Add small dots in-between the arches and over them. After that apply a matte top coat. So easy, right?

Crystal Watermelon Nail Art
There are times when you wish to decorate your nails with that juicy bright vibe to make everyone drool. However, you do not have the luxury of hitting the salon at the moment, what is there left to do? The answer is simple – do it yourself! There is nothing easier than to grab some pink and white nail polish and create an ombre, add a green French tip and a watermelon nail art is ready. To complete the look add some few gem rhinestones, which will resemble the seeds. There you go!

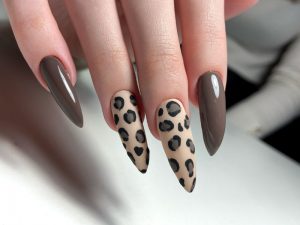
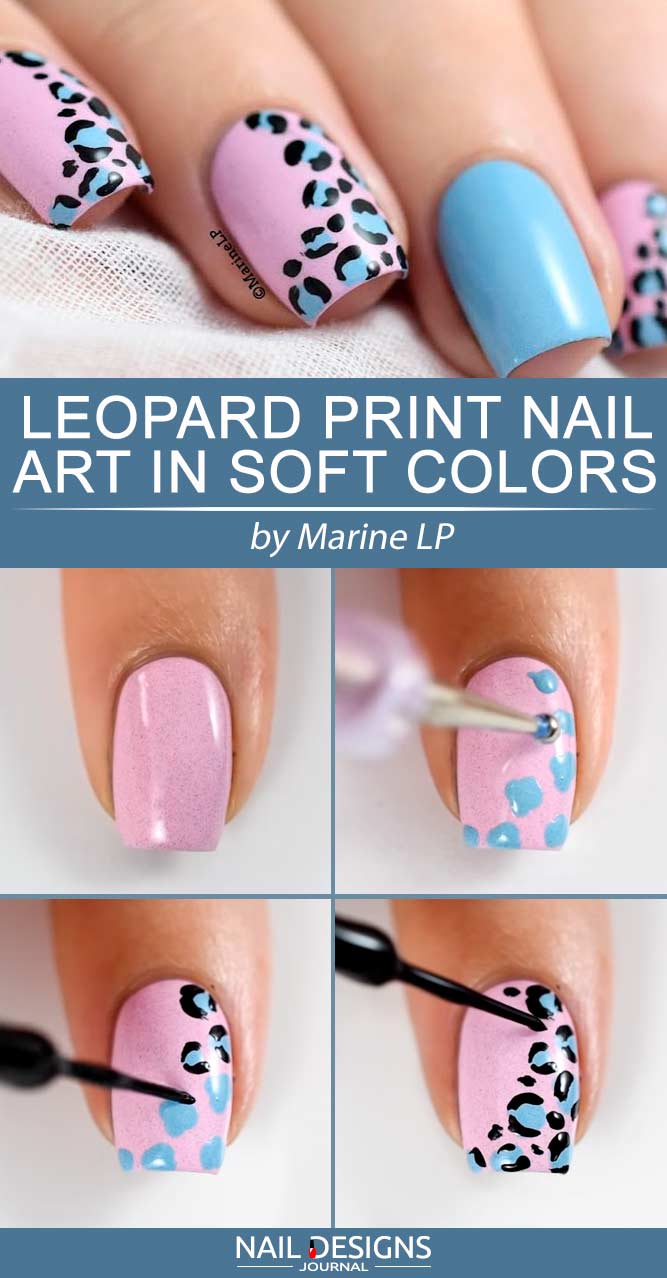
Leopard Print Nail Art In Soft Colors
Among all the animal prints leopard one is undoubtedly the most required one. However, when you wish to step away from the basics, it is time you change the shading. That is why pastel blue and pastel pink base coats suit the goal perfectly. What is more, gentle blue and black print is exactly what you need to finish the look off.
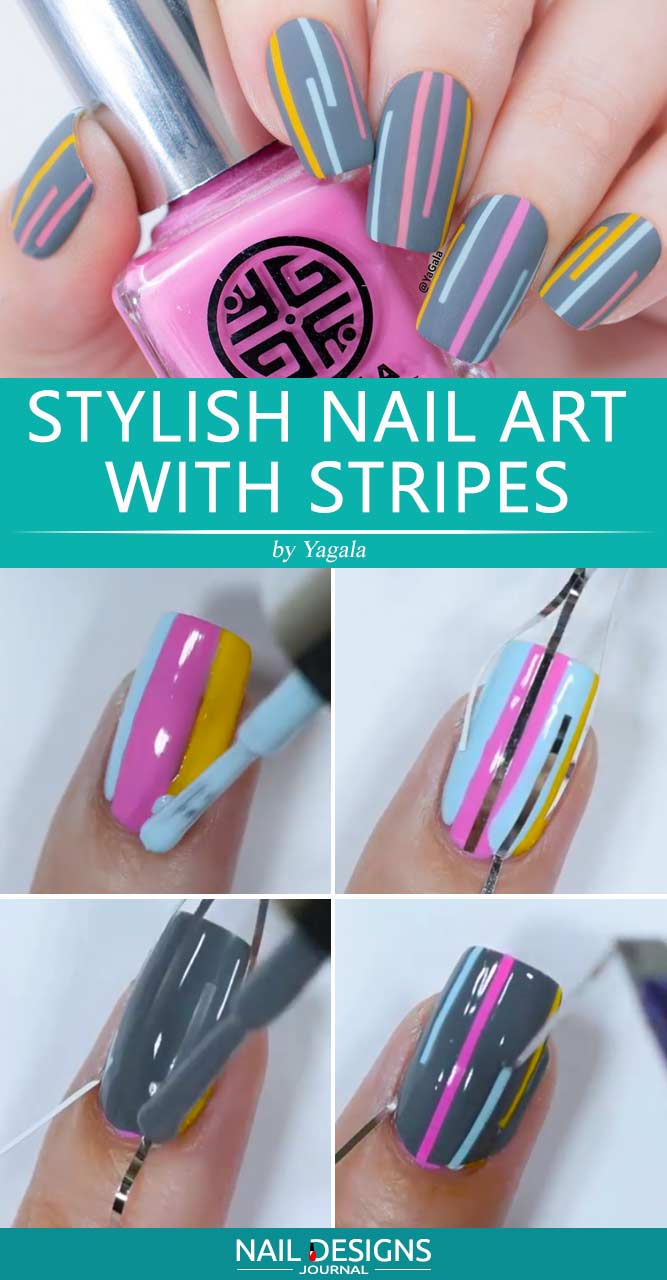
Stylish Nail Art With Stripes
1. Apply a base coat.
2. Coat your nail with three bright base colors.
3. Place a few pieces of striping tape over your nail, facing different directions.
4. Cover the nail with grey nail polish.
5. Remove the stripes.
6. Apply a matte top coat.
Different nail designs are the inevitable part of life of every modern woman. Sometimes to be different, you do not need to go to the salon! Intrigued?
Was this article helpful?