
Aeropuffing nail art is relatively new, but that does not mean that it is less required. There is a list of peculiarities about it that makes it slightly different from all the other nail art techniques known nowadays. To be more precise it is used for the creation of various intricate nail art designs, but it is extremely easy to afford and to use as well. That is why we decided to talk about all the benefits of aeropuffing as well as to treat you with a set of useful tutorials to prove you how fancy and simple at the same time this technique is. Enjoy!
What You Should Know About Aeropuffing Nail Art?
Even though the technique is pretty new, there is nothing complicated about it, all you need compared to a fancy set like the one required for the airbrushing is a set of gel paints and sponge brush! In comparison with airbrushing, there is less time to spend on cleaning of your working place since aeropuffing is not messy at all. Besides you do not need to take your time and use it for tiresome cleaning of your tools, your sponge brush is easy to clean with acetone. What is more, the number of designs you can come up with using just a sponge brush and a set of gel pastes of choice is close to being unlimited, and even the nail art novice can master it. Now when we learn how amazing this technology is it is time to have a look at some useful and easy tutorials which you can effortlessly try out and repeat at home!
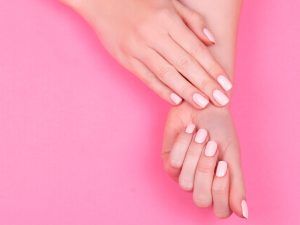
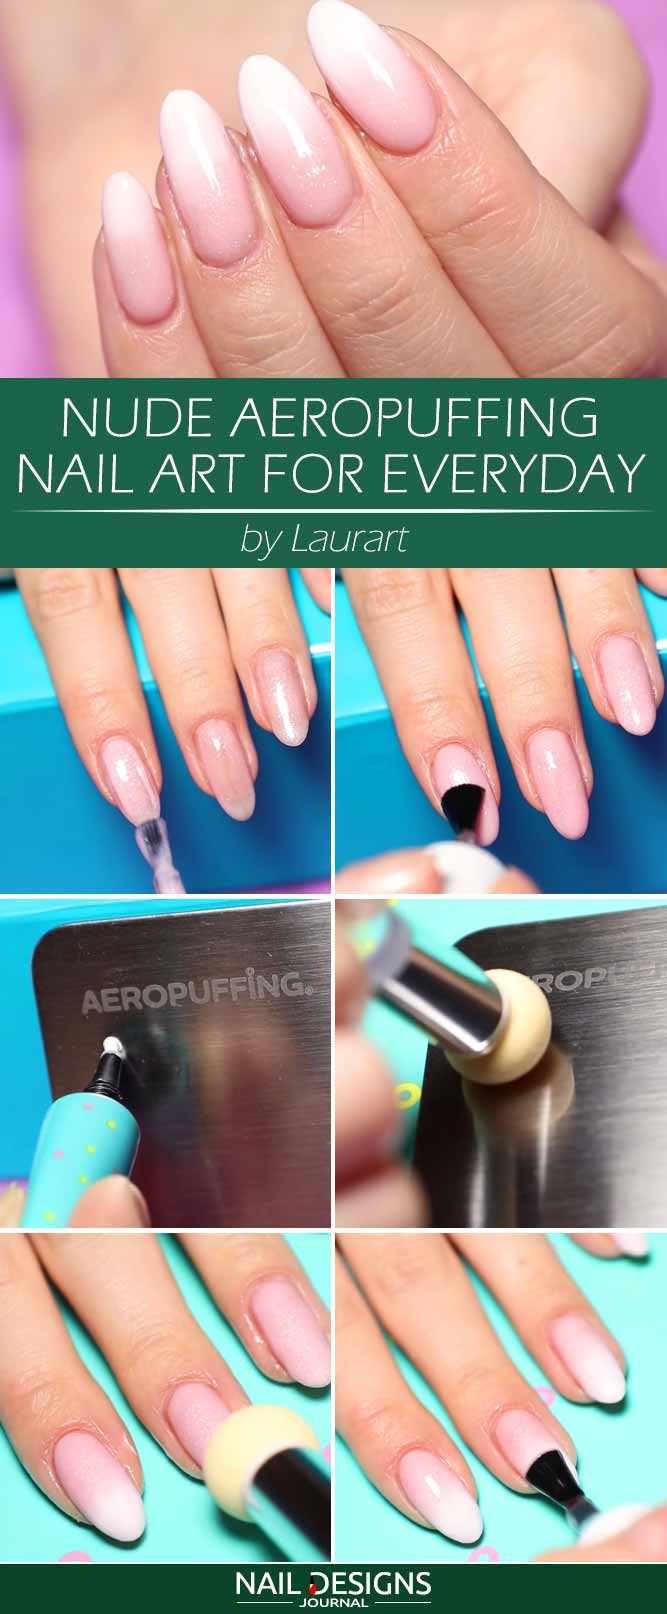
Nude Aeropuffing Nail Art For Everyday
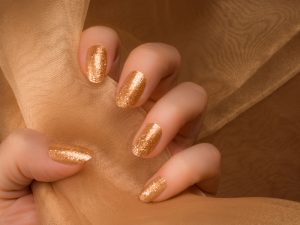
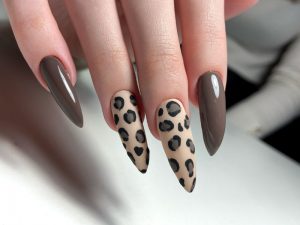
Quick Leopard Aeropuffing Nail Art
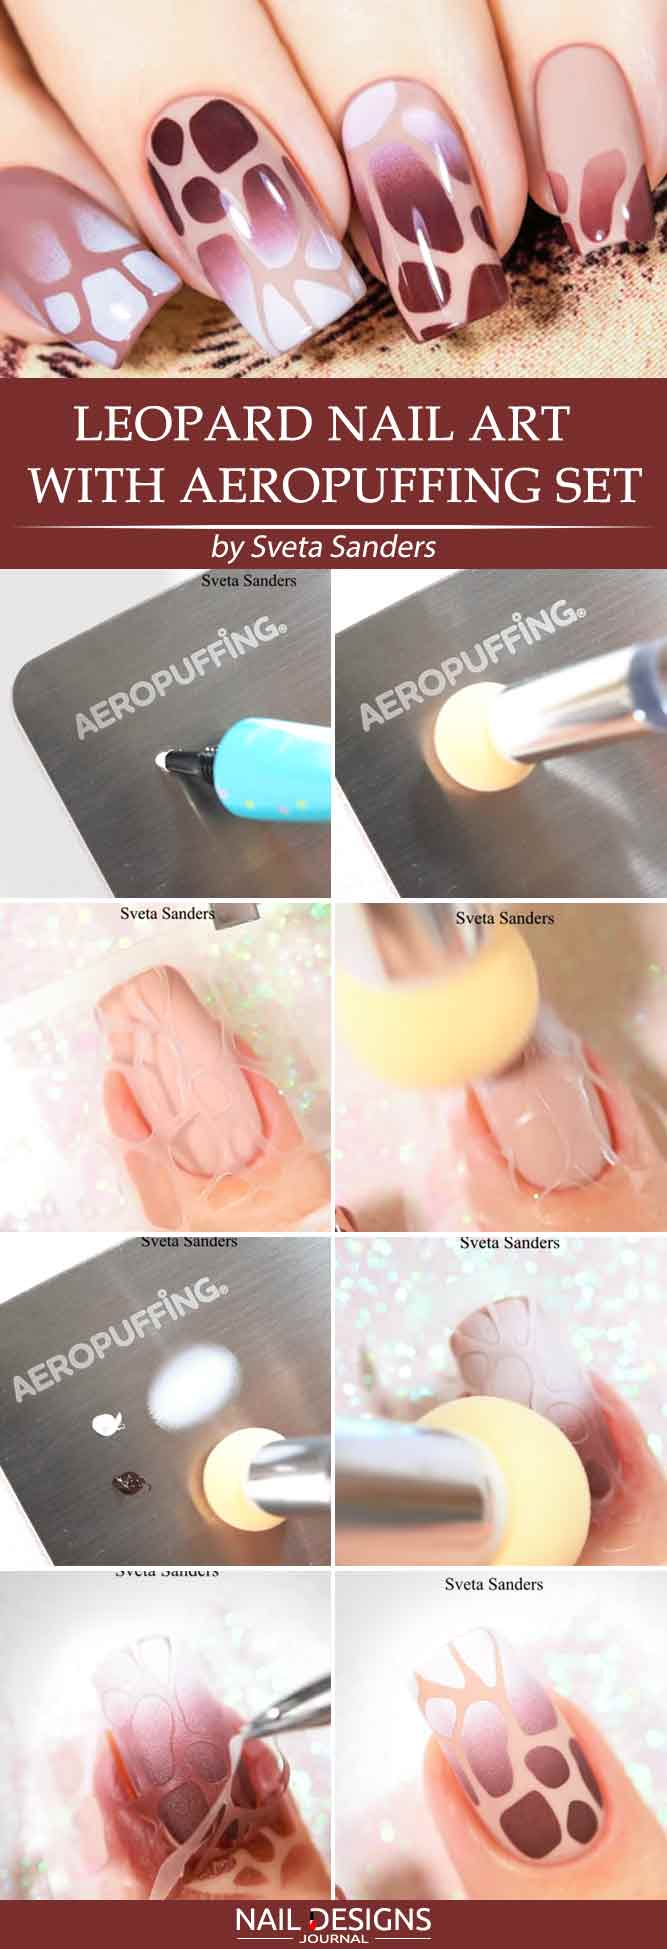
- Apply a base coat.
- Apply neutral base coat.
- Apply top coat.
- Wipe off the sticky layer.
- Squeeze out a drop of white artistic gel polish and disperse it with the help of the sponge brush to get the proper consistency.
- Squeeze out a drop of white artistic gel polish and disperse it with the help of the sponge brush to get the proper consistency.
- Place the stencil over your nail.
- Apply white polish with the help of the sponge brush to the top of your nail.
- Clean your brush with acetone.
- Take burgundy artistic gel and repeat the procedure with the bottom of your nail.
- Remove the stencil.
- Apply top coat.
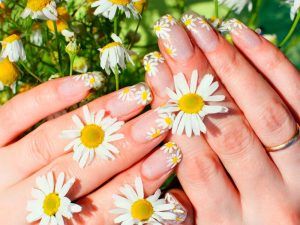
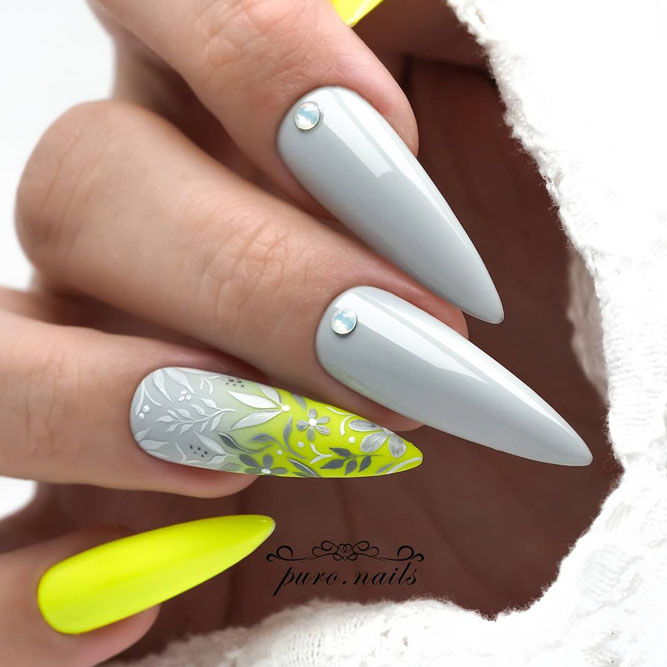
Floral Aeropuffing Nail Art In Simple Steps
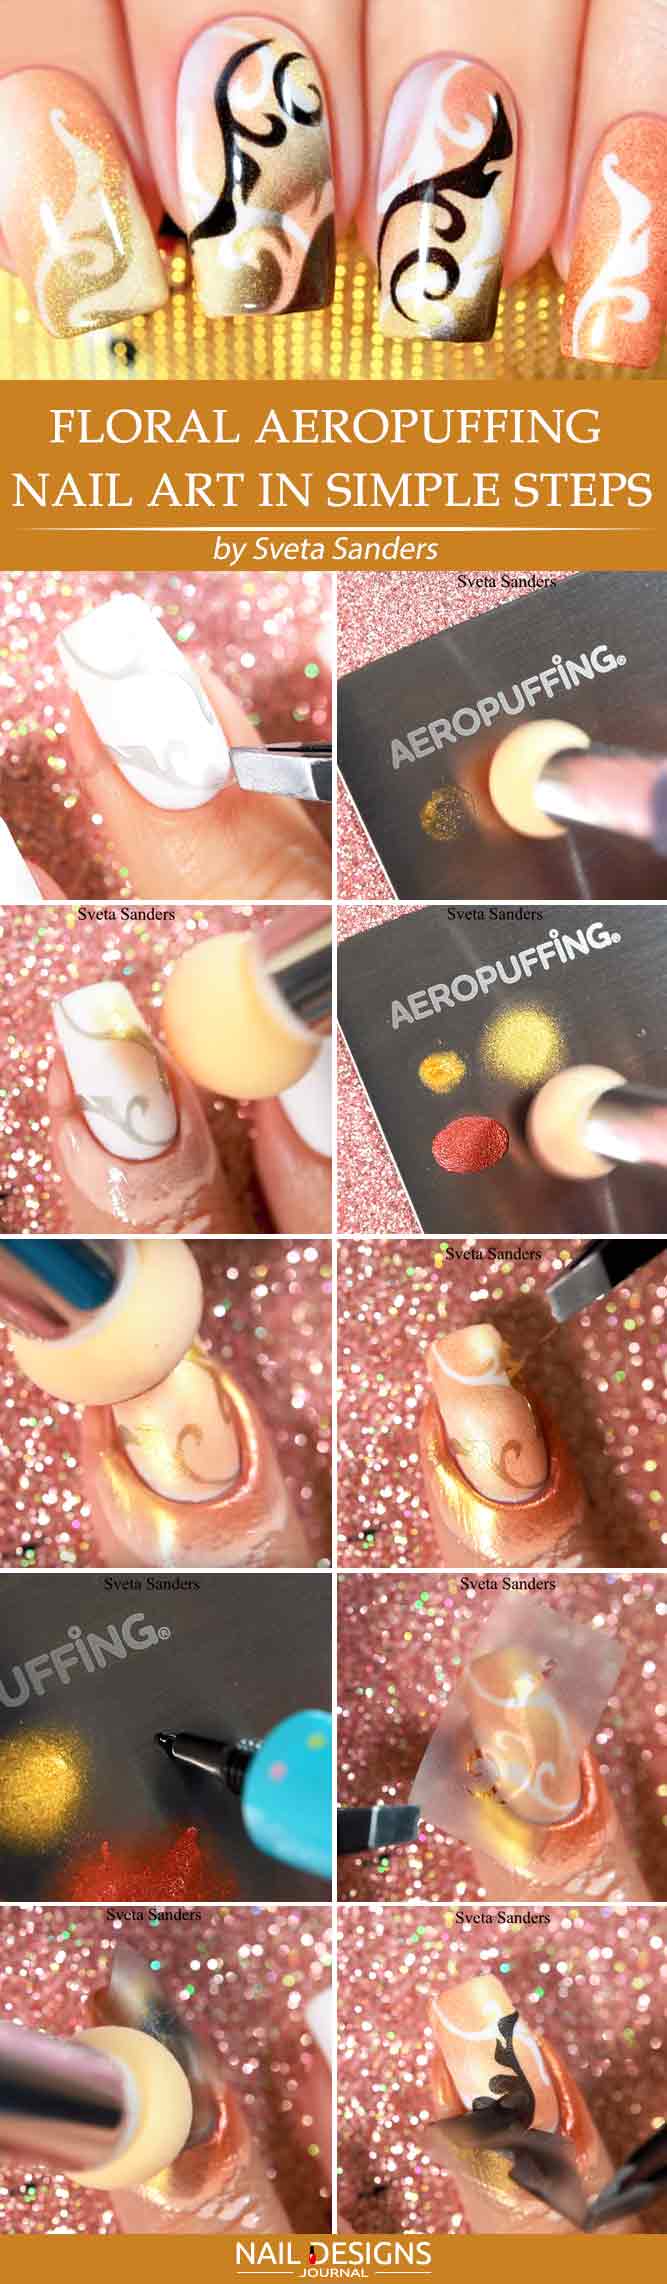
- Apply a base coat.
- Apply white base coat.
- Apply matte top coat.
- Wipe off the sticky layer.
- Apply leafy-shaped stickers onto your nail.
- Take yellow chrome gel pain and spread it with the help of a sponge brush over the metal place.
- Press the sponge over two opposite sides of your nail.
- Repeat the procedure with red chrome gel paint.
- Remove the stickers and apply the stencil to your nail.
- Repeat the sponge brush procedure with black gel pain.
- Remove stencil.
- Apply another sticker to the top of your nail and add a little bit of black pain there too.
- Remove the sticker.
- Apply top coat.
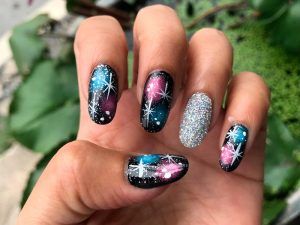
Neon Circles With Aeropuffing Set and Stencils
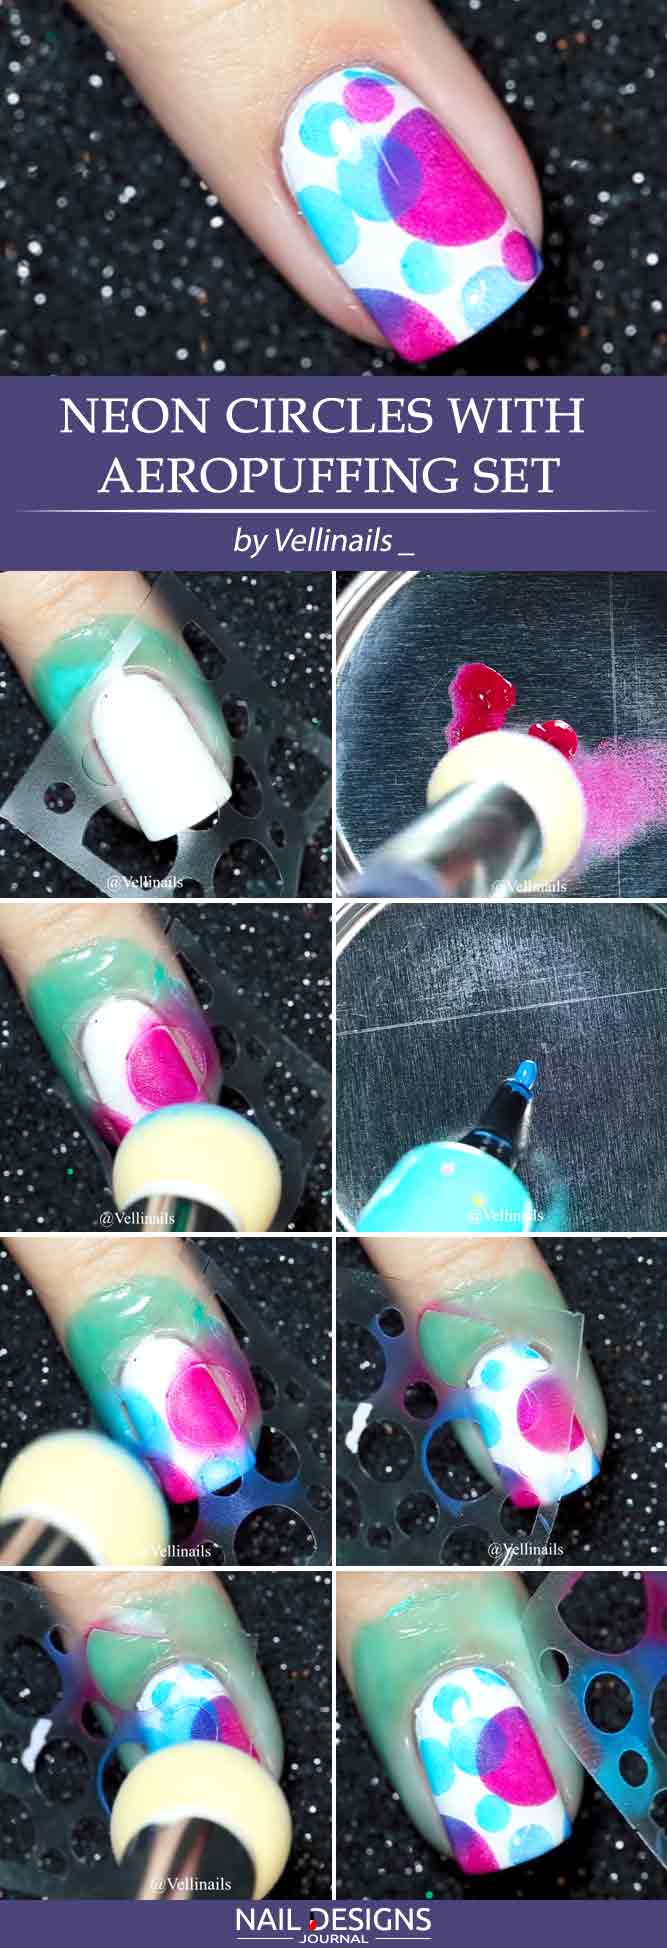
- Apply a base coat.
- Apply neutral base coat.
- Apply liquid latex.
- Use some white gel paint and a sponge brush to add it to the tip of your nail.
- Add some more of white moving down.
- Apply top coat.
- Apply a stencil over your nail.
- Use bright neon gel pains to fill in the circles of the stencil in the order you prefer, use a sponge brush to succeed with the design.
- Remove the stencil and re-apply in in different direction.
- Add some more color to your design using a sponge brush.
- Apply top coat.
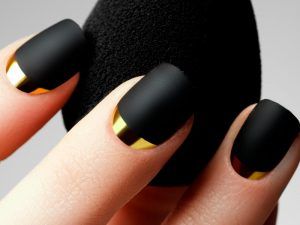
Easy Striped Aeropuffing Nail Art
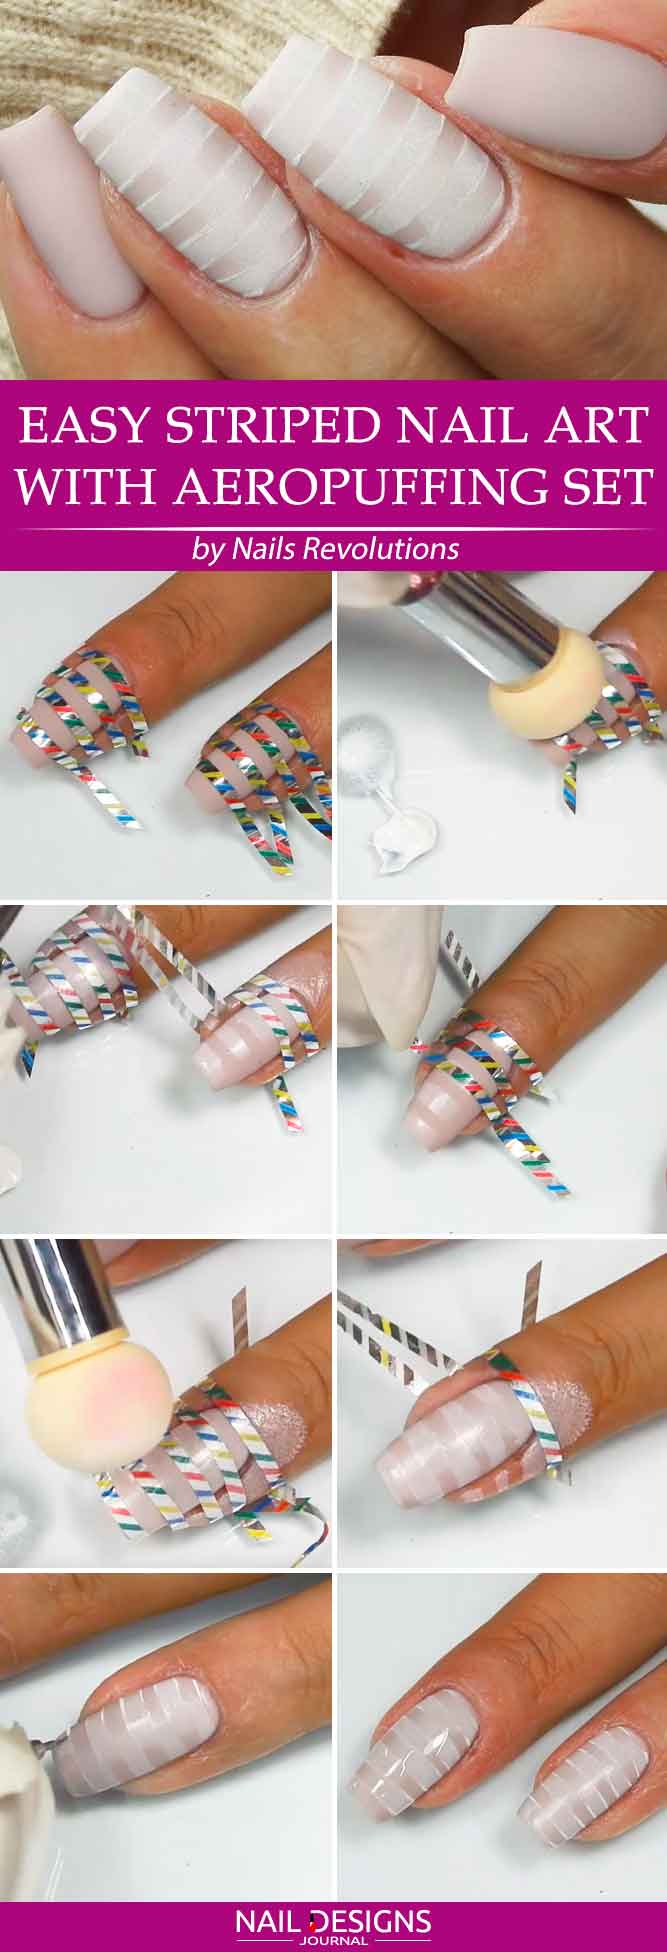
- Apply a base coat.
- Apply neutral base coat.
- Apply a set of horizontal stripes over your nail.
- Use white gel paint and a sponge brush and apply it to the half of your nail.
- Remove the stripes.
- Re-apply the stipes over your nail so that they cover the white lines on your nail.
- Repeat the procedure with the help of white gel paint and sponge brush over the other side of your nail.
- Remove the stripes.
- Add some definition to the lines with the help of white gel paint and detailer brush.
- Apply matte top coat.
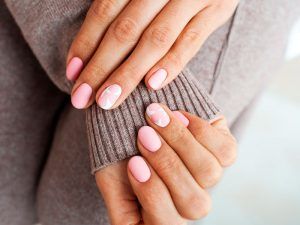
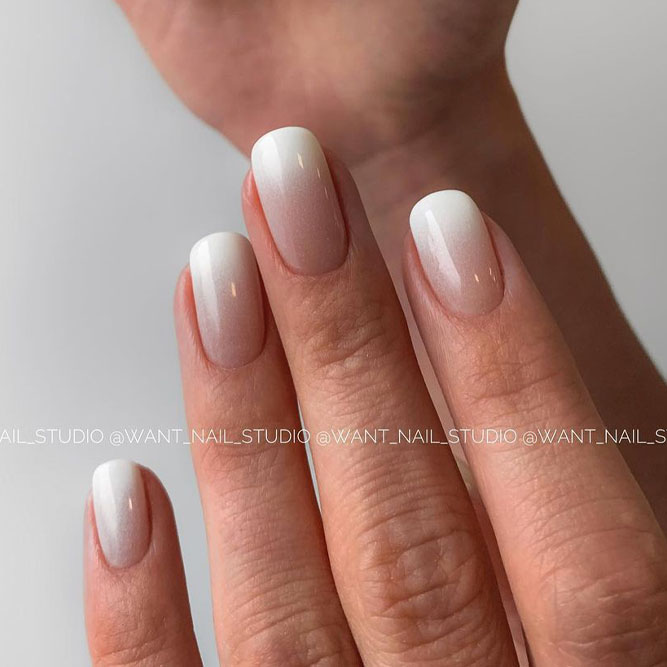
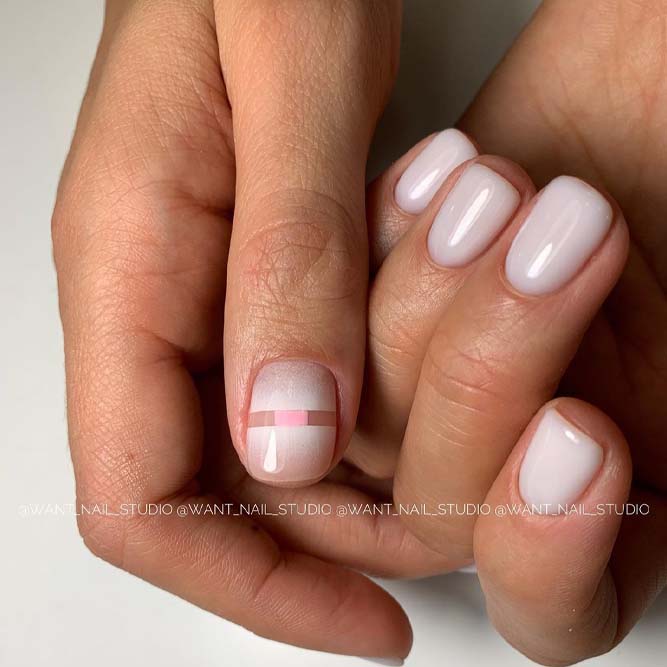
Sandy Nail Art and White Ombre Base
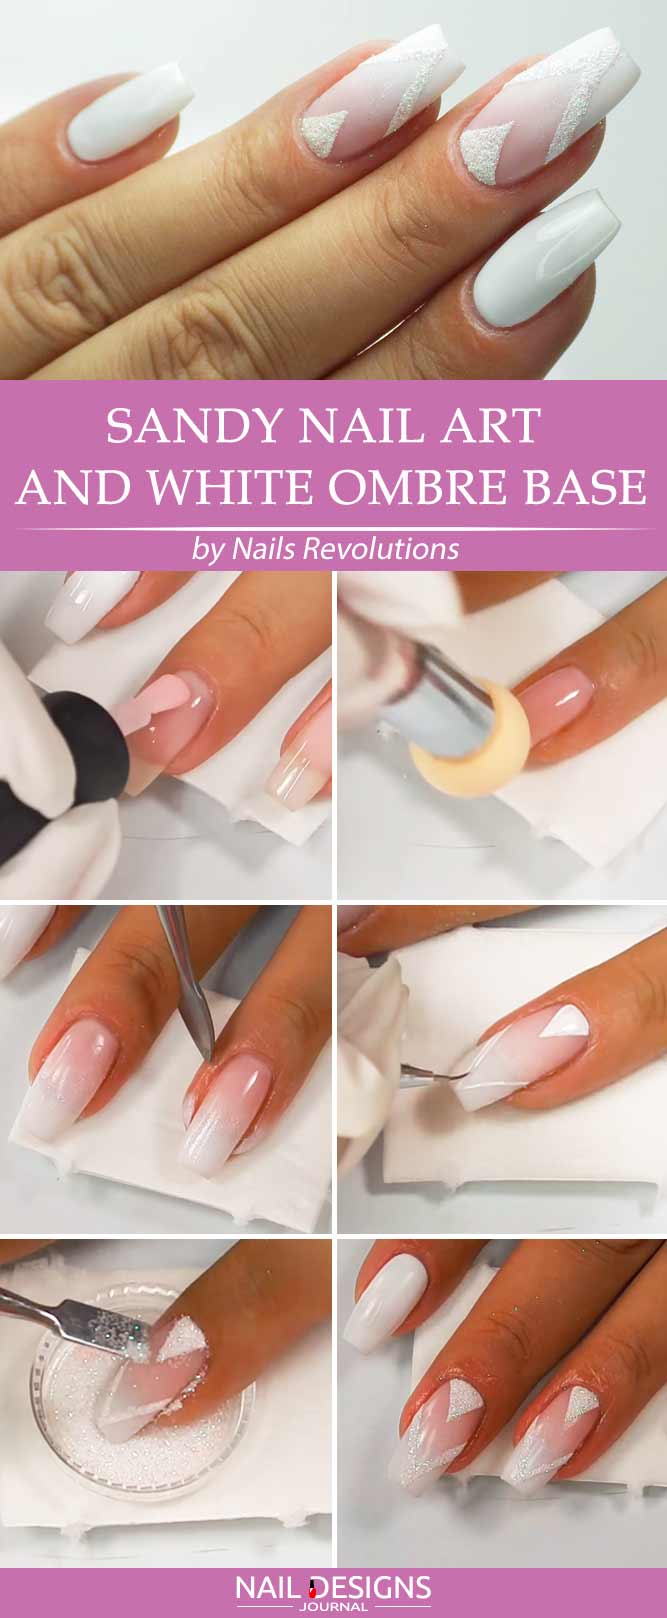
- Apply a base coat.
- Apply a white base coat to your index and little finger and milky pink base to the rest of your nails.
- Apply liquid latex around your nails.
- With the help of white gel paint and sponge brush create a white fade over the milky pink base.
- Wipe the sticky layer off.
- With the help of a small detailer brush and white pain draw a triangle close to your cuticles.
- Fill it in with white paint.
- Draw another triangular shape closer to the tip of your nail.
- Apply white glitter to your nail.
- Clean up all the messes.
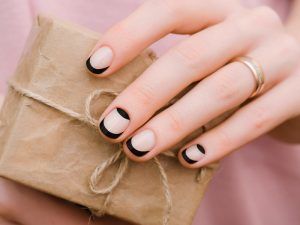
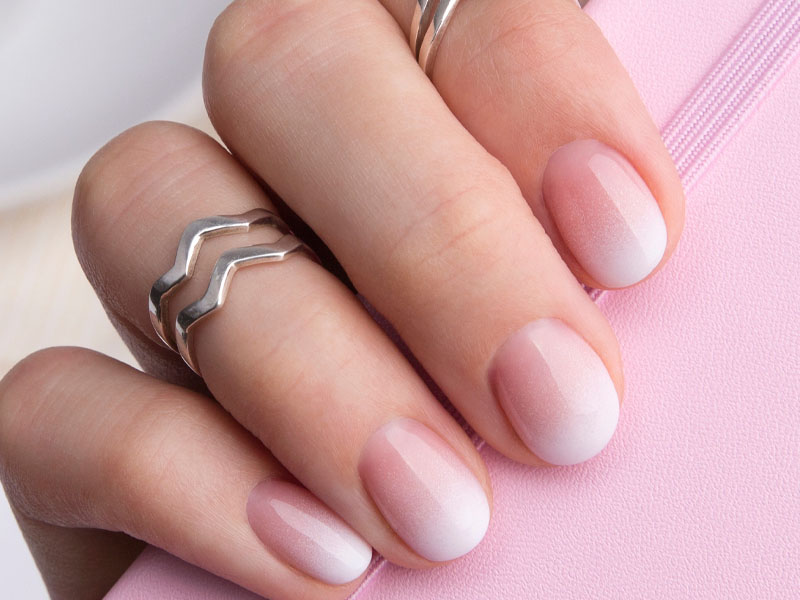
Geometric French Mani In Few Steps
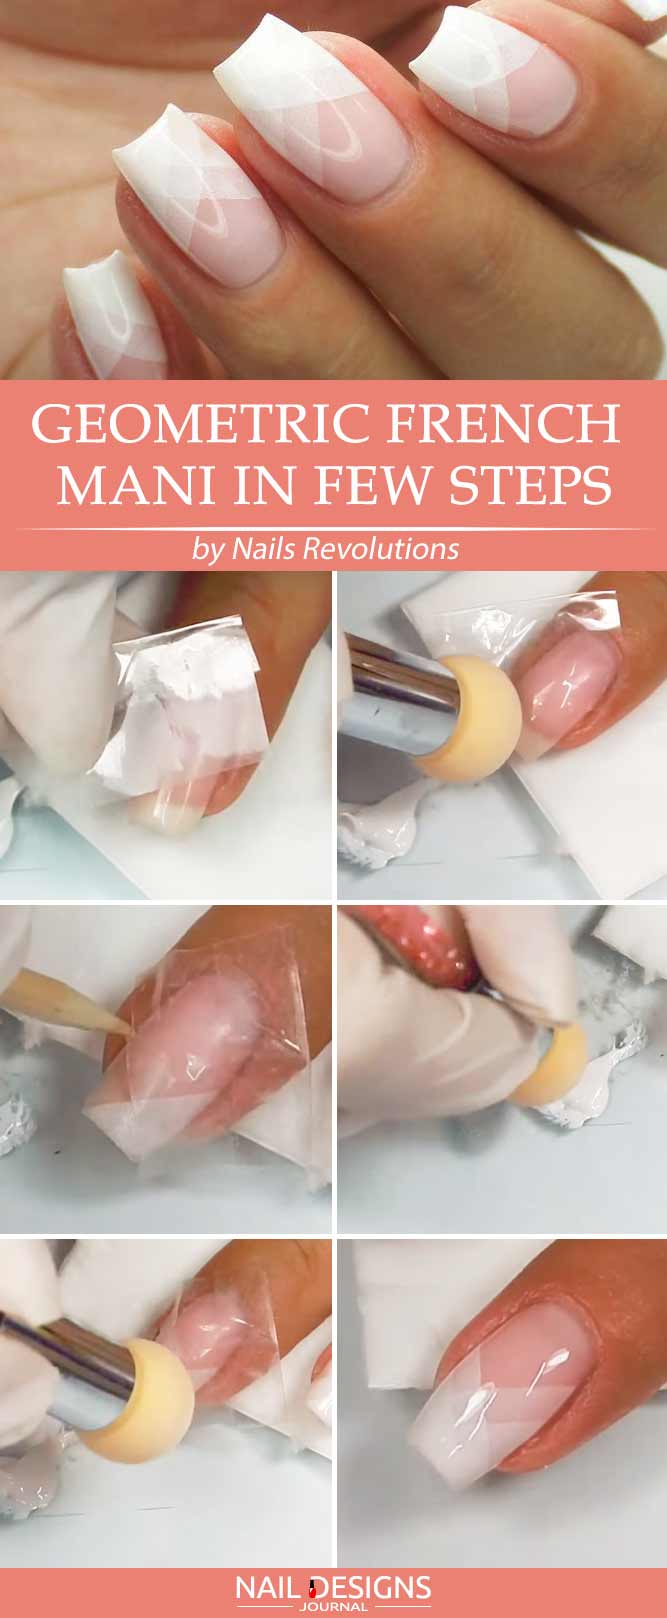
- Apply a base coat.
- Take a piece of scotch tape and place it over your nail.
- Apply white gel paint with the help of a sponge brush to the uncovered part of your nail.
- Take the scotch tape off and tape to the other side and repeat the procedure.
- Repeat the procedure in three layers.
- Apply top coat.
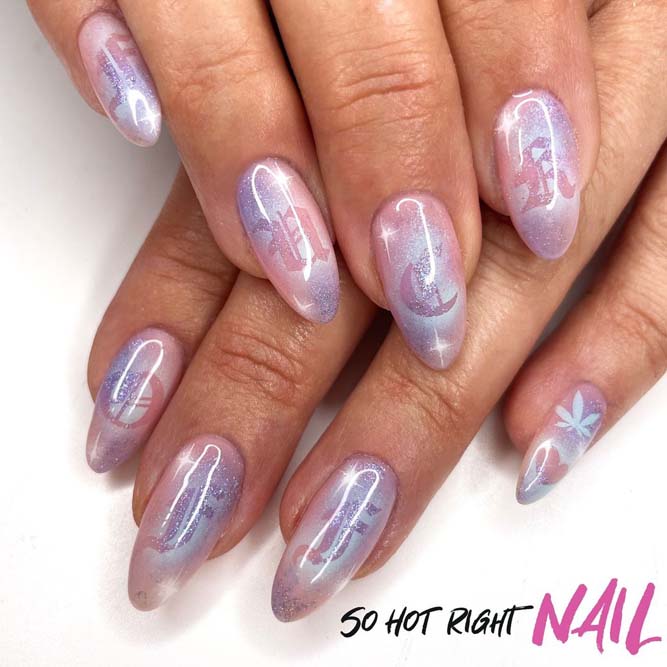
Colorful Swirl Nail Art In Few Steps
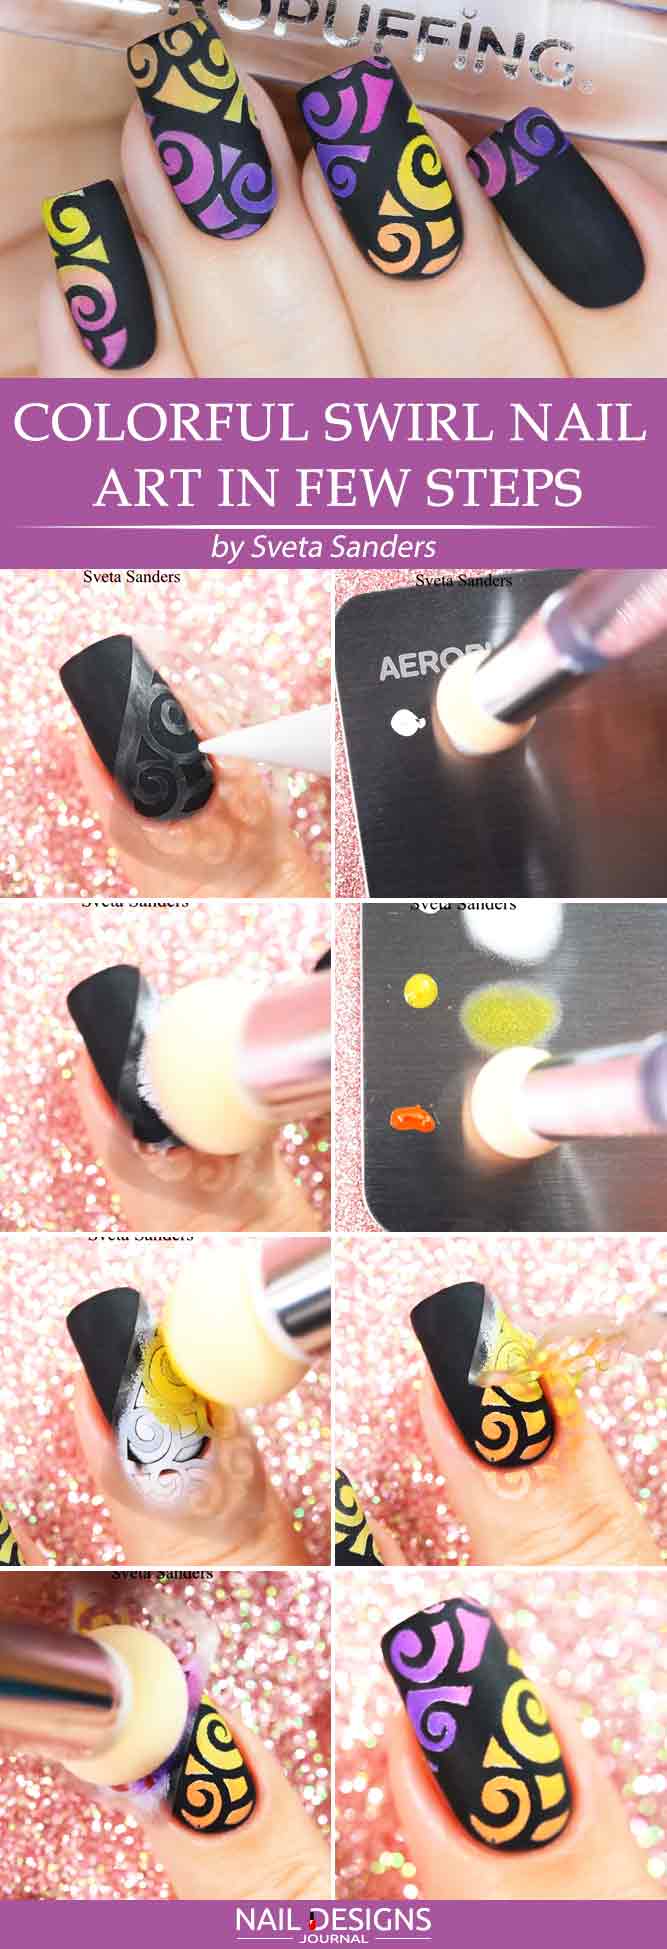
- Apply a base coat.
- Apply a back base coat.
- Apply a matte top coat.
- Place a swirly stencil over the lower part of your nail.
- Add some white pain to the design with the help of your airbrush brush.
- Add yellow and orange shades to the design.
- Remove the stencil.
- Repeat the procedure at the top of your nails, but use mauve and blues shades instead.
- Remove the stencil.
- Apply a matte top coat.
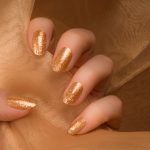
Easy Gradient Nail Art To Do In 5 Min
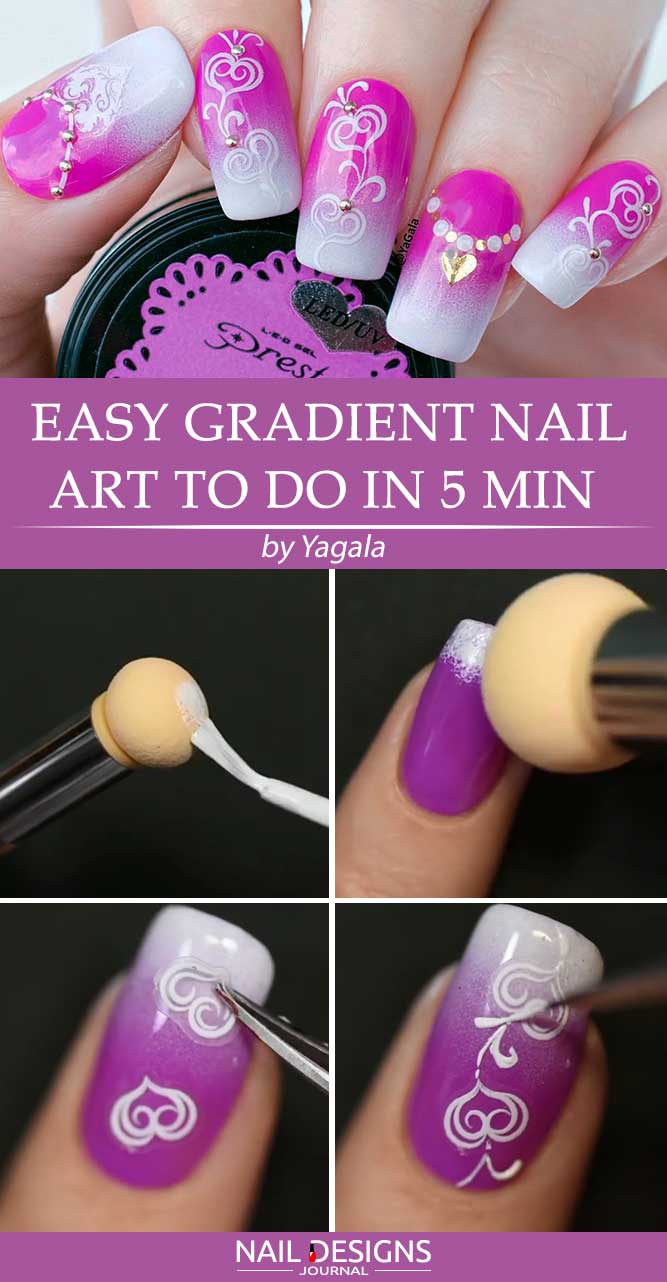
- Apply a base coat.
- Apply purple base coat.
- Create the ombre effect using your airbrush and white paint.
- Take two heart-shaped stickers, place them on your nail and connected with white swirly
lines. - Apply the top coat and add two gold studs to the design.
Amazing Aeropuffing Nail Art Ideas
Abstract Aeropuffing Nails

Classic White Aeropuffing Nail Art
Geometric Nails with Aeropuffing Method
Shiny Aeropuffing Nail Art
Aeropuffing Gradient Nails With Stones
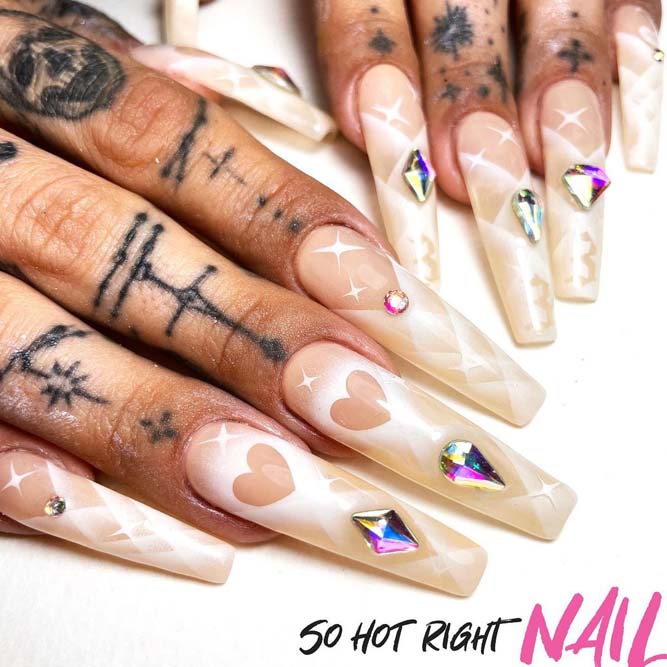
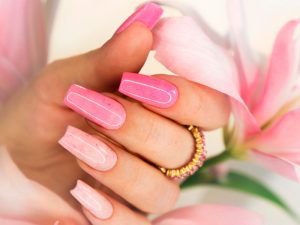
Long Nails With Aeropuffing Art
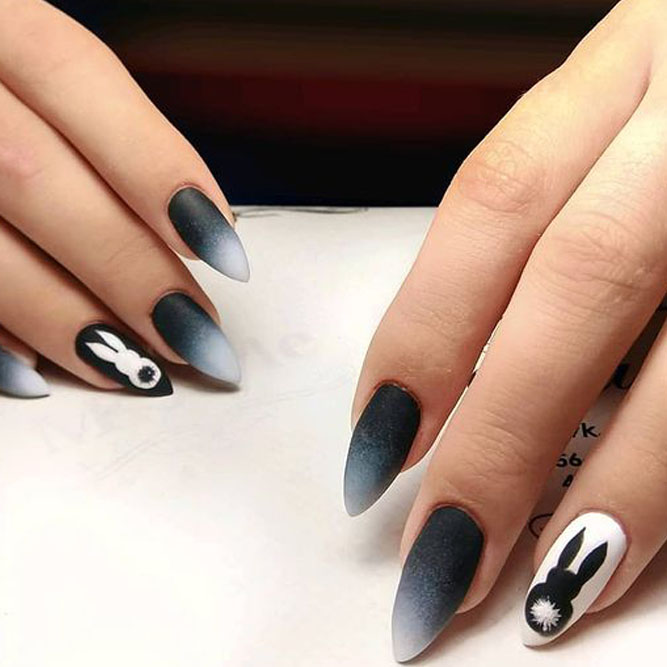
Hot Black Nails Aeropuffing Design
We hope you enjoy these tutorials and will succeed in their replication with the least of time and effort involved. Do not forget to visit us for some more fresh ideas and pieces of trendy advice!
Was this article helpful?