
What is so special about striped nails? To tell you the truth the list of suggestions may be endless but we are going to mention the most important ones. The thing is that striped manicure is very easy to pull off even if you are just the beginner in the world of nail art, besides the number of possibilities is never-ending. To prove our point we are going to share with you a list of easy and unique tutorials, which will help you discover the world of nail art from the different side. Are you ready?
Scroll down for endless pinning enjoyment!
Summer Nails Art With Striping Tape

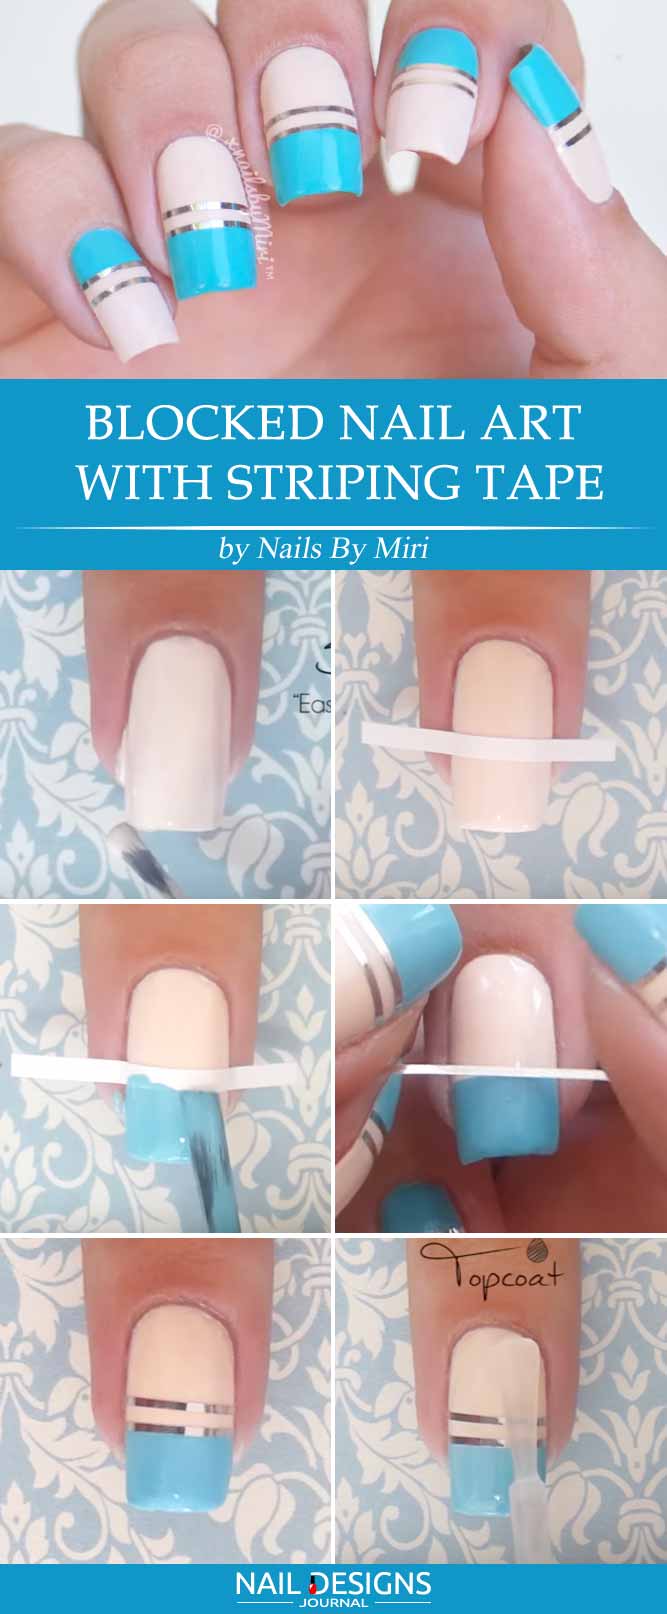
- Apply a beige base coat.
- Apply a piece of stripe tape to the middle of your fingernail.
- Apply blue nail polish to the top part of your nail.
- Remove the tape.
- Apply two silver stripe tapes to the middle of your nail.
- Apply a top coat
.
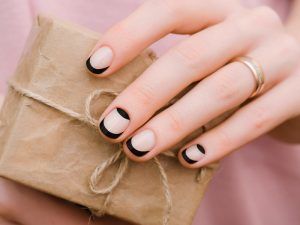
Negative Space Striped Nails
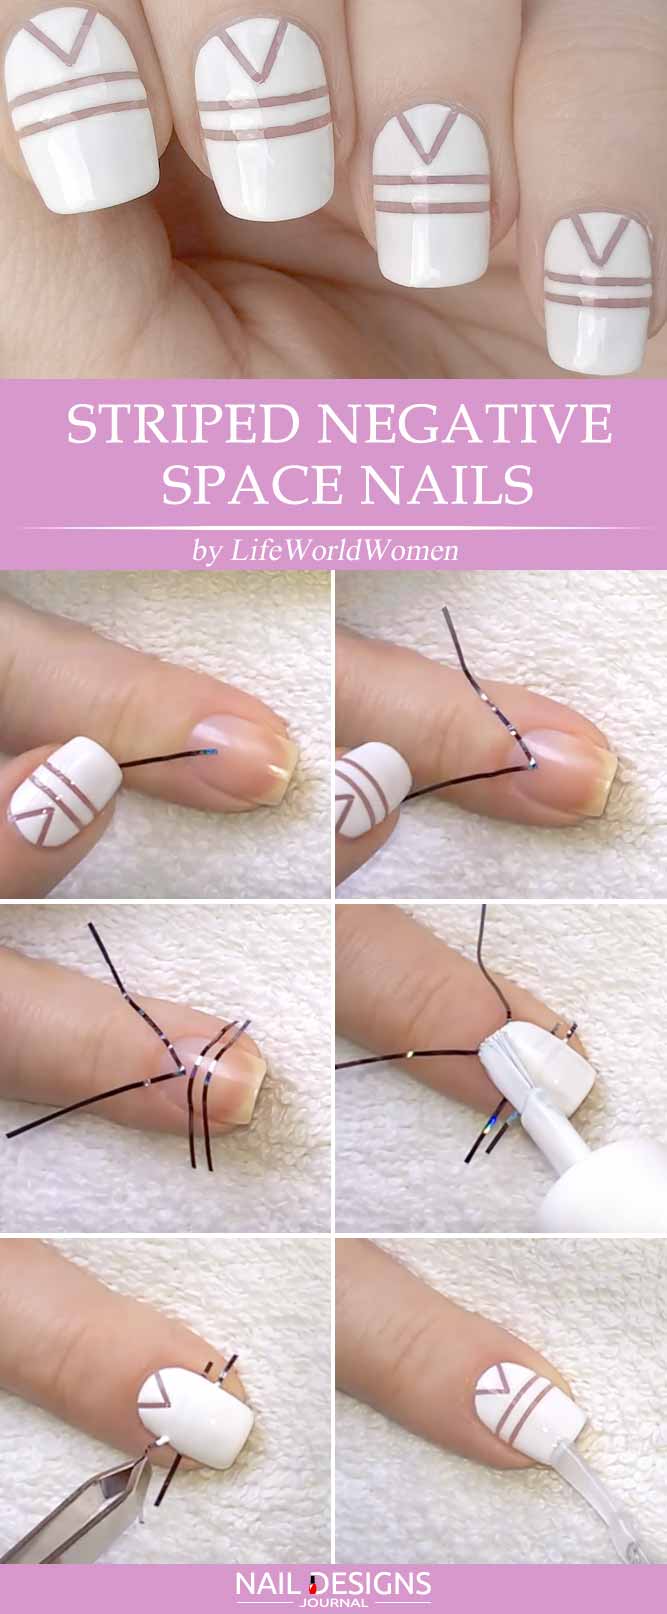
- Fix the pieces of striping tape in a triangular.
- Add two lines of striping tape to the middle of your fingernail.
- Apply white base coat.
- Remove the stripes gently.
- Apply a top coat.
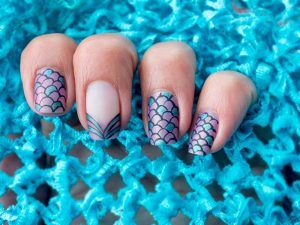
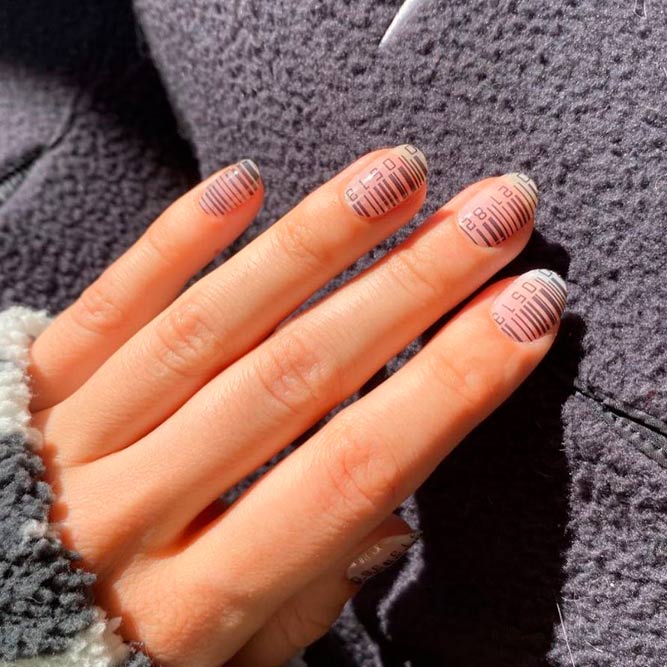
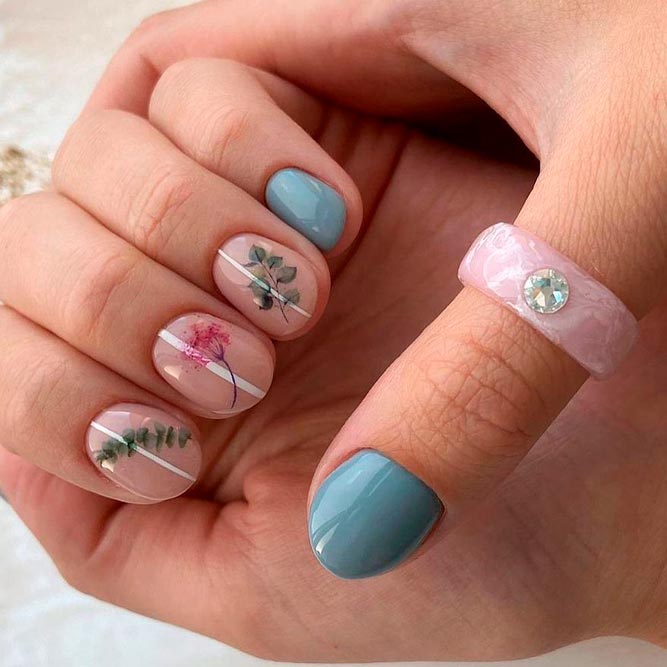
Vertical Lines on Nails Without the Tape
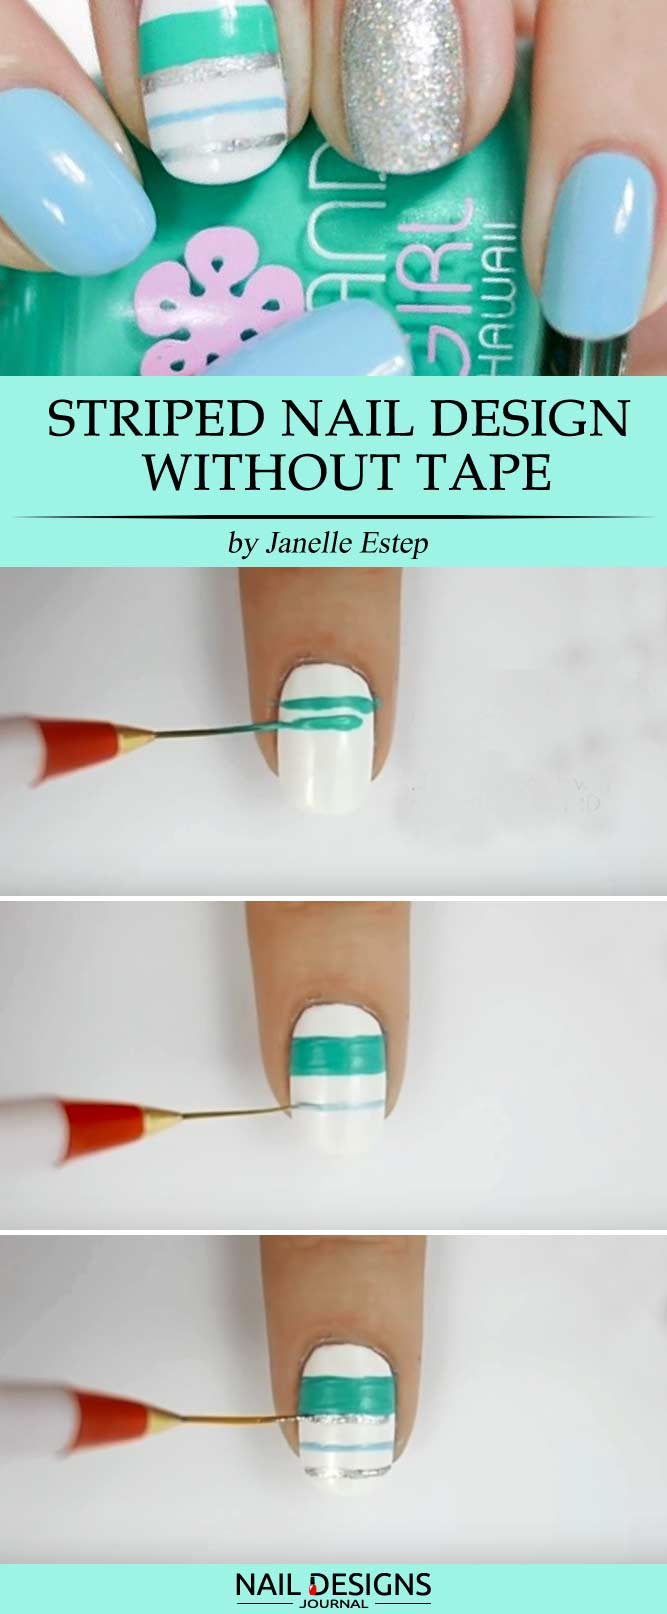
- Paint your thumb, pointer and pinkie fingers light blue.
- Apply white nail polish to your middle finger.
- Add a thick mint green horizontal line to the bottom of your nail with the help of a tiny detailer brush.
- Add a thin blue line closer to the tip of your nail.
- Add a thin silver line the closest to your nail tip.
- Add another silver line close to the minty one.
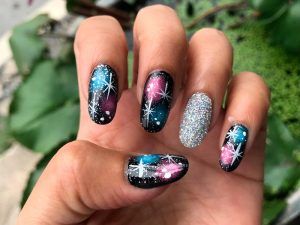
- Add glittery coat to your ring finger.
- Apply a top coat.
Bright Horizontal Lines on Nails
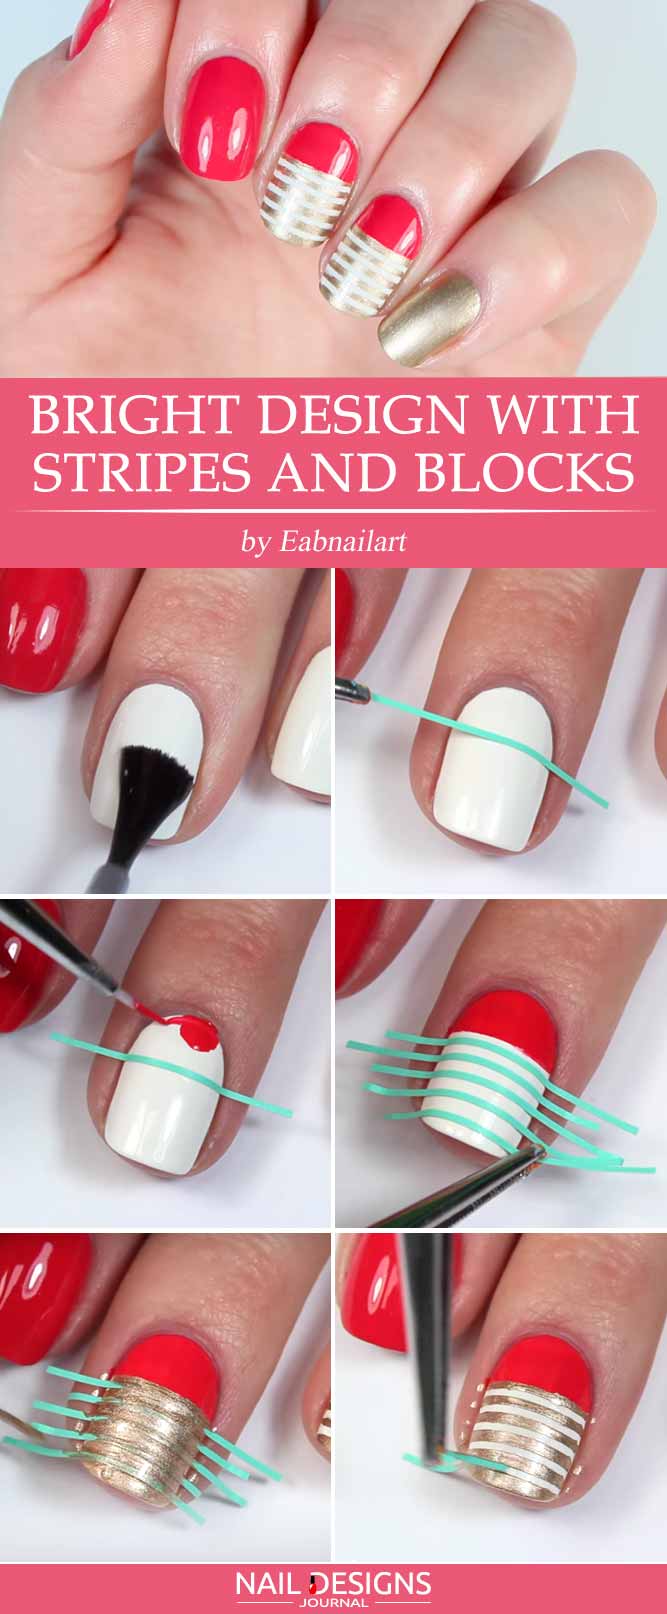
- Apply a white base coat to your middle and ring fingers.
- Apply a piece of striping tape closer to your nail bed.
- Fill in the space between the cuticles with red nail polish.
- Remove the first striping tape and add a bunch of fresh ones to your nail.
- Apply gold glittery nail polish to cover the upper part of your nail.
- Remove the stripes.
- Apply a top coat.

Striped Nails With No Tools Required
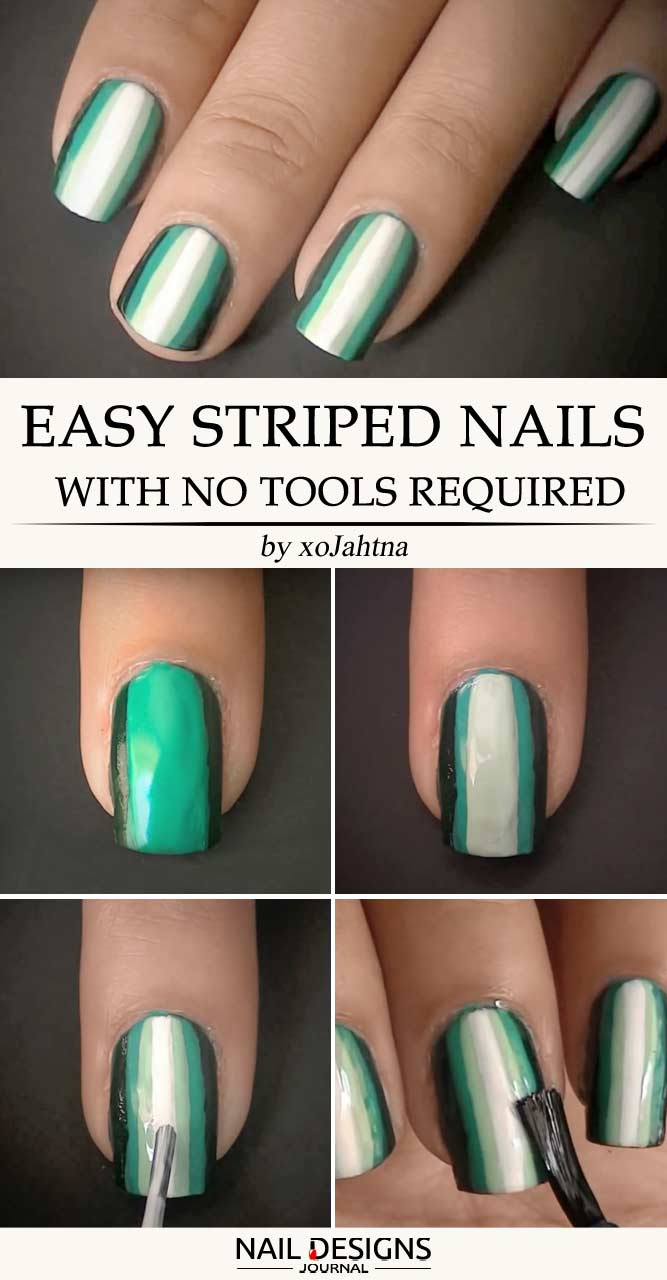
- Apply dark green base coat.
- Add light green coat to the nail without going to close to the sides.
- Repeat the procedure with lighter green shade.
- Finish the process with the addition of white nail polish to the middle of your fingernail.
- Apply a top coat.
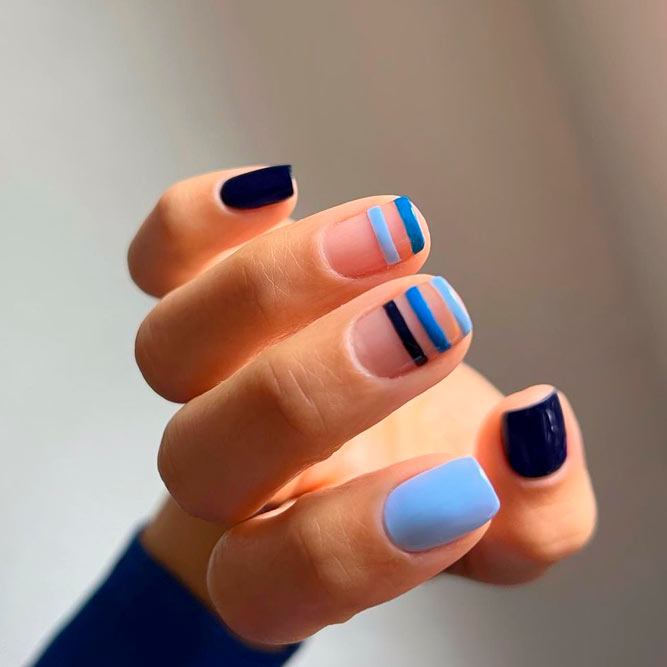
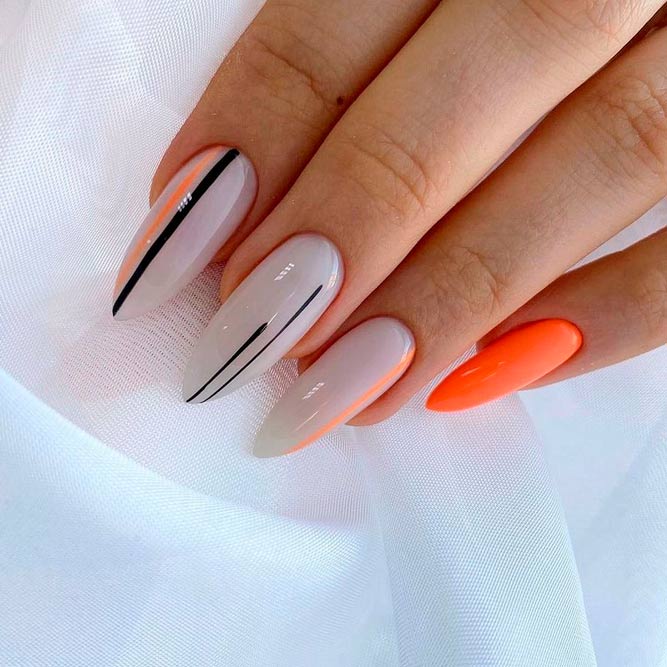
Perfect Vertical Lines on Nails With DIY Decals

- Apply some pink nail polish over the sandwich bag or a decal mat.
- Let it dry out properly.
- Remove the decal from the mat and cut it into even stripes.
- Apply a white base coat.
- Place the stripes over your nail diagonally.
- Remove the excess nail polish with the help of a nailbrush and acetone.
- Apply a top coat.
Simple Diy Art With Tape For Short Nails
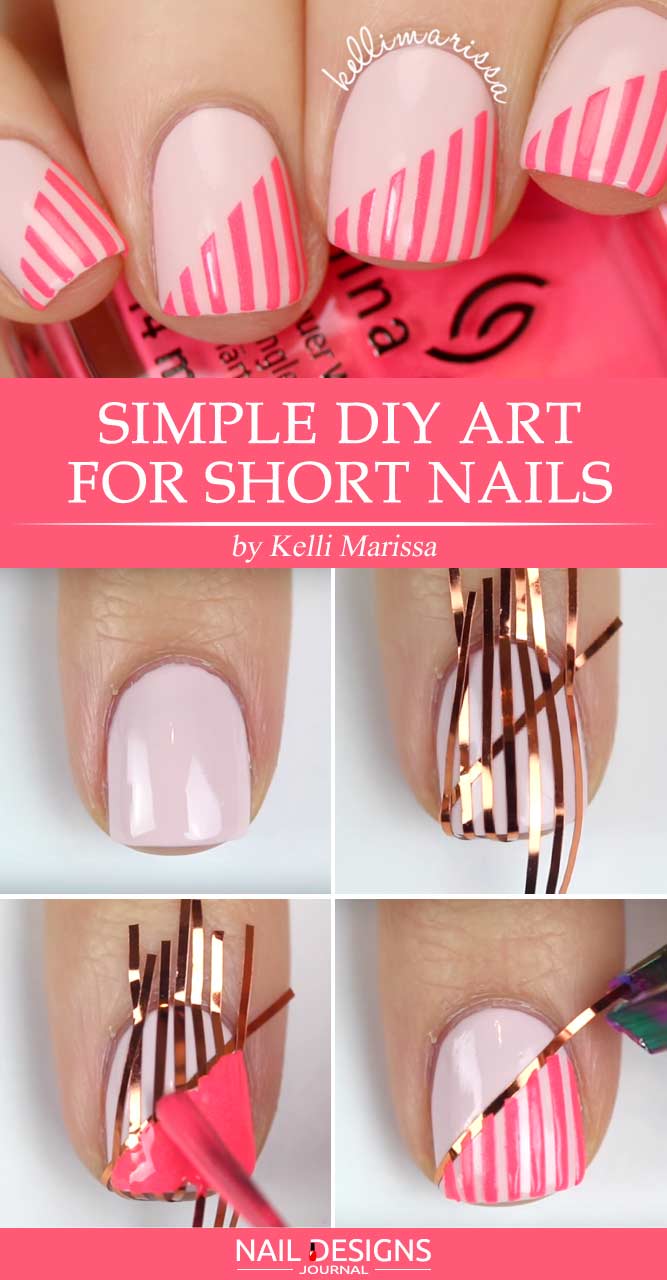
- Apply light pink base coat.
- Apply a piece of striping tape diagonally first.
- Apply several pieces of striping tape vertically as well.
- Apply neon pink nail polish to the upper diagonal side of the nail.
- Peel off the tape.
- Apply a top coat.
Nail Designs With Glitter Stripes
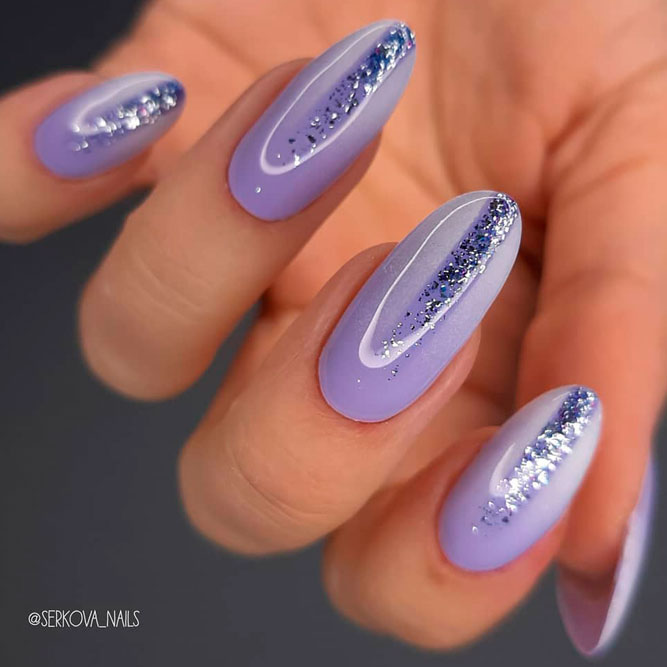
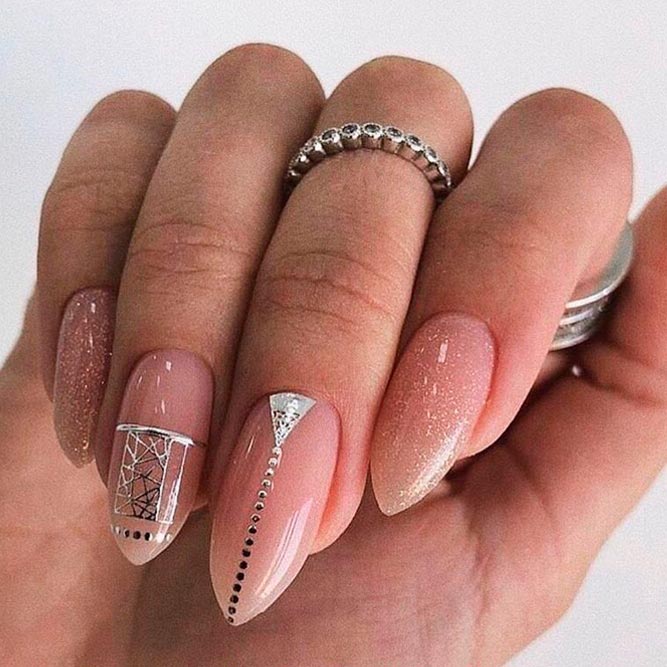
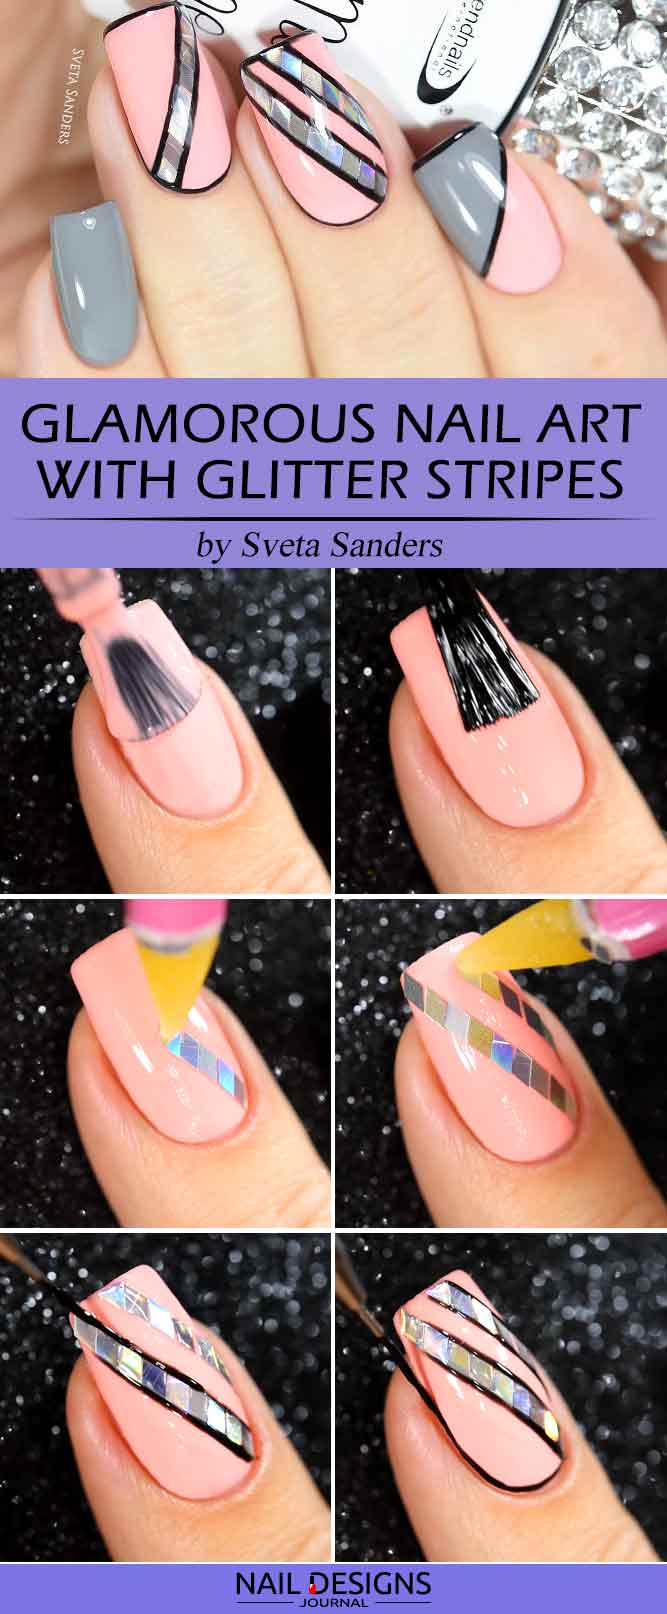
1. Apply a base coat.
2. Coat your nails with a light pink base.
3. Use sparkly glitter rhombus to form two diagonal lines.
4. Apply a top coat.
5. Outline the sparkly lines with thin black lines.
6. Repeat the outlining procedure with the whole nail.
7. Apply a top coat.
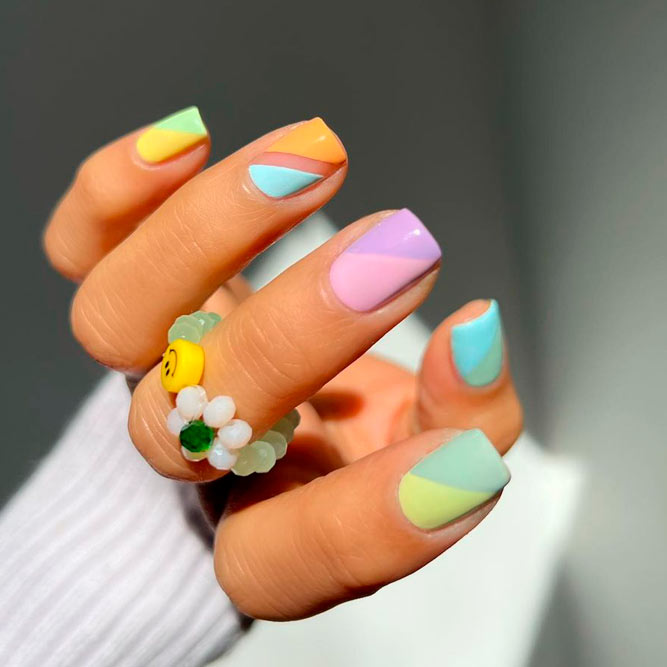
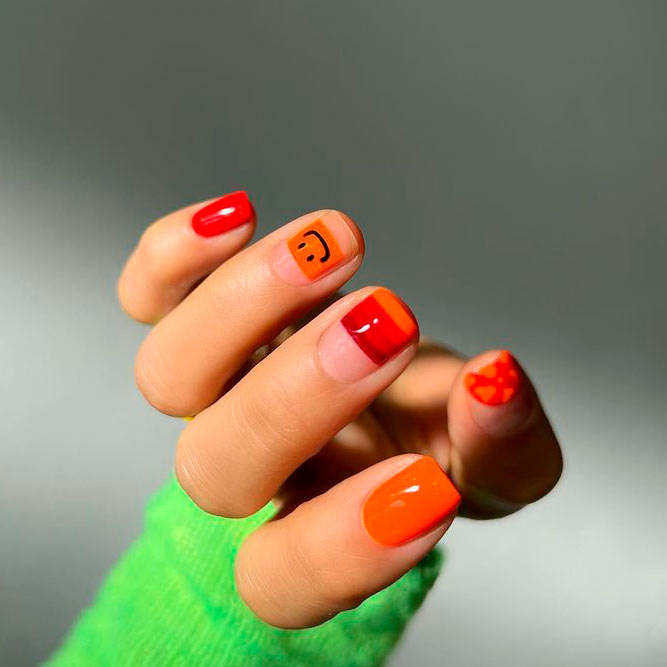
Colorful Nails Designs
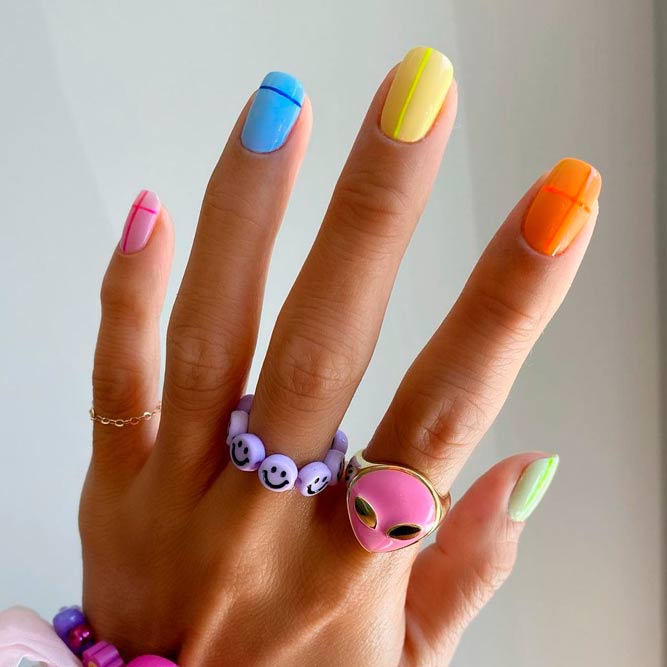
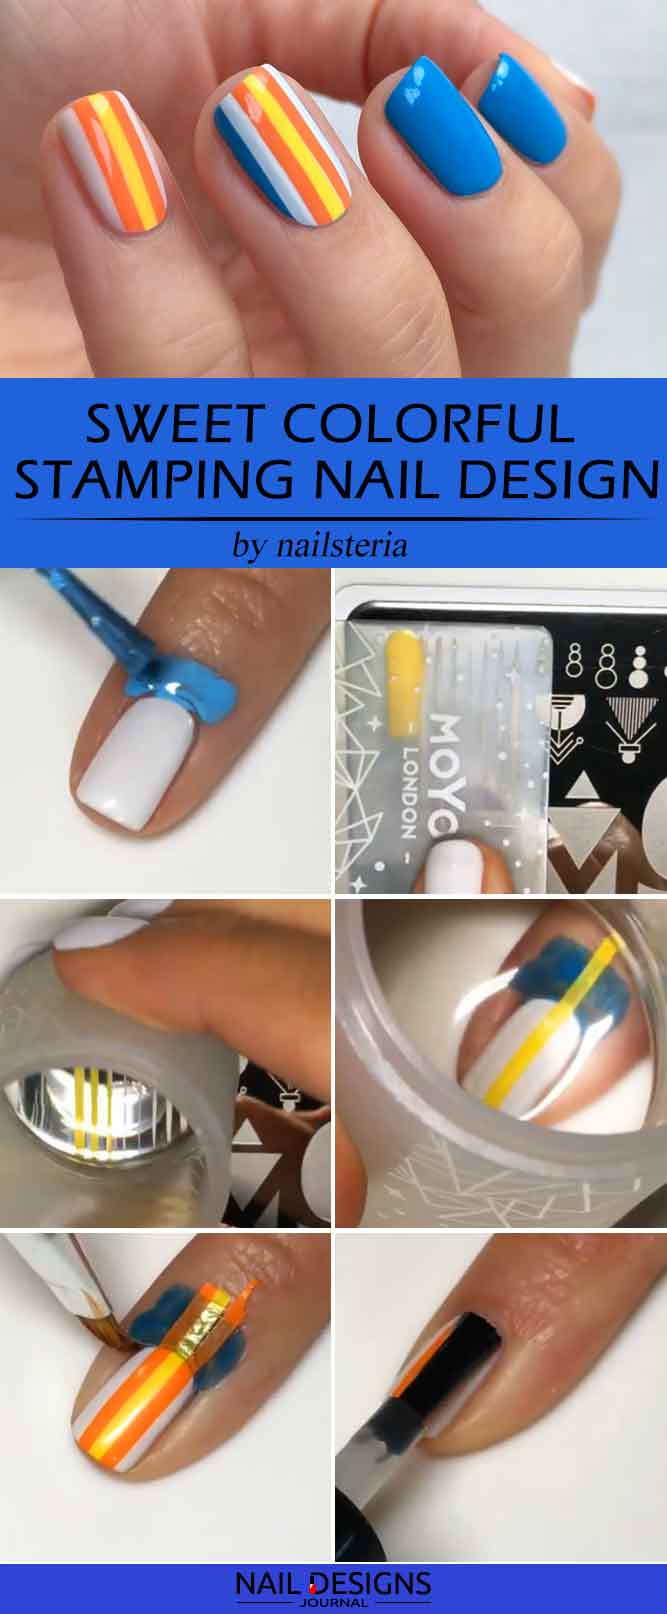
1. Apply a base coat.
2. Coat your nails with a white base.
3. Apply liquid latex around your fingernail.
4. Find a stamping plate with a striped pattern.
5. Cover the stamping plate with yellow nail polish.
6. Use the stamper to transfer the line to your nail.
7. Repeat the process with orange nail polish.
8. Apply a top coat.
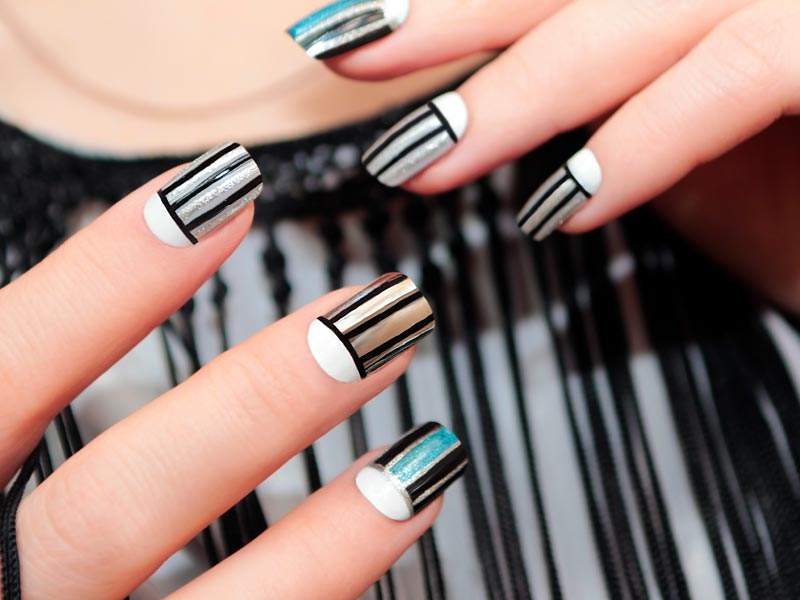
Dark Vertical Lines on Nails
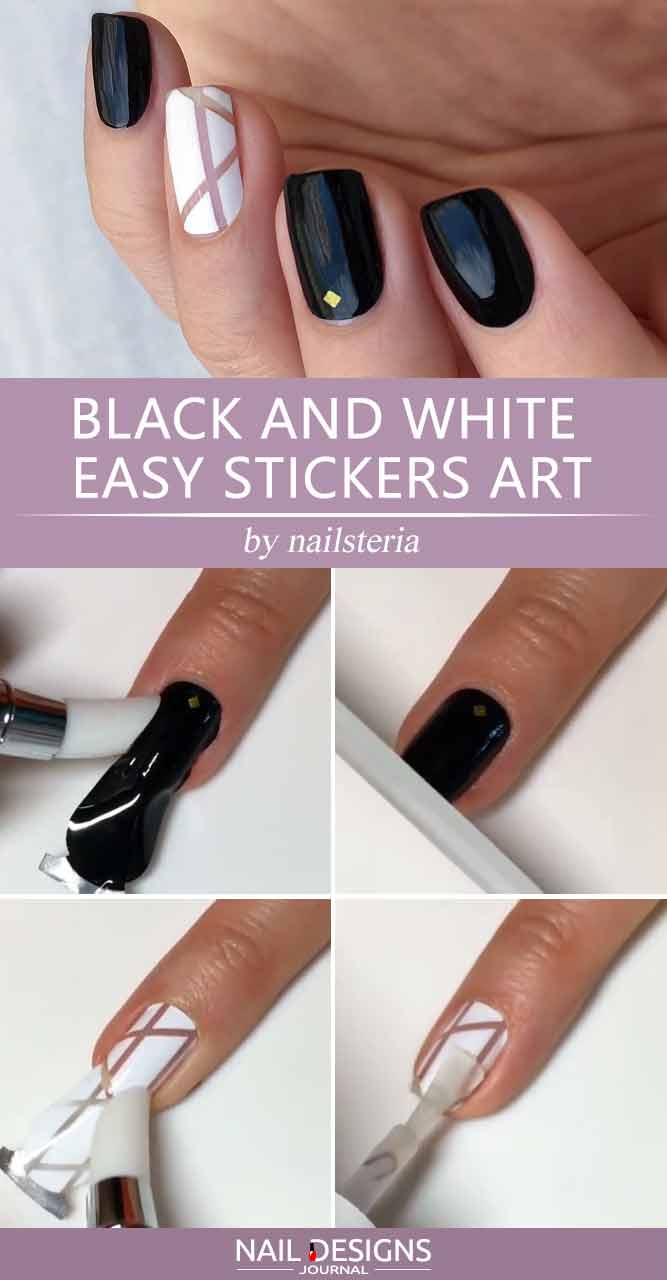
1. Apply a base coat.
2. Use the stickers of choice.
3. Apply the sticker over your nail.
4. Smooth it out with the help of a silicon nail brush.
5. Cut the remaining piece of the nail sticker.
6. Even out the sticker with the help of a nail file.
7. Apply a top coat
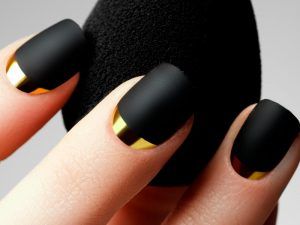
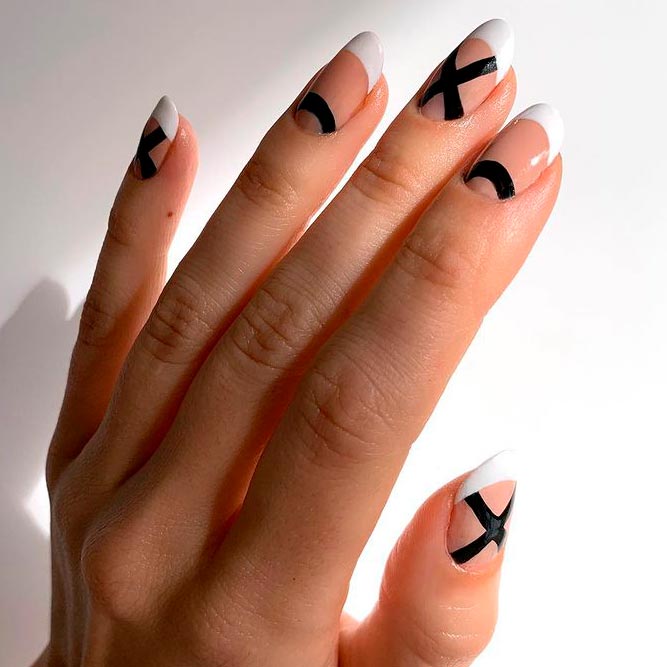
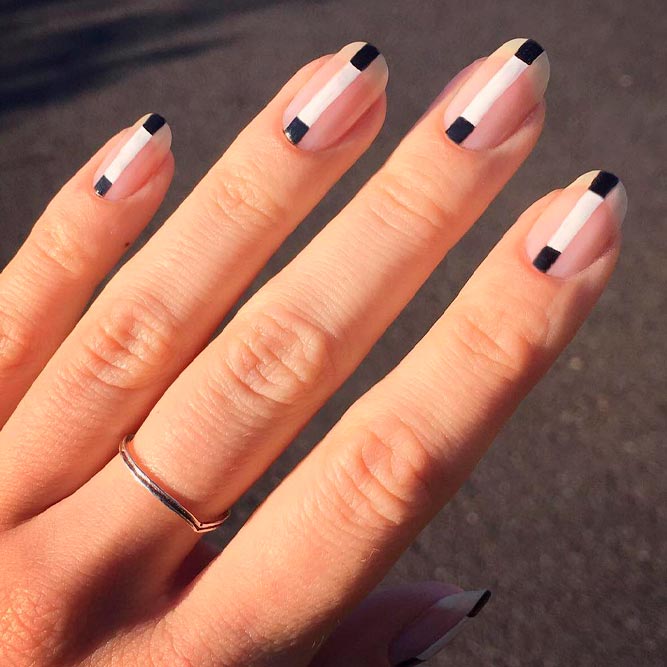
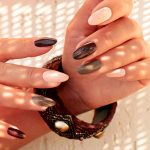
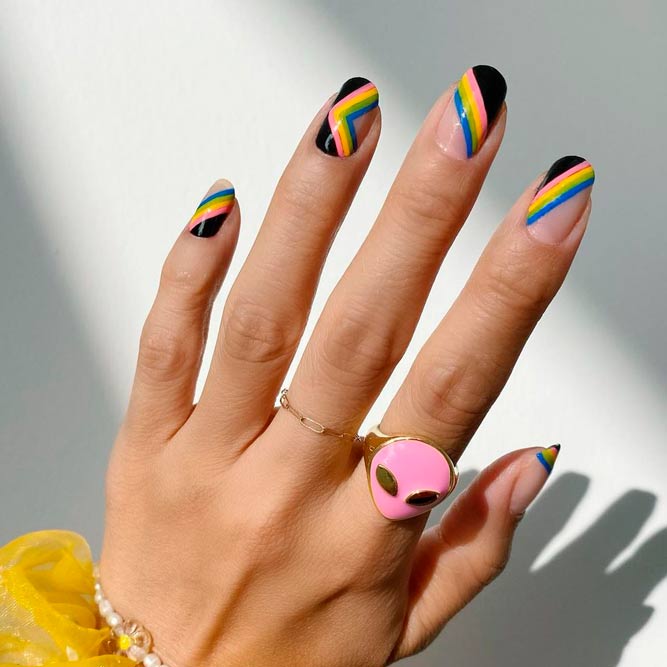
Abstract Striped Nails
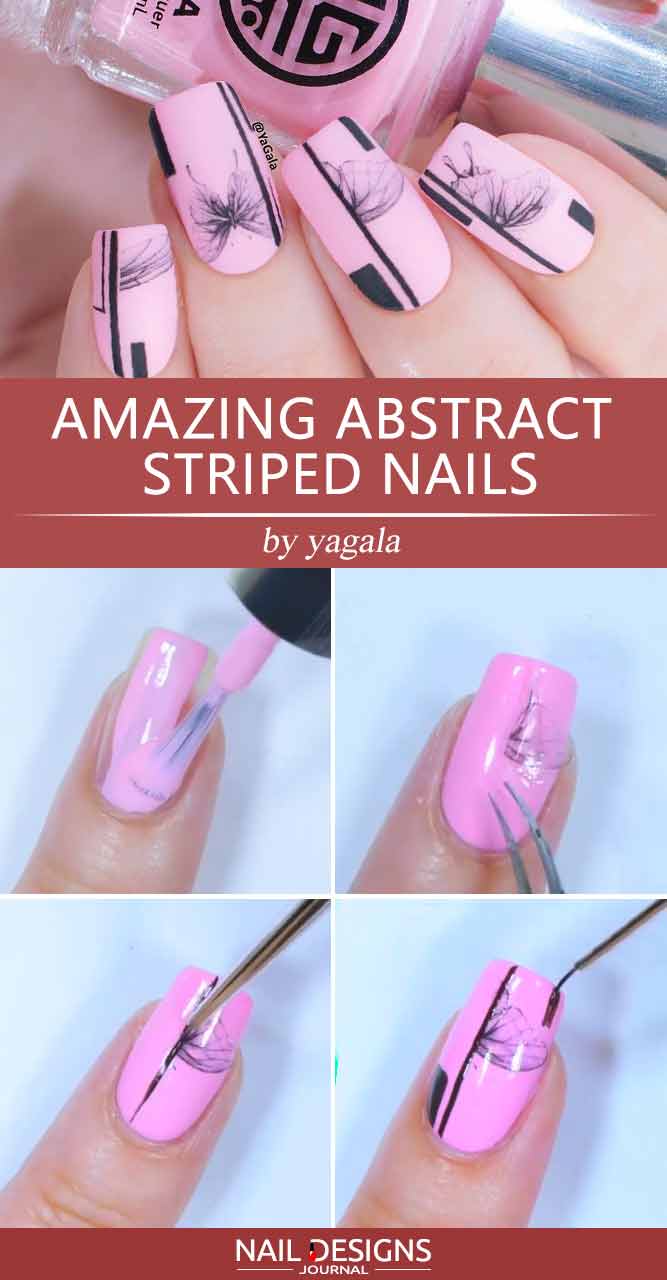
1. Apply a base coat.
2. Coat your nails with a light pink base.
3. Place a sticker over your nail.
4. Cover the nail with a top coat.
5. Draw a thin vertical line in the middle of your nail using a detailer brush and black nail polish.
6. Add a black square shape to the bottom corner of your nail.
7. Pain a thicker line in the top corner of your nail.
8. Apply a matte top coat.
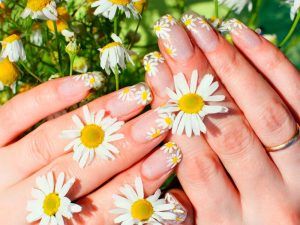
Flower Vertical Lines on Nails
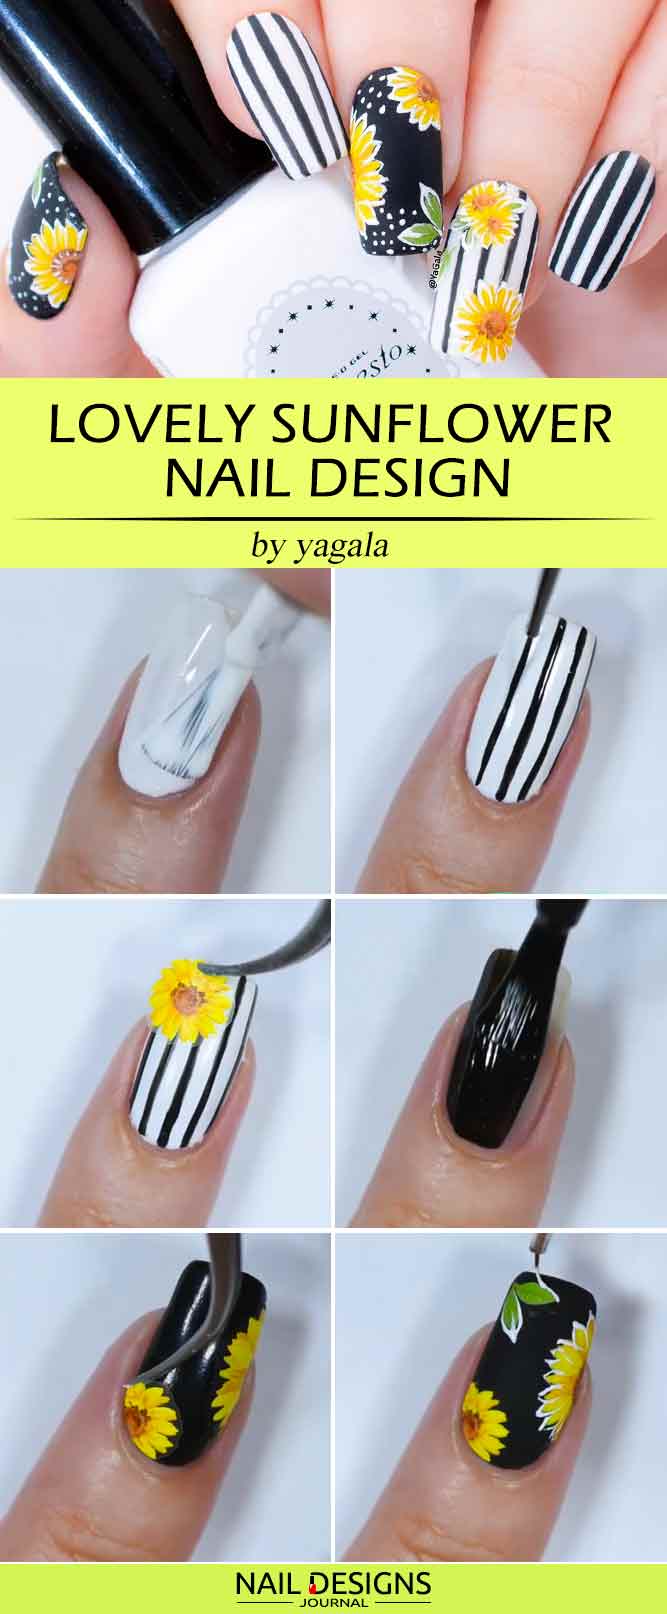
1. Apply a base coat.
2. Coat your nails with a white base.
3. Using a detailer brush and black nail polish draw thin vertical lines over your nail.
4. Place sunflower stickers over the design.
5. Coat your nails black.
6. Add sunflower stickers to the base.
7. Outline the flowers with white nail polish.
8. Apply a matte top coat
There are so many striped nails ideas out there that we may seem that you can’t possibly be able to pull off all of them on your own in the safety of your own house. The truth is – you totally can, we are going to prove that to you with the help of these perfectly doable designs. And that is not just it; we are going to show you that the least of tools required for a fancy mani is not only affordable but also minimal. Check out this video and enjoy!
We hope you enjoy these tutorials and will succeed in their replication with the least of time and effort involved. Do not forget to visit us for some more fresh ideas and pieces of trendy advice!
Was this article helpful?